PUNCH UNIT B531 August 2006
1-98
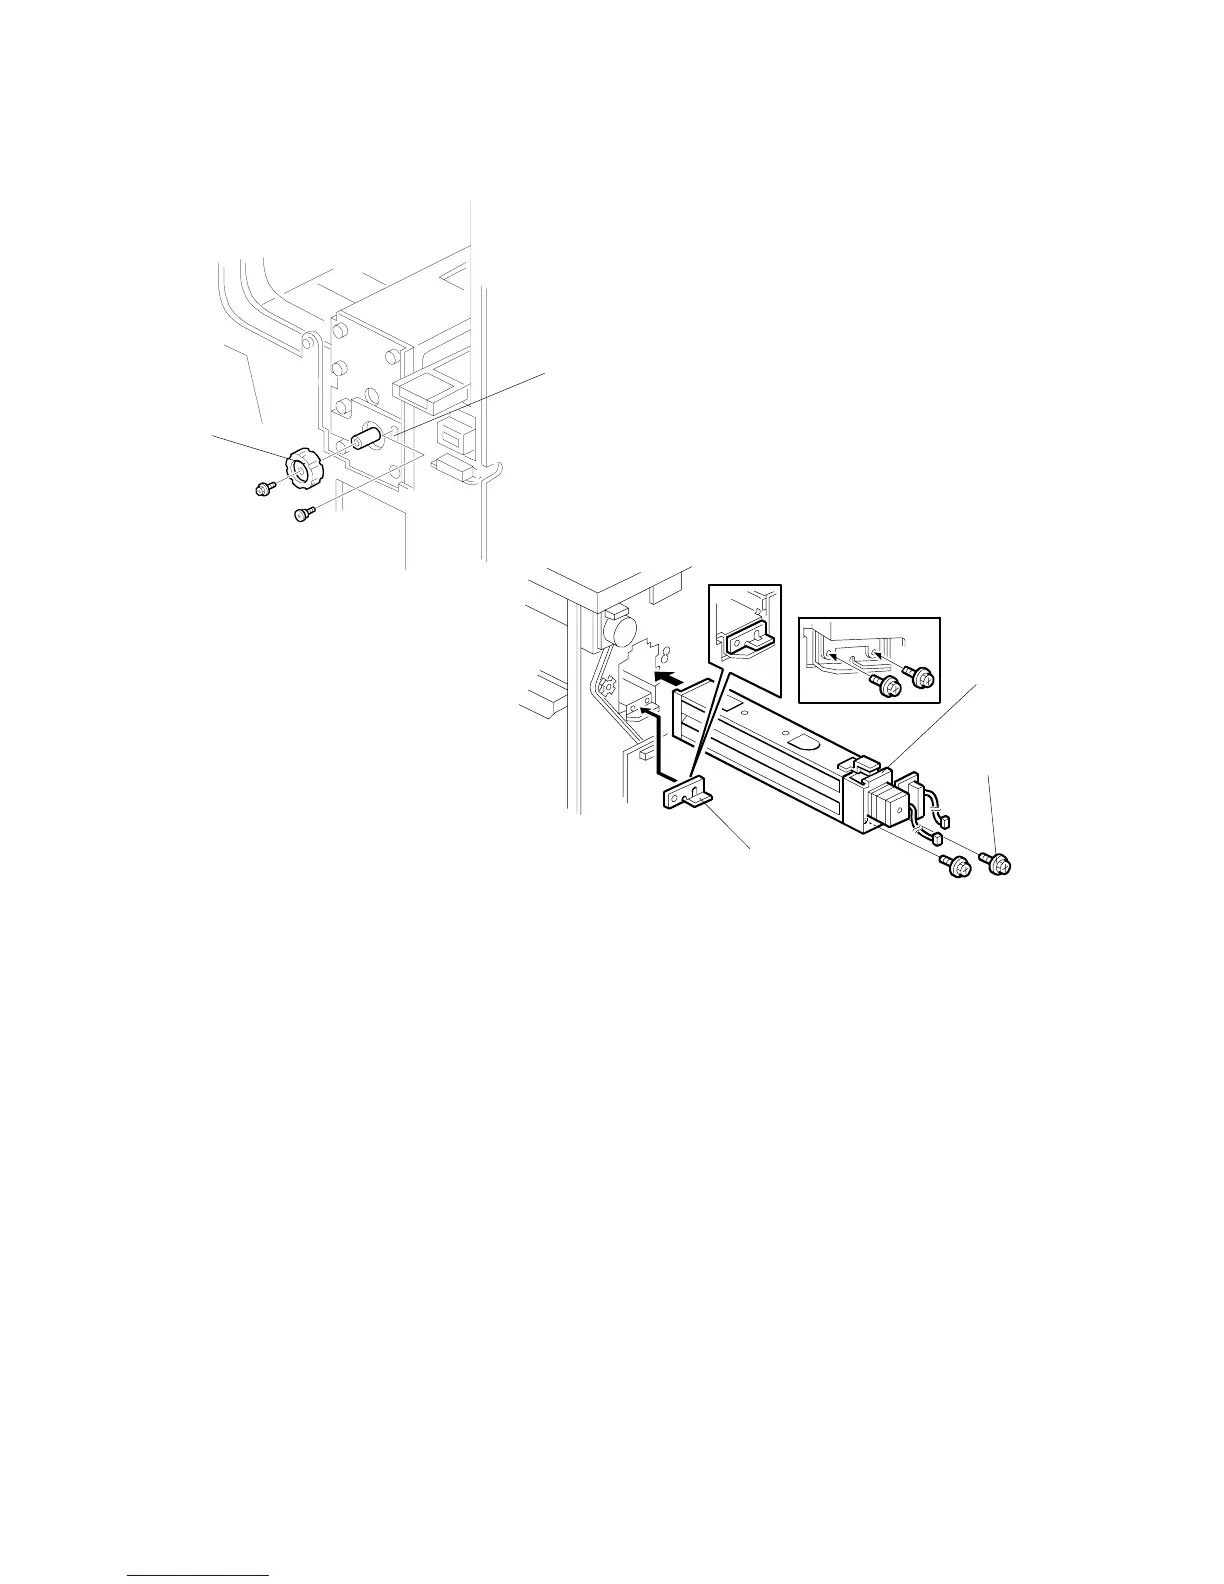
10. At the rear side of the finisher, put the punch unit [A] in the finisher.
11. At the front side, attach the punch unit [B] with the large step screw ( x 1, M4
x 10).
12. At the rear, attach the 2 mm spacer [C] and attach the tapping screws [D] to the
punch unit ( x 2, M4 x 10).
NOTE: At the hole immediately above the lock lever, use one of the screws
from the paper guide removed above to attach the remaining two
spacers to the frame. These two spacers are used to adjust the
horizontal position of the punch holes.
13. At the front side, attach the punch unit knob [E] ( x 1, M4 x 6).
B531I006.WMF
B531I005.WMF
[D]
 Loading...


