Configure Quality of Service
460
M4300 Series and M4300-96X Fully Managed Switches User Manual
The default value is untrusted.
10. Click the Apply button.
Your settings are saved.
Map 802.1p Priorities to Queues
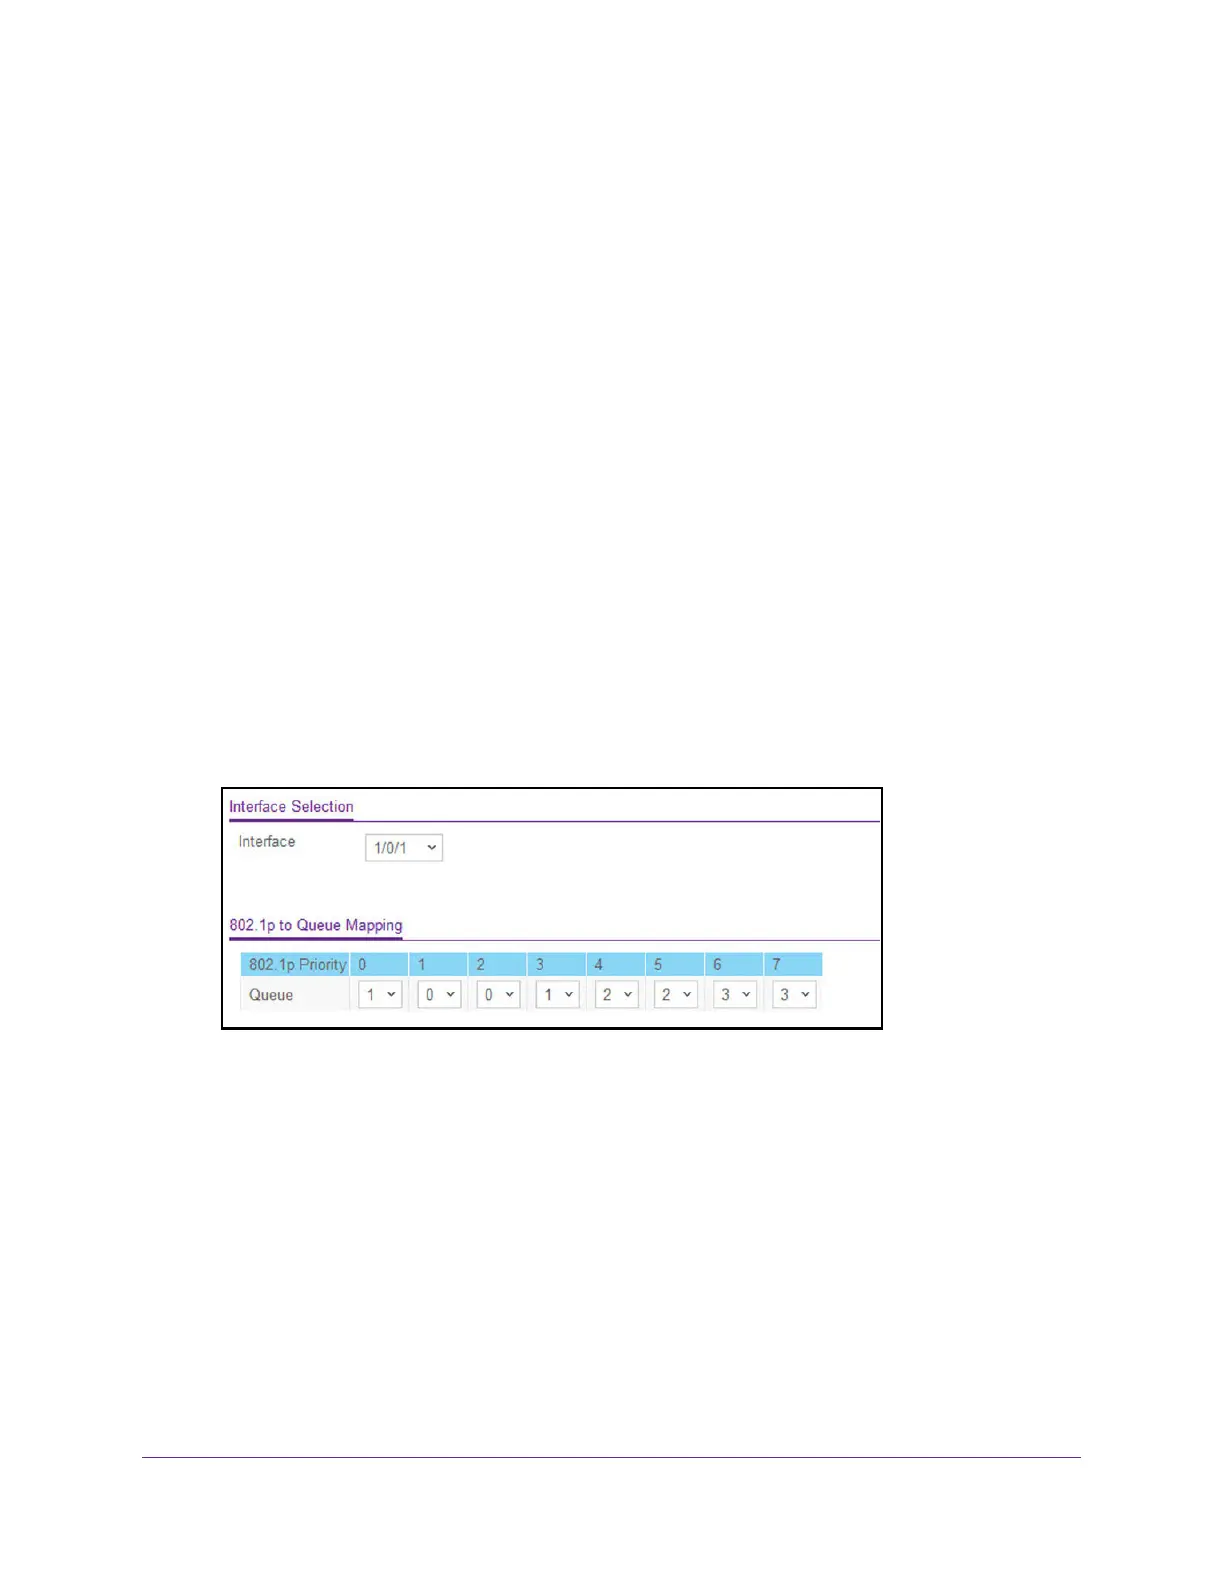
The 802.1p to Queue Mapping page also displays the Current 802.1p Priority Mapping table.
To map 802.1p priorities to queues:
1. Launch a web browser.
2. In the address field of your web browser, enter the IP address of the switch.
The login window opens.
3. Enter the user name and password.
The default admin user name is
admin and the default admin password is blank, that is,
do not enter a password.
4. Click the Login button.
The System Information page displays.
5. Select QoS > CoS >
Advanced > 802.1p to Queue Mapping.
6. Use Interface to select interfaces.
Y
ou can specify CoS configuration settings per-interface or for all CoS configurable
interfaces.
7. Specify which internal traf
fic class to map the corresponding 802.1p value.
The queue number depends on the specific hardware.
The 802.1p Priority row contains
traffic class selectors for each of the eight 802.1p priorities to be mapped.
The priority
goes from low (0) to high (3). For example, traffic with a priority of 0 is for most data traffic
and is sent using best effort. Traffic with a higher priority, such as 3, might be
time-sensitive traffic, such as voice or video.
The values in each list represent the traffic class. The traffic class is the hardware queue
for a port. Higher traf
fic class values indicate a higher queue position. Before traf
fic in a
lower queue is sent, it must wait for traffic in higher queues to be sent.
 Loading...


