Stacking
166
M4300 Series and M4300-96X Fully Managed Switches User Manual
The valid range is 100 to 500.
8. Click the Apply button.
Your settings are saved.
Configure a Stack Member
To configure a stack member before adding it to the stack:
1. Launch a web browser.
2. In the address field of your web browser, enter the IP address of the switch.
The login window opens.
3. Enter the user name and password.
The default admin user name is
admin and the default admin password is blank, that is,
do not enter a password.
4. Click the Login button.
The System Information page displays.
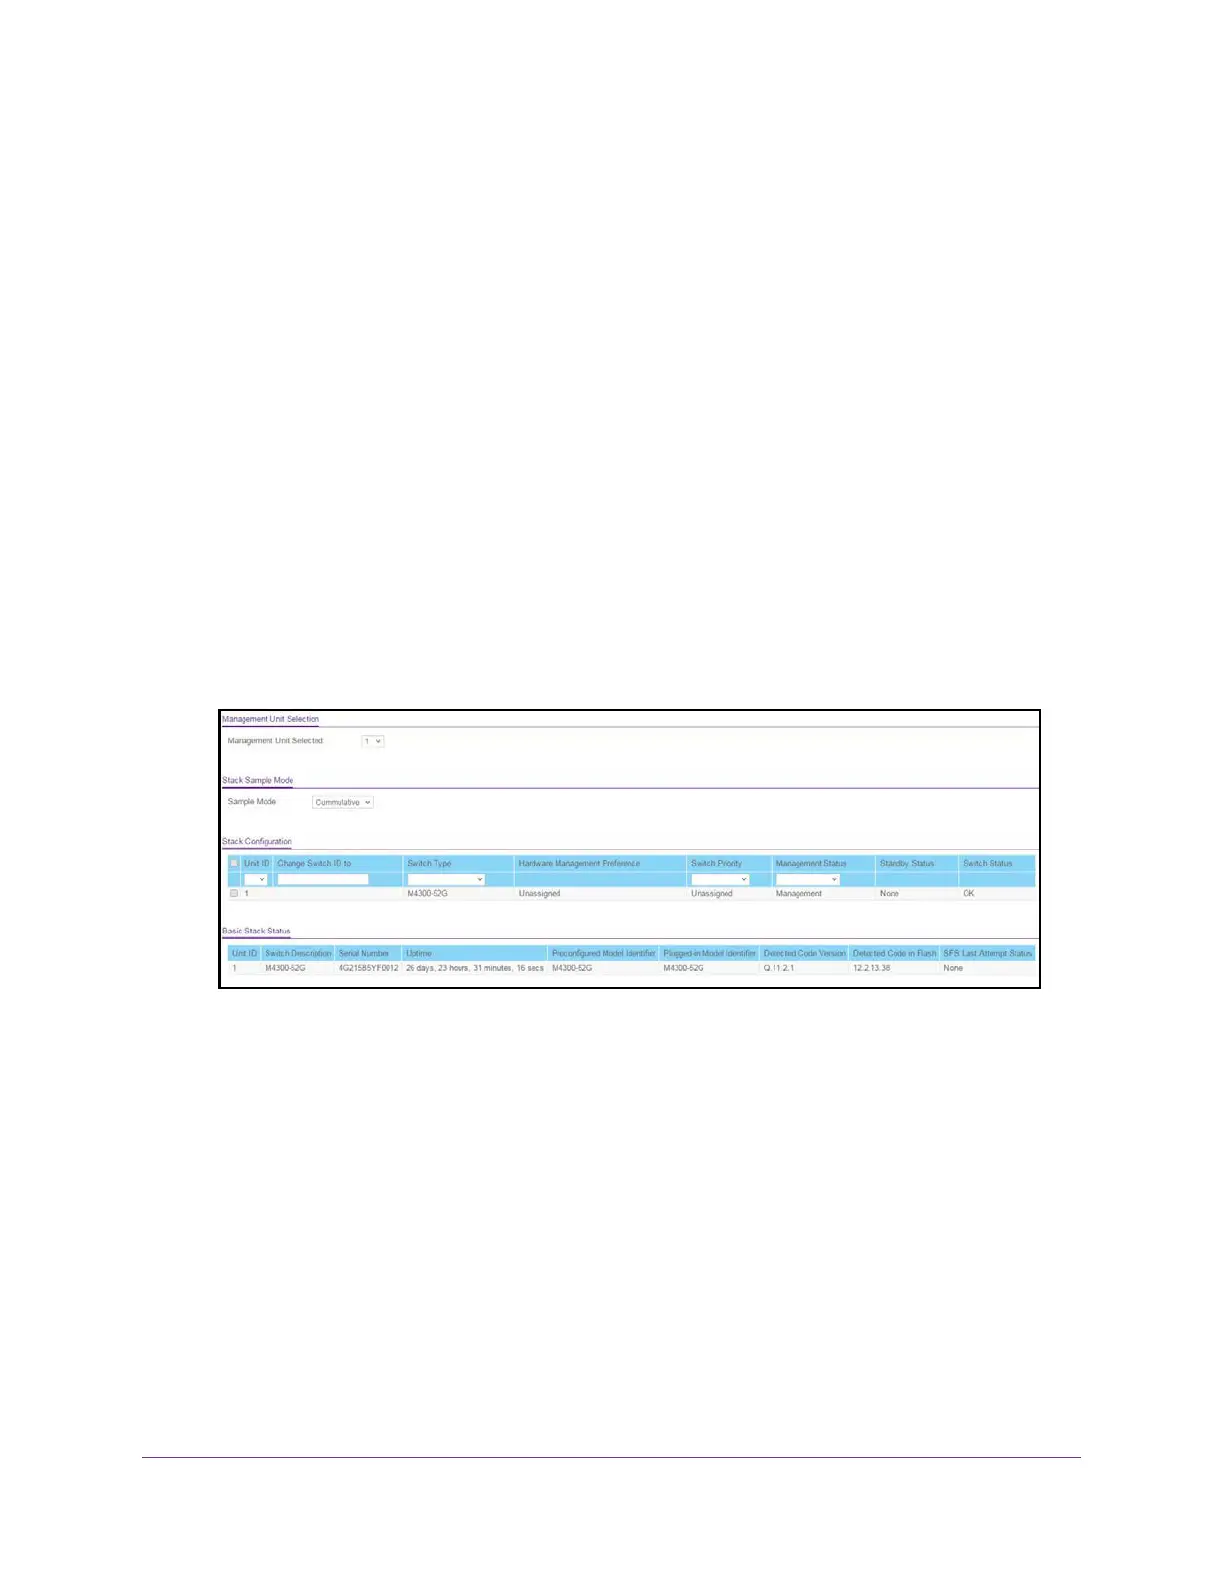
5. Select System > Stacking > Stack Configuration.
6. Select the Unit ID of the stack member to add.
7. Select the switch model number of the new unit from the Switch T
ype
field.
8. Optionally, specify the
Switch Priority to select whether this unit becomes a management
unit in preference to another unit.
The default value for this setting is undefined. If the preference level is set to zero, then
the device cannot become a management unit. A higher value indicates a higher priority
.
The maximum value is 15.
9. Use the Management Status field to indicate whether the selected switch is the stack
master, a normal stacking member
, or the standby unit.
A standby unit takes over the stack master responsibilities if the stack master becomes
unavailable.
10. Click the Add button.
The preconfigured unit is added to the stack.