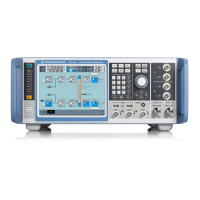
Summary: New Features for R&S SMU200A Users
R&S
®
SMW200A
1181User Manual 1175.6632.02 ─ 16
Example: Configuring an RF offset of 10 MHz
Compare the steps necessary to fulfill the same task in R&S SMU and R&S SMW.
Required steps in R&S SMU Required steps in R&S SMW
Press the DIAGRAM key
Turn the rotary knob and select "RF A" block
Push the rotary knob to open the context menu
Turn the rotary knob to navigate and select "Fre-
quency"
Push the rotary knob to open the dialog
Turn the rotary knob and select "Offset"
Use the front panel keypad and enter 10 MHz
Press ESC to close the dialog
In the block diagram, tap the "RF A" button
In the context menu, tap the "Frequency"
In the "Frequency" dialog, tap the parameter "Off-
set"
In the on-screen keypad, tap on "1""0""MHz"
Close the dialog
A.2 Revised Front Panel Keys
The R&S SMW introduced redesigned front panel keys. There are new or changed
functions assigned to the front panel keys; keys are removed and new keys are intro-
duced.
Consider the following comparison between the R&S SMW and the R&S SMU front
panel keys.
Front panel
keys in
R&S SMU
Front panel
keys in
R&S SMW
Comment Assigned Function
- USER New Key with a customizable function.
You can define the action to be
executed.
FILE SAVE/RCL Renamed Saves and loads instrument set-
ting
Accesses the file manager
CLOSE
HIDE
WINBAR
- Removed
The touchscreen functions take
over the window/dialog manage-
ment
-
- NEXT
WINDOW
New Toggles between the active dia-
logs
MENU - Removed
Access to the main and setup
menus is provided via the block
diagram and the softkeys on the
taskbar
-
Revised Front Panel Keys

 Loading...