0142530-000 AB KLA-Tencor Confidential 6-7
3/13/09
KLA-Tencor P-16+ / P-6 User’s Guide Sequence Recipe and Data - Creating a Sequence Recipe
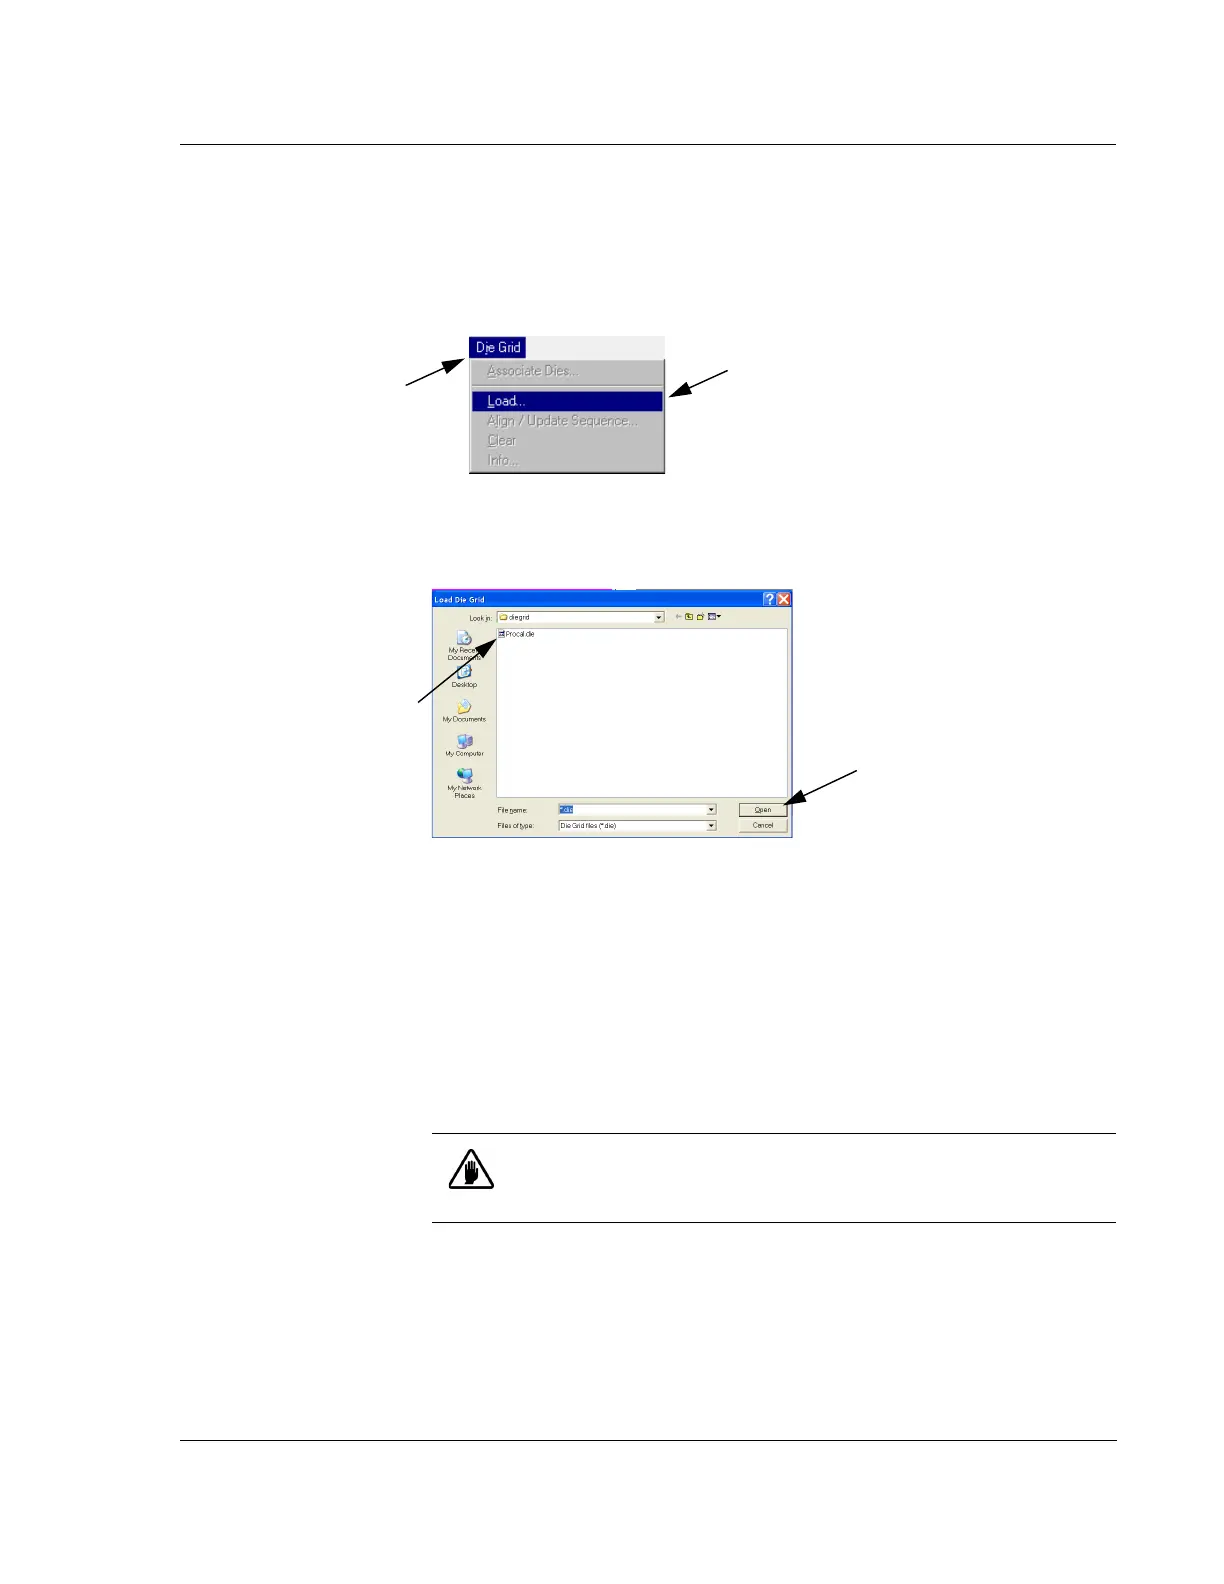
4. In the menu bar, click Die Grid to display its menu. (See Figure 6.6.) If Die Grid
is grayed out in the menu bar, the Safe Area might be incorrect. Set the
Safe Area
in the Configuration screen to the size of the wafer being used. See Safe Area
Configuration on page 14-12.
5. Click
Load... (See Figure 6.6.)
This displays the XY view screen with the
Load Die Grid dialog box
overlay. (See Figure 6.7 for dialog box.))
6. In the
Load Die Grid dialog box, double-click the name of the die grid to be used.
This displays the die grid name in the
File Name display box. (See
Figure 6.7.)
7. Click
Open to load the die grid. (See Figure 6.7.)
The system nulls the stylus and begin to search for the pattern that is displayed
in the sample navigation window. After it successfully locates the test pattern,
the die grid is loaded.
Figure 6.6 Die Grid Menu
Step 4 Click Die Grid in
the menu bar to display
its menu.
Step 5 Click
Load... to display the
Load Die Grid dialog box overlay
on the XY View screen.
Figure 6.7 Load Die Grid Dialog Box
Step 6 Double-click the
name of the die grid to
be used.
Step 7 Click
Open to
open the die grid.
CAUTION: The die grid must match the die grid pattern on the wafer
that has been loaded. If not, the die grid feature cannot be found and
the die grid does not load.

 Loading...