0142530-000 AB KLA-Tencor Confidential 6-9
3/13/09
KLA-Tencor P-16+ / P-6 User’s Guide Sequence Recipe and Data - Creating a Sequence Recipe
12. The Pattern Rec. Deskew Teach: Site 1 screen is displayed. Click a die in the
upper left quadrant of the sample navigation grid. the dark (blue on the screen)
rectangle has been chosen in Figure 6.10.
13. After the die in the upper left quadrant is clicked, the system moves that die into
view in the video window. Click
FOCUS in the tool bar to bring the die into clear
focus.
14. Use the arrow buttons in the tool bar to move the field of vision to a feature in
that die that is used for centering the die and aligning the wafer. It is best to use
the same feature that is used in the die grid. (See Figure 6.10.)
15. After locating the feature, use the click and drag procedure, starting from the
upper left corner of the feature, to draw a rectangle around the feature. When the
box is complete, the system centers it in the X-Y-grid and a replica of it is
produced in a box on the screen. The die navigation box, under the die grid
navigation grid, now contains a small blue box indicating the position of the
feature with respect to the die boundaries. (See Figure 6.10.)
16. When satisfied with the die position and the feature, click
OK.
End: Teach Global Pattern
Recognition Sites
17. Repeat Step 10 through Step 16 for Site 2. For a location, choose the lower right
quadrant, at approximately the opposite die position, at an approximate 45°
angle through the center of the die grid from the first die.
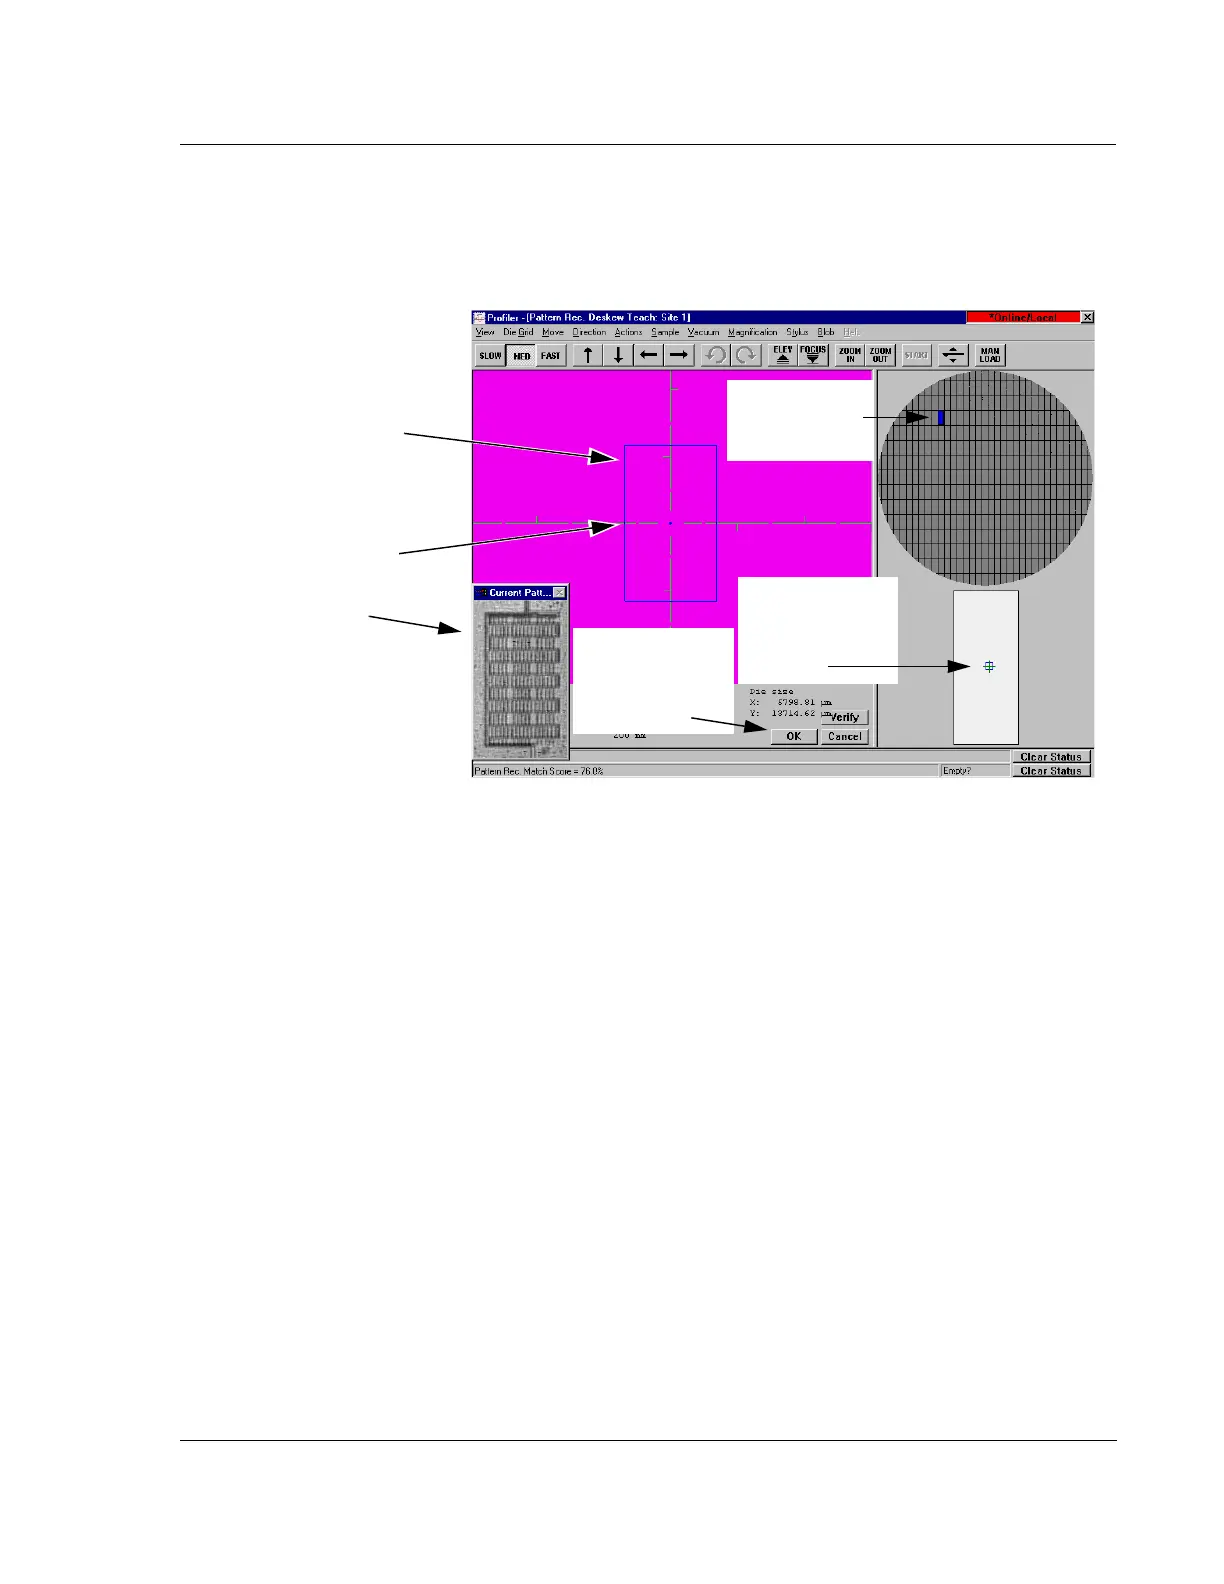
Figure 6.10 Pattern Rec. Deskew Teach: Site 1 Screen
(The video image is not
visible in this illustration but
would be present on the
actual screen.) The box is
drawn around the feature
that is displayed in the
Current Patt... box.
Step 12 Click a
die in the upper
left quadrant.
The location of the
feature is indicated
in the die navigation
box.
Step 15 Use the
click-and-drag process to
draw a box around the
feature to be used for
pattern recognition deskew.
Step 16 Click OK
when satisfied with
the feature and die
location.