0142530-000 AB KLA-Tencor Confidential 6-13
3/13/09
KLA-Tencor P-16+ / P-6 User’s Guide Sequence Recipe and Data - Creating a Sequence Recipe
Begin: Teach Scan
Location
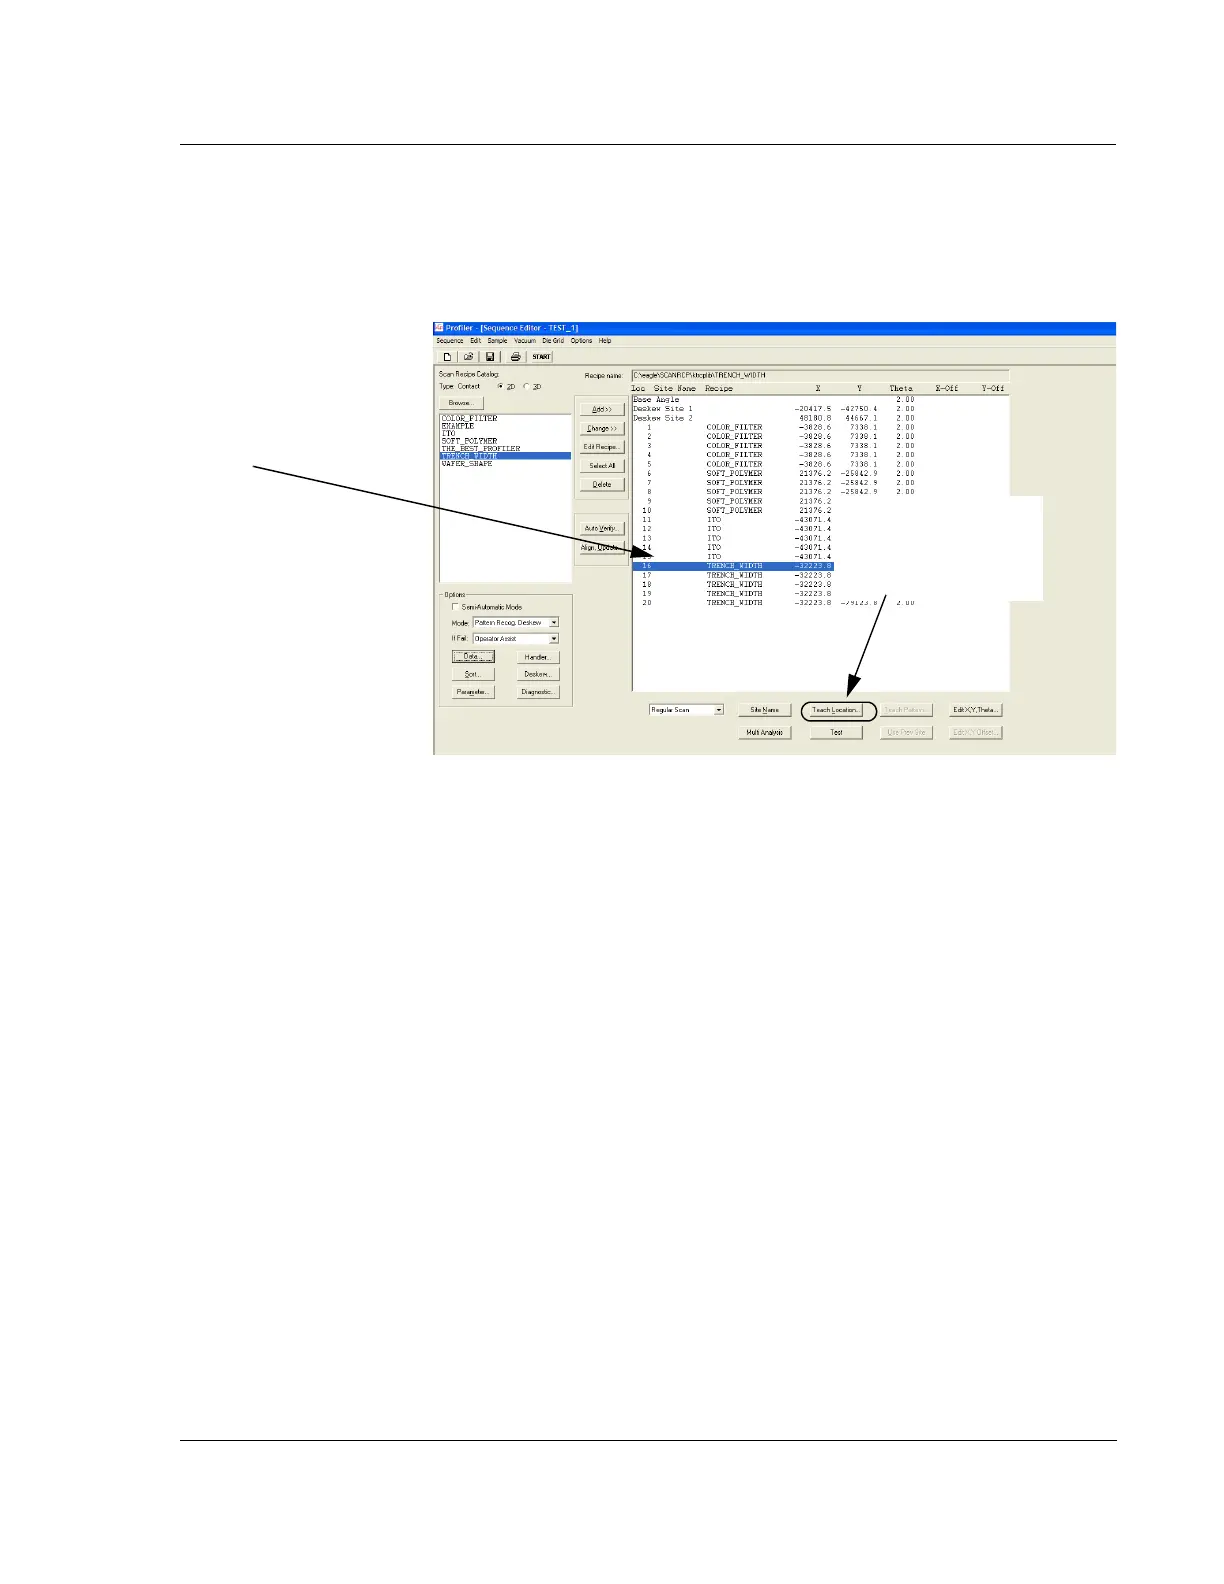
5. In the Sequence Editor, click a scan recipe in the sequence. It highlights when
chosen. (See Figure 6.14.)
6. Click the
Teach Loc button at the bottom of the screen.
The XY view screen appears and the system proceeds to null on the sample
surface. It then searches for the feature in the die. When it is found, the scan path
indicator is displayed over the feature. (See Figure 6.15.)
7. The die grid is visible in the sample navigation window with the die navigation
box below it. During a scan sequence, the system uses the Pattern Recognition
Deskew to situate the wafer.
8. Find the feature in the die that is to be scanned using the first recipe. Click in the
relative position in the die navigation box to move the feature close to the field
of view. Use the arrow buttons to move the feature into view. Click in the
relative position in the die navigation box
Figure 6.14 Sequence Editor - Teach Scan Location
Step 5 Click a scan
recipe so that it
highlights.
Step 6 When a Scan
Recipe is chosen, click
Teach Loc... to begin the
Teach procedure.
 Loading...