0142530-000 AB KLA-Tencor Confidential 3-41
3/13/09
KLA-Tencor P-16+ / P-6 User’s Guide Scan Recipes - Creating and Editing a Scan Recipe
b. Click and hold the mouse button while using the track ball to drag the
boundary into position for leveling the scan. Release the mouse button
when the boundary is correctly positioned.
c. Repeat Step 1 and Step 3 for the remaining cursor.
4. Click the
LEVEL button to level the trace. (See Figure 3.31.) This cause the trace
to be leveled and displays the trace with the Measurement Cursors active. (See
Figure 3.33 for a leveled trace.)
Measurement Cursors
The Measurement cursors are used to measure various attributes of the scan. Some
measurements are obtained between the cursors, while others are made within the
boundary of a single cursor.
NOTE: Both cursors should be positioned on the same X-plane. The
cursor boundaries should be positioned on the same plain, avoiding
noise peaks or valleys. This generally gives a flat scan trace.
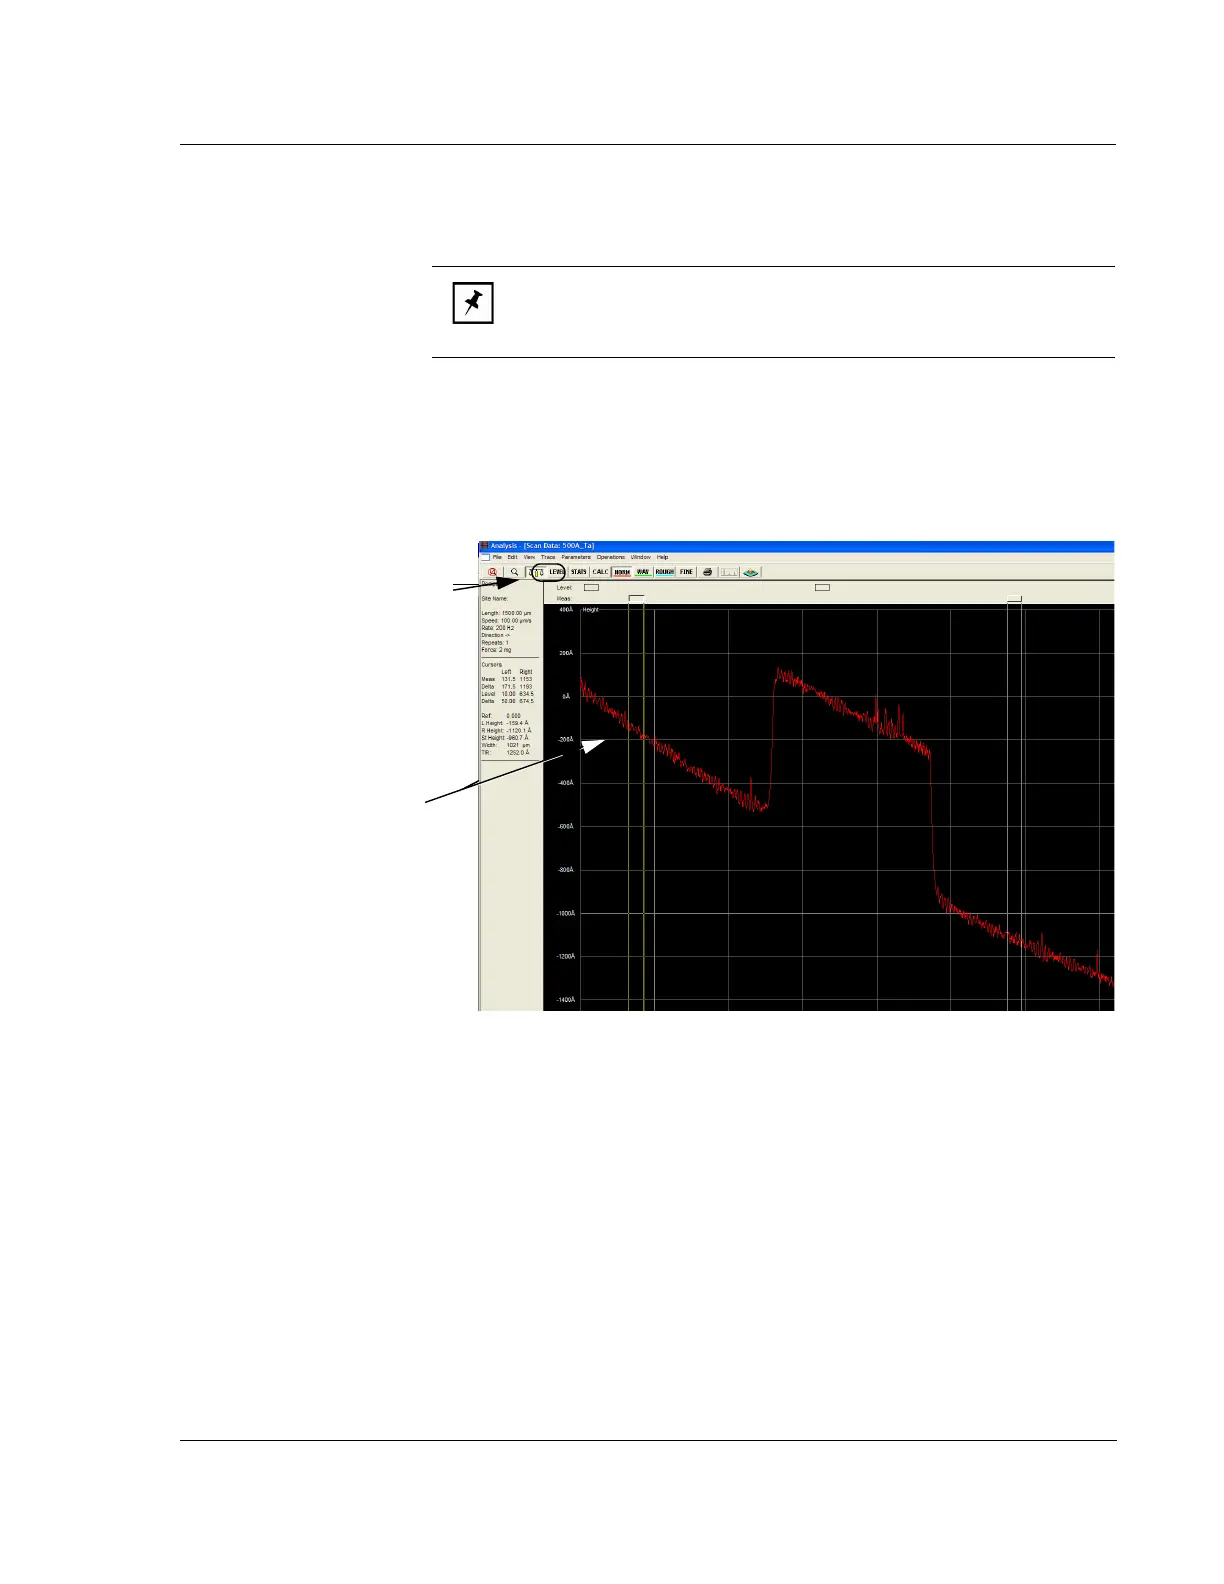
Figure 3.31 Cursor Boundary Setting on Unleveled Trace
Step 3 When the Leveling Cursor
is placed in the general area that it
is to be used, move the track ball
cursor down into the black trace
screen to position the cursor
boundaries.
A single arrow points at the cursor
boundary that is to be adjusted.
Click and hold the mouse button
and use the track ball to move the
cursor boundary into place.
Step 4 After Leveling cursors have
been set, click
LEVEL to level the
trace.