Stylus Change Procedure - Stylus Removal and Replacement KLA-Tencor P-16+ / P-6 User’s Guide
13-22 KLA-Tencor Confidential 0142530-000 AB
3/13/09
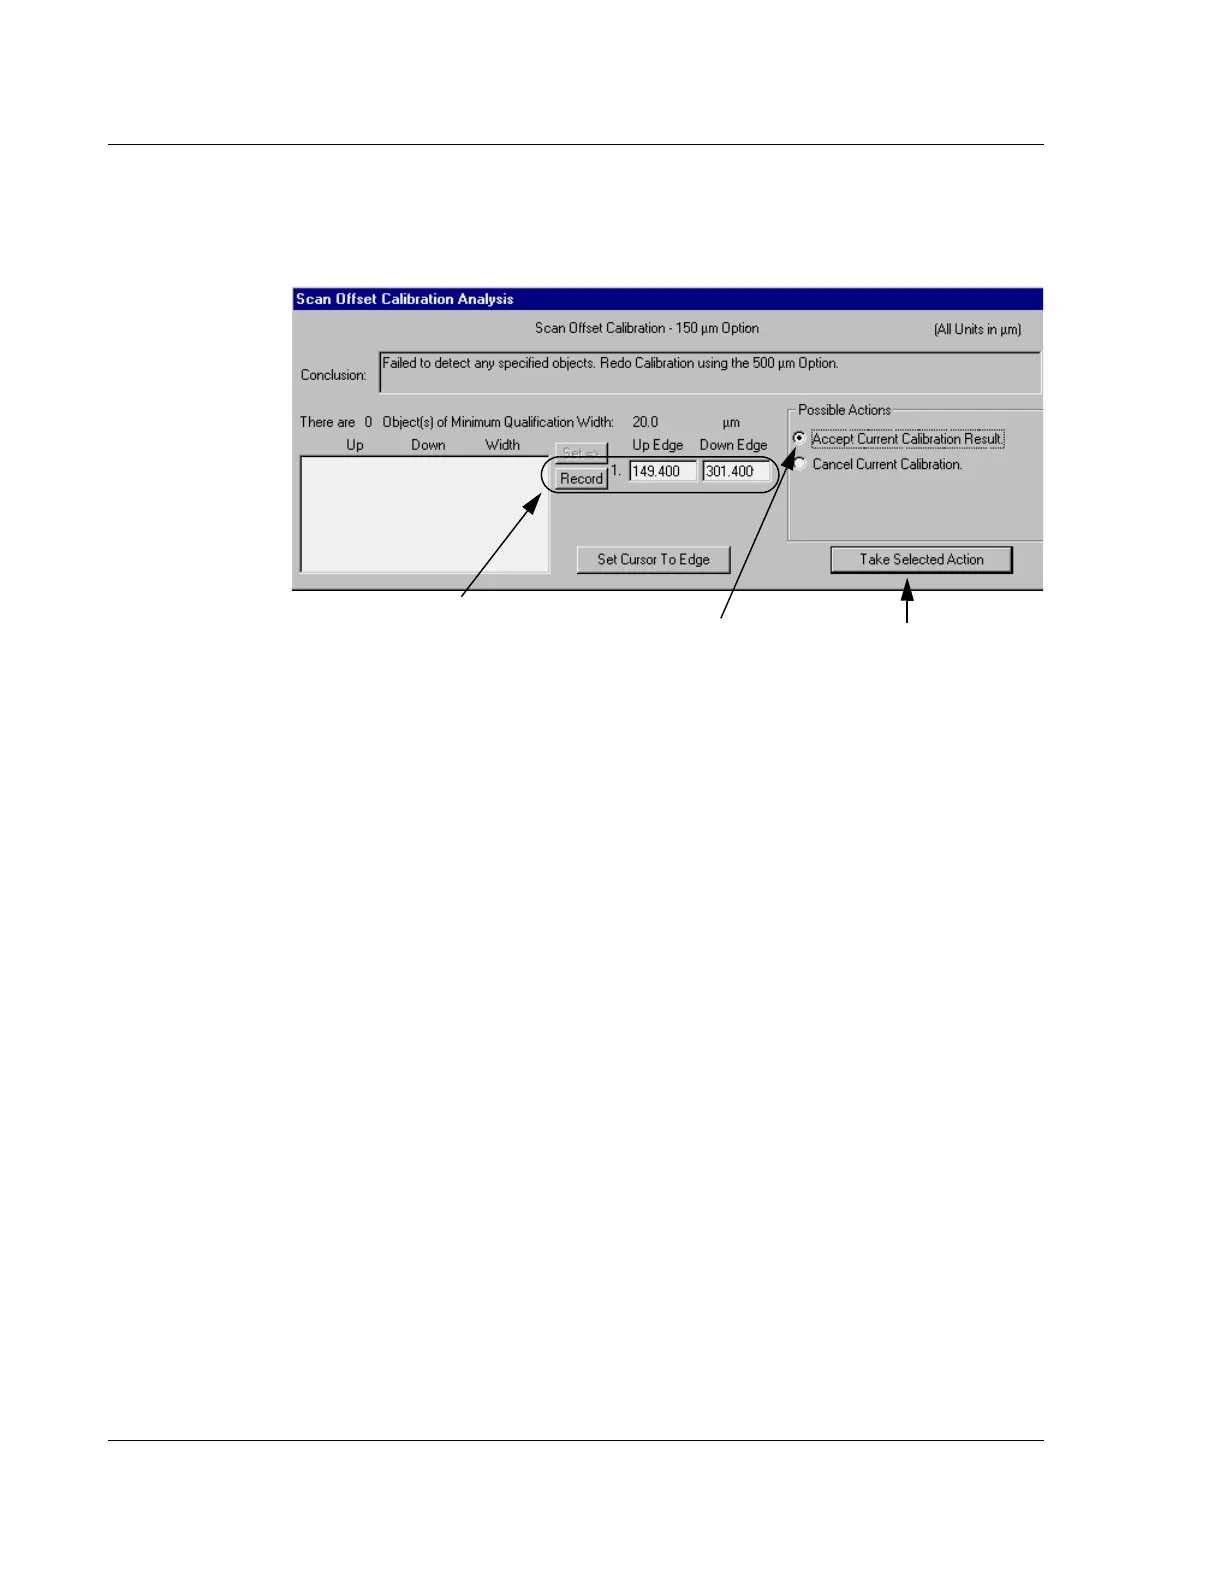
2. Once the measurement cursors are in position, click Record in the Scan Offset
Calibration Analysis section of the screen. (See Figure 13.34.)
3. When the edges of the triangle have been recorded, choose
Accept Current
Calibration Result
in the Possible Actions box. (See Figure 13.34.)
4. Click
Take Selected Action. (See Figure 13.34.)
When More Than One
Possibility is Displayed
On rare occasions the system fails to recognize the triangle even though it is in the
data set. The system might also make a determination that one of a number of
detected features is the correct one. To determine if the triangle is in a given data set,
review the scan data set of detected features at the bottom left of the Scan Offset
Calibration Analysis portion of the screen. If the triangle is present then the scan
calibration can be reset.
1. Click on the scan feature data set that represents the triangle so that it highlights.
In Figure 13.35 the system choose feature number 1 and set its parameters in the
Up Edge and Down Edge fields. (See Figure 13.35.) However, feature number 2
is 151.71 μm which is very near the expected scan distance of 150 μm. In this
example the user would click on that feature to highlight it.
2. With the feature highlighted, click on
Set to choose that feature as the triangle.
The Up and Down parameters of the data set are recorded in the Up Edge and
Down Edge fields. (See Figure 13.35.)
Figure 13.34 Scan Offset Calibration, Analysis Information Window
Step 2 Once the cursors have been placed
at the top edges of the triangle, click
Record
to set the coordinates of the triangle edges in
the Up Edge and Down Edge fields.
Step 3 Click
Take Selected
Action
to save the calibration
results.
Step 2 Choose
Accept Current
Calibration Results
by clicking in
its empty radio button.