0142530-000 AB KLA-Tencor Confidential 7-35
3/13/09
KLA-Tencor P-16+ / P-6 User’s Guide Analyzing 3D Scan Data - Line-by-Line Leveling
4. If the positions for the line spacing is known, enter the respective positions in
each of the fields. Remember the following when entering the position:
The units are microns (
μm).
The range is [0
μm to (Length of scan) μm] (length as defined in the scan
recipe being used).
0 ≤ Line 1 position < Line 2 position < Line 3 position < Line 4 position ≤
Scan Length
If the cursor line entries fall outside the scan limits, the system
automatically adjusts the cursors according to the sequential priority in the
above bullet.
Manually Position Line Cursors on Image to Enter Line Position
1. Run the scan using the recipe that is modified as illustrated in Figure 7.21.
2. From the Analysis screen choose Operations in the Menu Bar.
3. Select Line Leveling from the Operations menu.
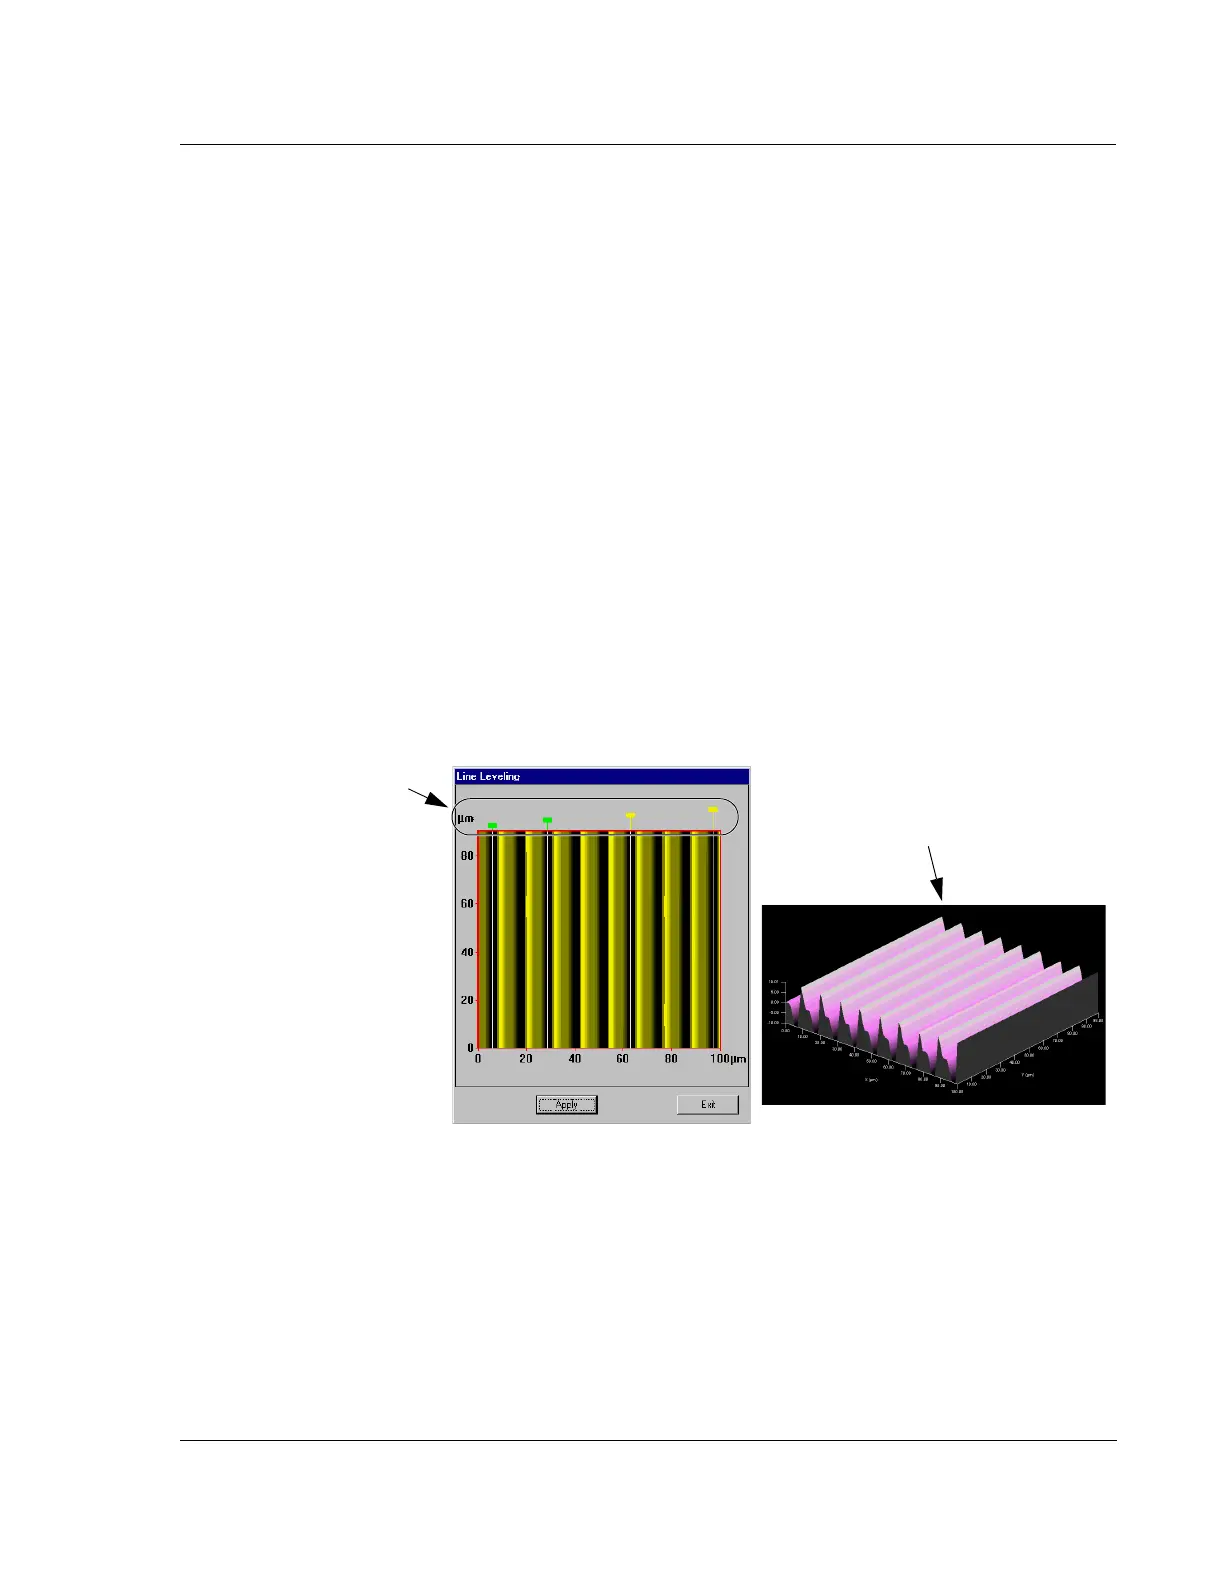
The graphic display of the data appear midscreen in the top view with the four
line cursors in place at opposite borders of the image.
4. Click and drag each line to its required position. All four line cursors must be on
the same plane for the data to be properly leveled. (See Figure 7.22.)
5. It is not necessary to save the data for the new cursor position to be recorded in
the recipe.
6. To observe the recipe, click
Edit in the Menu Bar to display its menu.
7. Select
Recipe from the Edit menu to return to the Recipe Editor.
Figure 7.22 Line Leveling Top View Analysis Screen
Step 4 Click and drag lines
to the required positions.
Notice that all the cursor
lines are set to level on the
same plane.
If necessary, view the same image
from a different perspective so
positioning cursors is easier.