0142530-000 AB KLA-Tencor Confidential 13-7
3/13/09
KLA-Tencor P-16+ / P-6 User’s Guide Stylus Change Procedure - Stylus Removal and Replacement
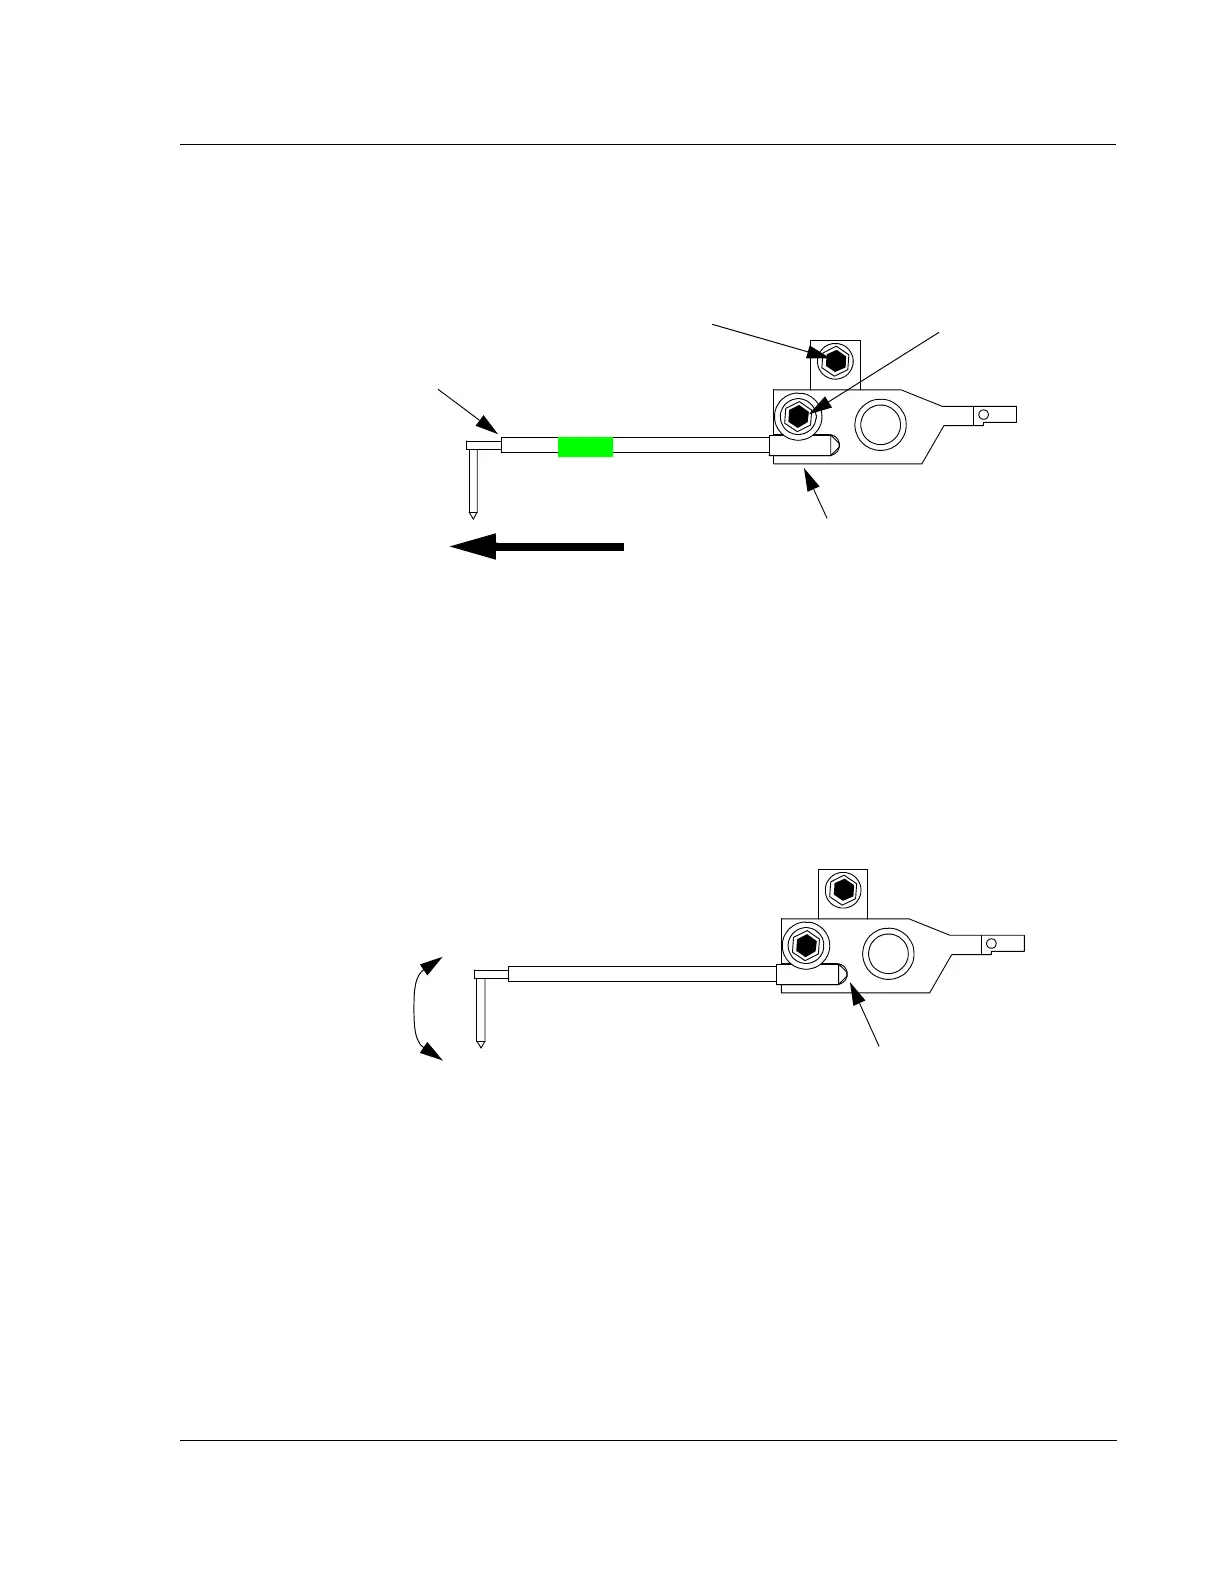
12. With the stylus clamp screw loose, take hold of the stylus with tweezers and pull
gently straight to the left until the stylus comes free. (See Figure 13.8.)
Stylus Replacement 13
1. Using tweezers, take hold of the new stylus with the tip pointing downward
toward the stage. Insert the long arm of the stylus into the support groove in the
stylus arm. Gently maneuver it into the slot. Once in the slot, move it up and
down gently to ensure that it reaches the end of the slot and seats properly. (See
Figure 13.9.)
2. Support the stylus mount (arm) and stylus with a finger to protect it from
damage while tightening the mounting screw. (See Figure 13.10.)
Figure 13.8 Sensor Assembly - Loosening Stylus Clamp Screw
Step 11 Loosen the
stylus clamp screw.
CAUTION: Do not turn
this screw; it can result in
damage to the stylus.
Stylus
Step 12 Pull stylus straight out
in this direction with tweezers
Support the arm here while
loosening the clamp screw.
See Figure 13.7.
Figure 13.9 Sensor Assembly - Seating the New Stylus
Once in place, gently
move the stylus UP
and DOWN while
pushing it into place to
ensure that it seats
properly.
Ensure that the stylus
touches the end of the slot.