0142530-000 AB KLA-Tencor Confidential 3-43
3/13/09
KLA-Tencor P-16+ / P-6 User’s Guide Scan Recipes - Creating and Editing a Scan Recipe
b. As the track ball cursor approaches one of the active cursors, the cursor
header changes to appear indented and the track ball cursor appears as a
double arrow as shown in Figure 3.6.
Click and hold on the cursor that is to be moved. Drag it to the desired
position using the track ball to move it. Release the mouse button when the
cursor is in position.
2. When the cursor is in position, set each cursor boundary using the following
procedure:
a. Move the track ball cursor down into the black scan trace screen. The
boundary that the cursor arrow is pointing at is the one that moves. (See
Figure 3.33.)
b. Click and hold the mouse button while using the track ball to drag the
boundary into position for its intended measurement in the scan. Release
the mouse button when the boundary is correctly positioned.
c. Repeat Step 1 and Step 3 for the remaining cursor.
d. Click the
CALC button to record the cursor positions in the recipe and
calculate the measurement parameters.
3. When the trace has been leveled and the Measurement cursors have been placed,
click the
CALC button to cause the system to recalculate the data with new
cursor positions. The new positions are saved as part of the recipe.
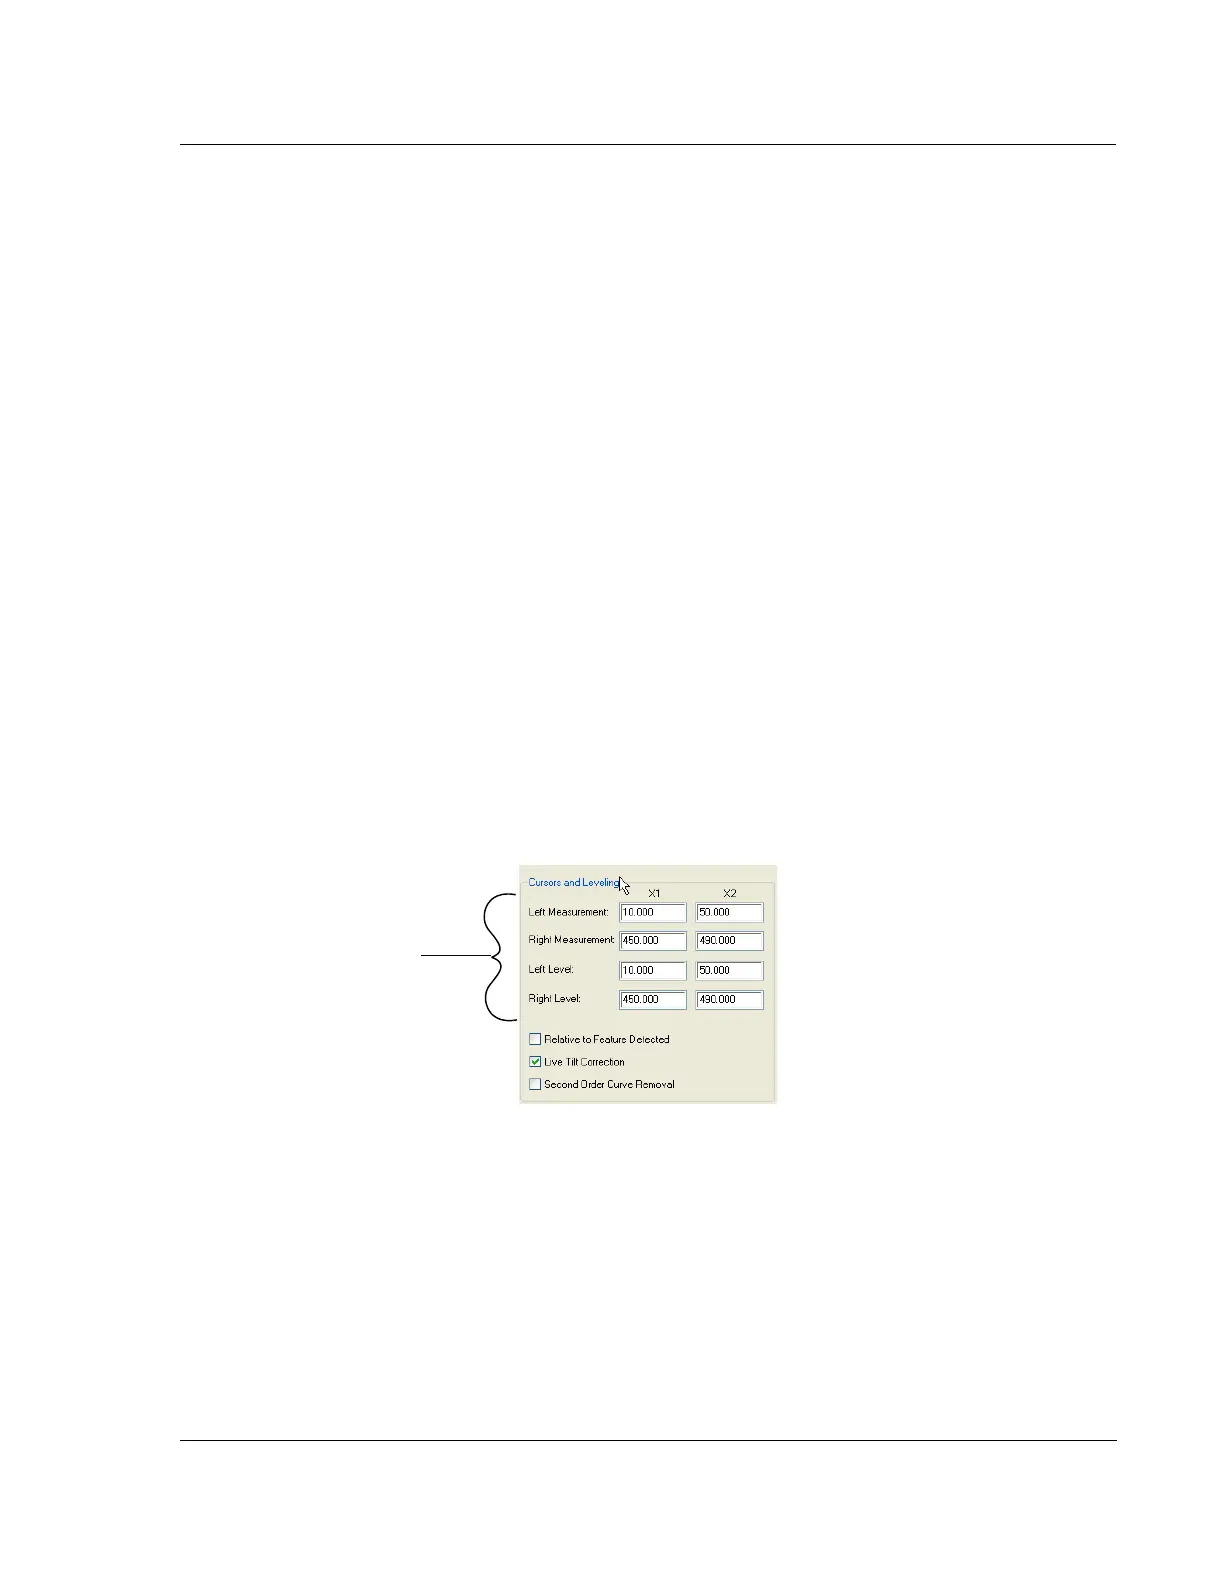
The Recalculation process places the cursor limits in the
Cursors window of
the
Recipe Editor. (See Figure 3.34.)
Figure 3.34 Cursor Parameters - Recipe Editor
Cursor parameters (limits) are
automatically changed when
the
CALC button is clicked in
the
Analysis screen.