Sequence Recipe and Data - Creating a Sequence Recipe KLA-Tencor P-16+ / P-6 User’s Guide
6-14 KLA-Tencor Confidential 0142530-000 AB
3/13/09
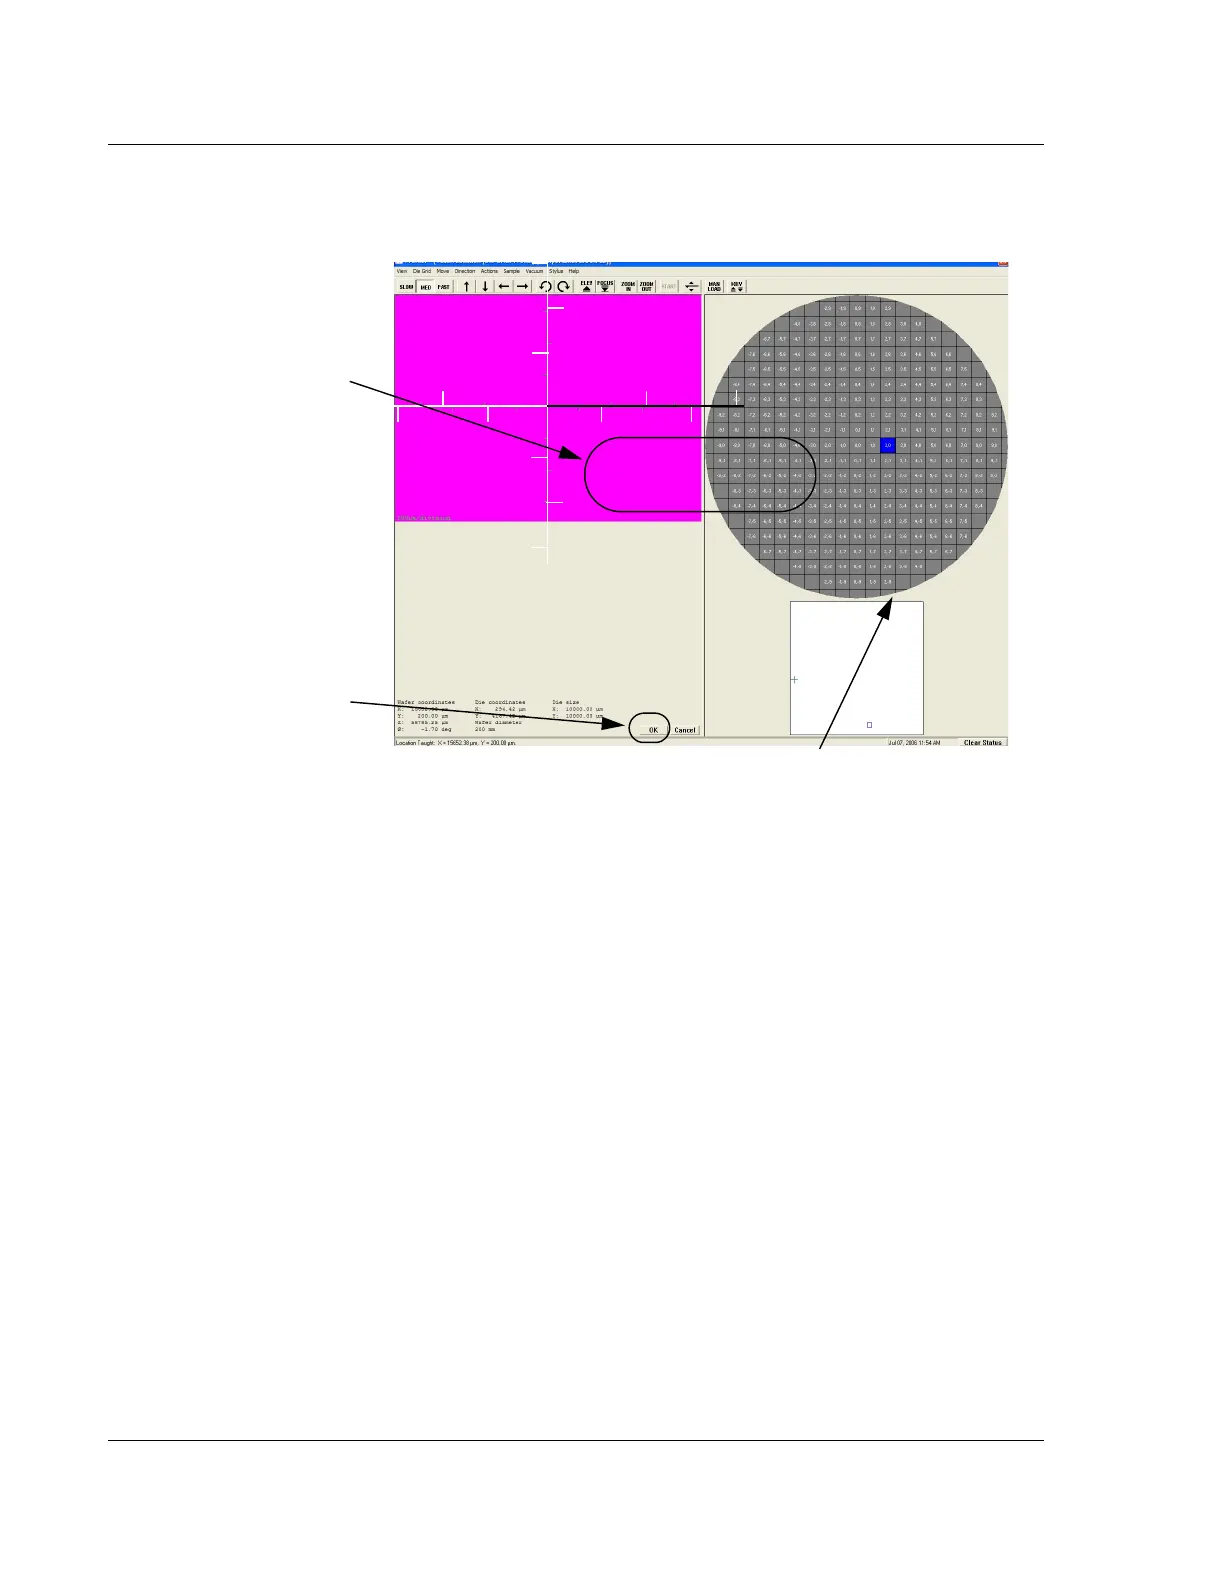
9. After the feature is centered in the video window, position the scan path
indicator over the feature in the die that is to be scanned using the first recipe in
the sequence. (See Figure 6.15.)
10. When the scan path indicator is correctly positioned, click
OK. (See
Figure 6.15.) The screen changes back to the Sequence Recipe screen.
In the Sequence Recipe screen, there are now coordinates next to the scan recipe
which describe the location of the scan path in the die for that recipe. (See
Figure 6.16.)
Figure 6.15 Teach Location for First Recipe Scan
Step 8 The Teach Location
screen displays the sample
surface under low magnification.
Position the scan path across
the chosen feature.
Step 9 Position the scan path
indicator over the portion of
the die that is to be scanned
by the recipe in the
sequence. Use the arrow
buttons to move the field of
vision and locate the scan
location.
Step 10 Click
OK when the
scan path indicator is properly
placed.
The die navigation box can be used to position the scan for
the recipe. Click the place in the die where the scan feature
resides. The video image displays that position.