0142530-000 AB KLA-Tencor Confidential 14-21
3/13/09
KLA-Tencor P-16+ / P-6 User’s Guide Configuration - Precision Locators (P-16+ Only)
8. Screw in the mounting screws to secure the locator to the stage. (See
Figure 14.20.)
Three Point Disk Locator 14
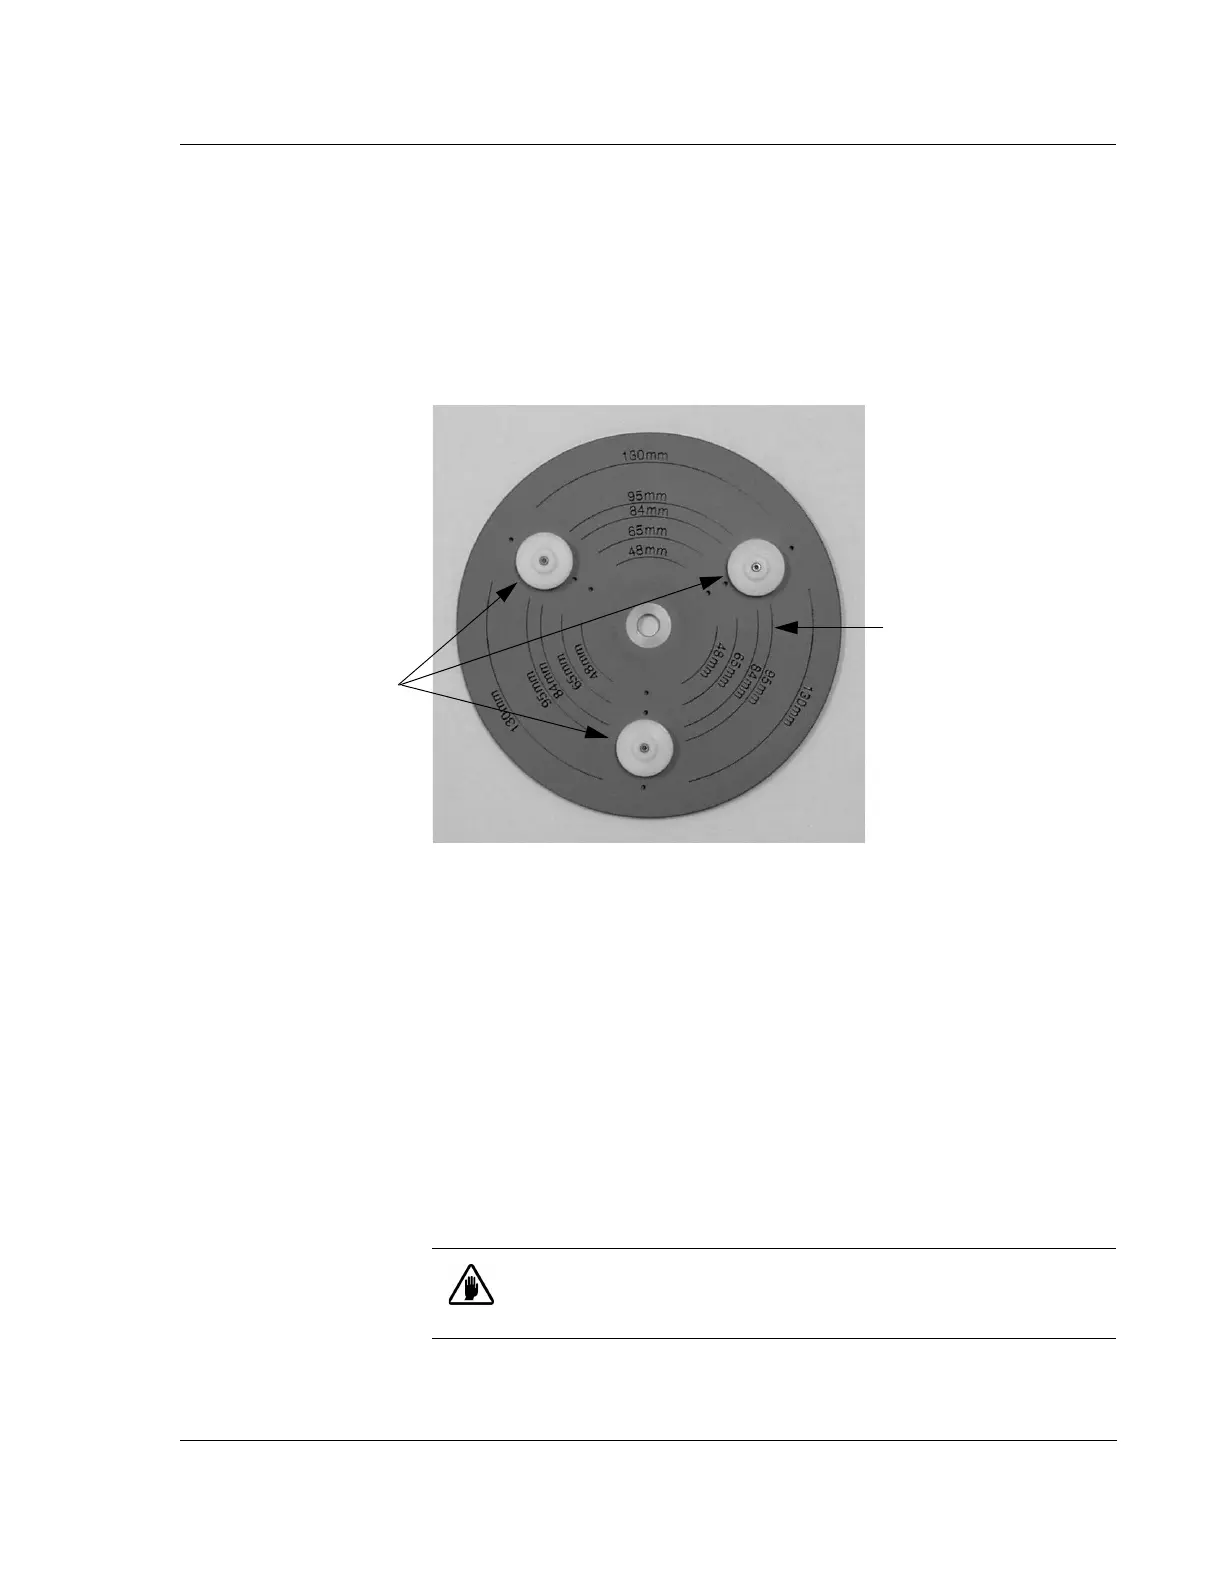
The KLA-Tencor three point disk locator for Profilers is shown in Figure 14.21.
The three point Disk Locator has three disk supports that can be situated to support
five sizes of disk: 48 mm, 65 mm, 84 mm, 95 mm, and 130 mm disks.
Installing the 3-point Disk Locator on the Stage: 14
1. In the Catalog screen, choose Scan Recipe to display the scan recipes in the site
list area.
2. With a recipe highlighted, click the
XY icon in the tool bar to open the XY View
screen. The XY View screen opens.
3. Click
MAN LOAD to move the head up and bring the stage out to the stage door.
4. If the head does not move up during the
MAN LOAD procedure, click the ELEV
button as many times as necessary to move the head to a high enough position so
that contact with the stylus can be avoided when removing the stage table.
5. Open the door.
6. Remove the three screws (8-32×3/8 in.) that hold the stage table to the stage.
Remove the table.
Figure 14.21 Three Point Disk Locator
Disk Supports. The
support is illustrated
in Figure 14.24.
The current locators are
situated at the 95 mm
position on the Three Point
Disk Locator.
CAUTION: Do not open the door before moving the stage into
position or the system might shut down due to the safety interlock
activation on the stage door.
 Loading...