Scan Recipes - Creating and Editing a Scan Recipe KLA-Tencor P-16+ / P-6 User’s Guide
3-22 KLA-Tencor Confidential 0142530-000 AB
3/13/09
3D Scan Category Parameters - Scan Parameters Definition 3
The parameters discussed in this section are those that are additions to or differ from
the 2D parameters already presented. For information on parameters that are identical
for 2D and 3D scans, see the descriptions in the 2D recipe section. (See Table 3.14 for
identification of which parameter settings are 2D or 3D.)
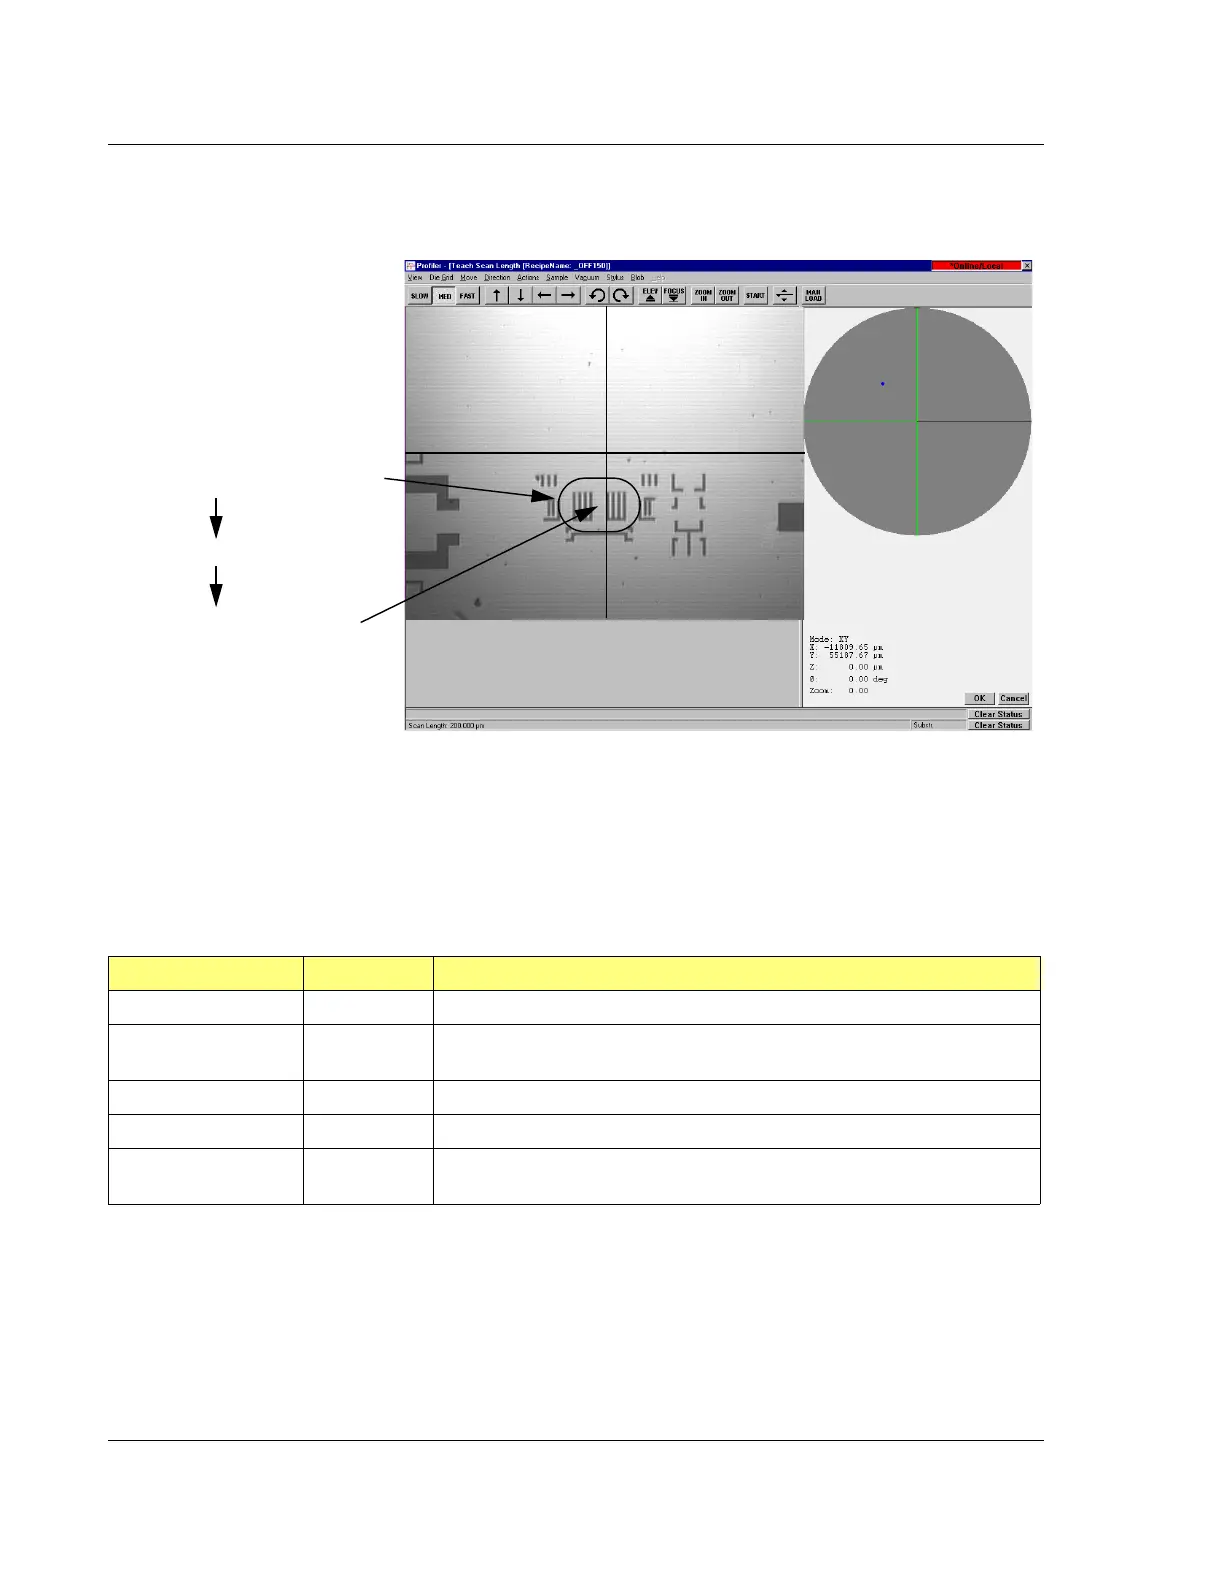
Figure 3.17 Teach Scan Length, from the 2D Scan Teach Button
With the feature in the field of view,
click in the appropriate reference
point (start, center, or end) for the
scan. The system positions that
point center screen and places the
scan arrow over the scan in the
appropriate place.
EXAMPLE: If the
circled feature is to
be scanned…
and the reference
is set on center…
Click the center of the scan travel
distance in the image and that point
is positioned center stage with the
scan trace through it.
Table 3.14 3D Scan Parameters Summary
Parameter Setting 2D, 3D or Both Description and Location
X Scan Size Both X direction scan length; Step 1. on page 3-15.
Y Scan Size 3D The length in the Y-direction through which the X-direction scans are made
at each
Y Spacing interval.
Scan Speed Both The speed at which the scan is performed.
Sampling Rate Both The rate at which data points on the scan are recorded for analysis.
Traces 3D This is the number of scans that are made to encompass the Y-distance
requirement.