Configuration - Precision Locators (P-16+ Only) KLA-Tencor P-16+ / P-6 User’s Guide
14-20 KLA-Tencor Confidential 0142530-000 AB
3/13/09
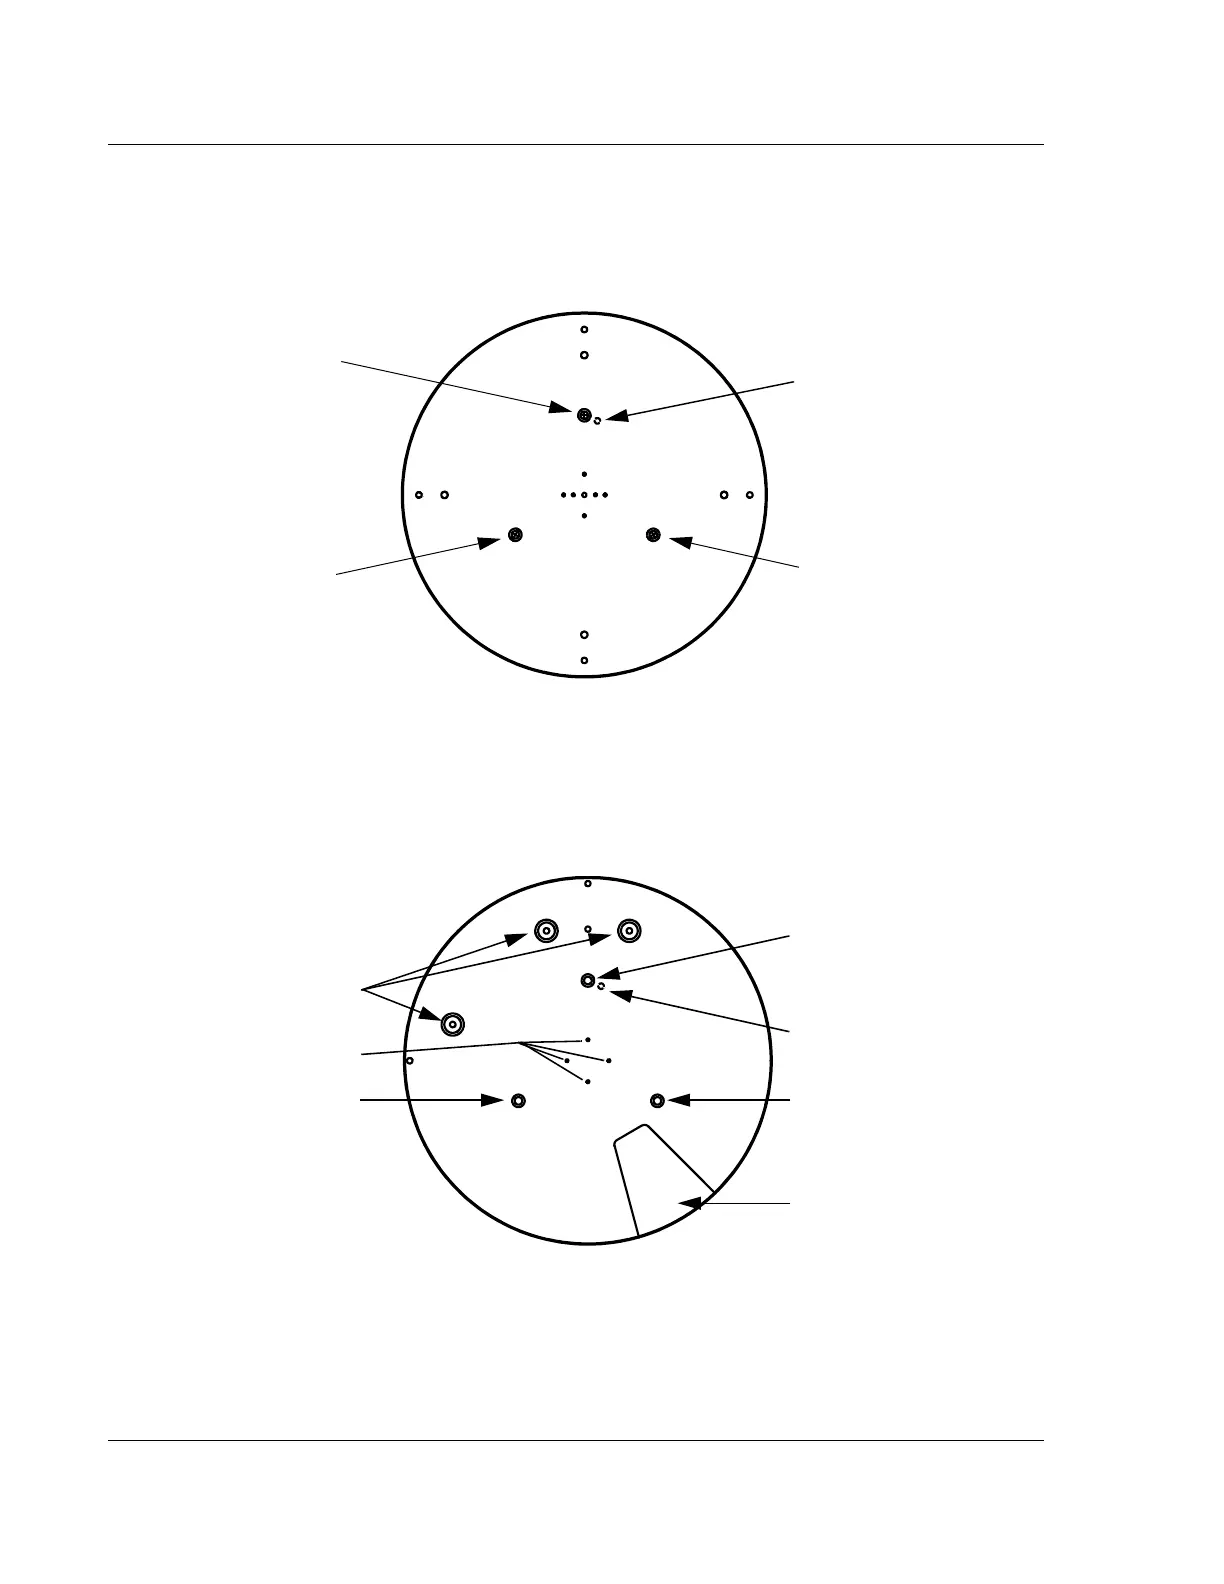
6. Remove the three screws (see Figure 14.19) that hold the stage table to the
stage. Remove the table. It might be necessary to rotate the stage using the
rotational arrow buttons (in the tool bar) for easier access to the screws.
7. Place the precision locator on the stage so that the three holes line up with the
mounting holes. A pin on the bottom of the locator fits into the groove on the
stage just to the right of the 12 o’clock position as seen from above. (See
Figure 14.20.)
Press down on the precision locator to slide the pin into the groove. When
positioned as shown in Figure 14.20, the precision locator is in the “0” theta
position (that is, theta equals 0 degrees).
Figure 14.19 Lightweight Stage Table Top
Screw #1 securing
the stage table to
the stage.
Locator pin
(underside of
the table)
Screw #2 securing
the stage table to
the stage.
Screw #3 securing
the stage table to
the stage.
Figure 14.20 Precision Locator
Wafer stops
Locator mounting screw #2
Gap for the wafer wand
Locator pin
(underside of
the table)
Locator mounting screw #1
Locator mounting screw #3
Vacuum holes

 Loading...