Basic Skills - Adjusting the Video Image KLA-Tencor P-16+ / P-6 User’s Guide
2-12 KLA-Tencor Confidential 0142530-000 AB
Friday, March 13, 2009
Preliminary
ADJUSTING THE VIDEO IMAGE 2
Introduction 2
The Video Controls allow the view of a particular sample surface to be optimized.
The brightness and contrast can be varied for the camera.
The purpose of adjusting the video image is to clarify the image resolution and
contrast so it can be clearly viewed.
Video Image Adjustment Procedure 2
1. With a sample loaded on the stage, click the FOCUS button to null the stylus on
the sample surface and focus at the chosen magnification. (See Figure 2.8.)
2. Click
View in the Menu Bar to display its menu.
3. Select
Video Controls.
The
Video Controls dialog box appears. (See Figure 2.9.)
4. Adjust contrast and brightness controls by moving sliders left or right.
5. When values for
Contrast and Lamp Brightness are set, click Apply.
6. When the adjustments are complete, click Exit. The settings are stored.
NOTE: Changing the focus can invalidate sequences that use pattern
recognition because the sample image is less likely to match the
stored image in the pattern recognition files.
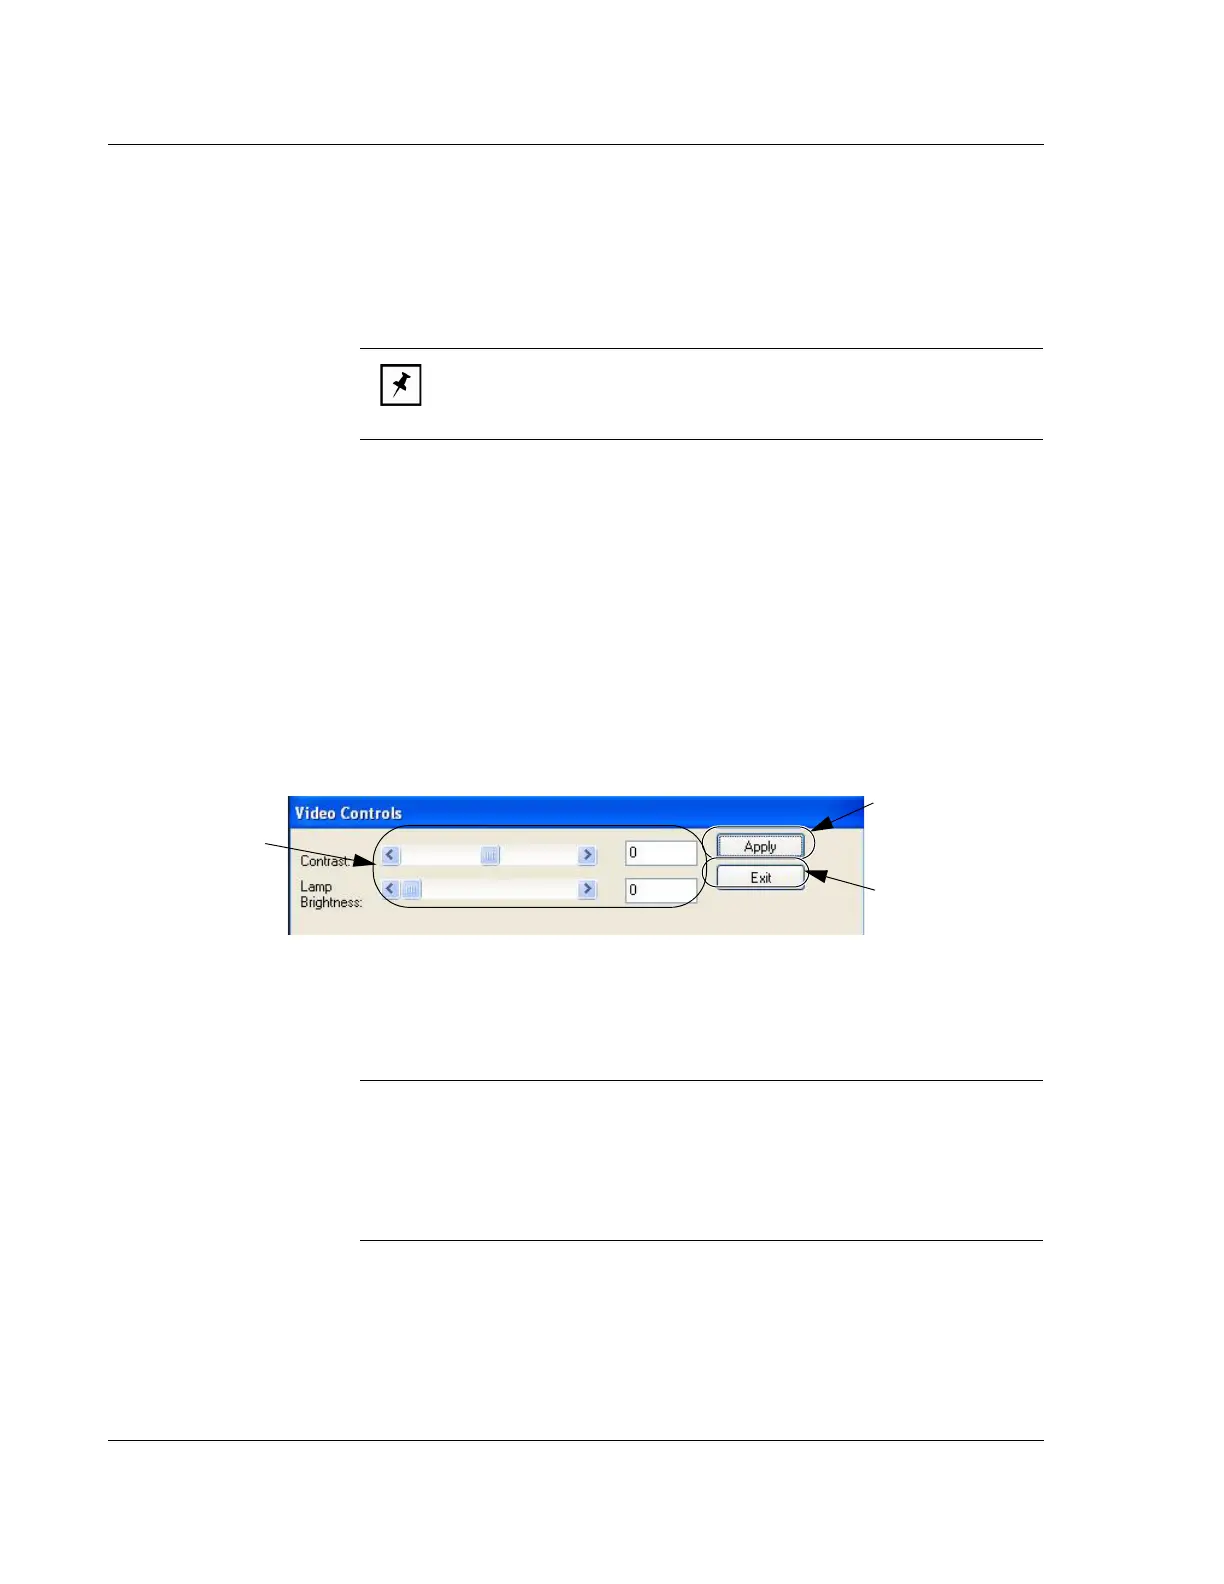
Figure 2.9 Video Control Dialog Box
Step 5 When desired
results are achieved,
click
Apply.
Step 6 Click
Exit.
Step 4 Use the slide
bar or directly enter
the value required.
NOTE: If the video image is too bright or too dark, even after
making adjustment to the video controls, the problem could be
due to auto brightness, adjustment during the focus routine.
Adjust the contrast to 0 and the lamp brightness to the
mid-point and then return to Step 1, re-focusing the image.
If the problem persists, contact KLA-Tencor.