Configuration - Stage Configuration KLA-Tencor P-16+ / P-6 User’s Guide
14-8 KLA-Tencor Confidential 0142530-000 AB
3/13/09
Procedure to Teach Lowest Elevator Position 14
This positioning procedure requires that the stylus make contact with the stage
surface, precision locator surface, or a ample (if samples of consistent thickness are
used) in order to assign a lowest elevator position that allows the system to locate and
use the sample support surface or embedded standards. It is best to use a sample if the
samples tested are of a consistent thickness. Make sure that the stylus stops on the
top surface and not in a hole or grove. Once the stylus is aligned with the proper
surface position, the remainder of the procedure is automatic.
1. Load a sample.
2. Click
FOCUS in the tool bar to move the head down to focus
on the sample.
The
system is set to protect the stylus so this final null could take a relatively long
time.
3. When the null is complete, click
OK to accept the Lowest Elevator Position (Z
coordinate) position or
Cancel to reject the new position (Z coordinate) and
retain the previous one. The screen should close and return to the Configuration
screen.
The system takes the null position Z coordinate and adds 500
μm to it. The new
accepted position is automatically entered into the Lowest Elevator variable
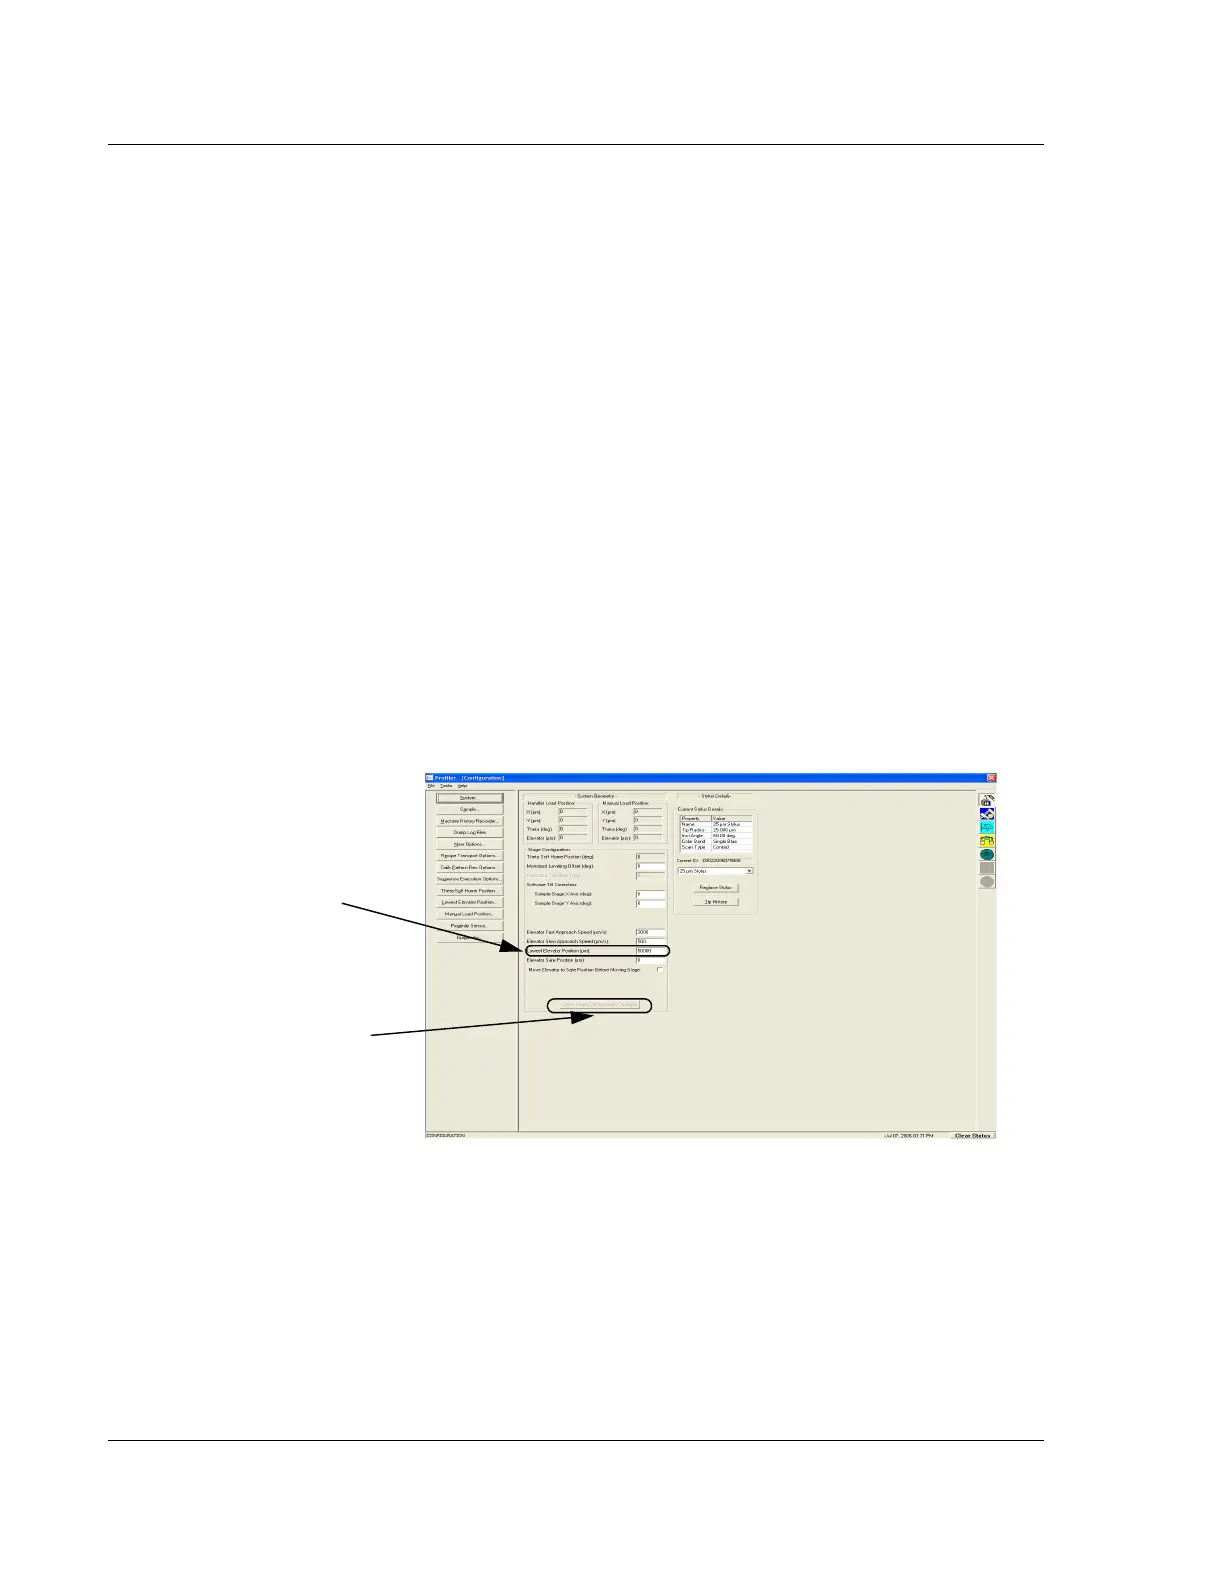
field in the Configuration screen. (See Figure 14.8.)
4. In the Configuration screen, if the Lowest Elevator Position (Z coordinate) is
acceptable, click
Save Stage Configuration Changes to accept the new value; or,
to retain the previous position, close the screen without saving the changes.
Figure 14.8 Configuration Screen - Lowest Elevator Position
The new value for Lowest
Elevator Position. In this case
it is: 50000.00.
Step 4 When an acceptable
change to the Lowest Elevator
Position has been entered, click
Save Stage Configuration
Changes
.

 Loading...