Analyzing 3D Scan Data - 3D Analysis Screen Features KLA-Tencor P-16+ / P-6 User’s Guide
7-14 KLA-Tencor Confidential 0142530-000 AB
3/13/09
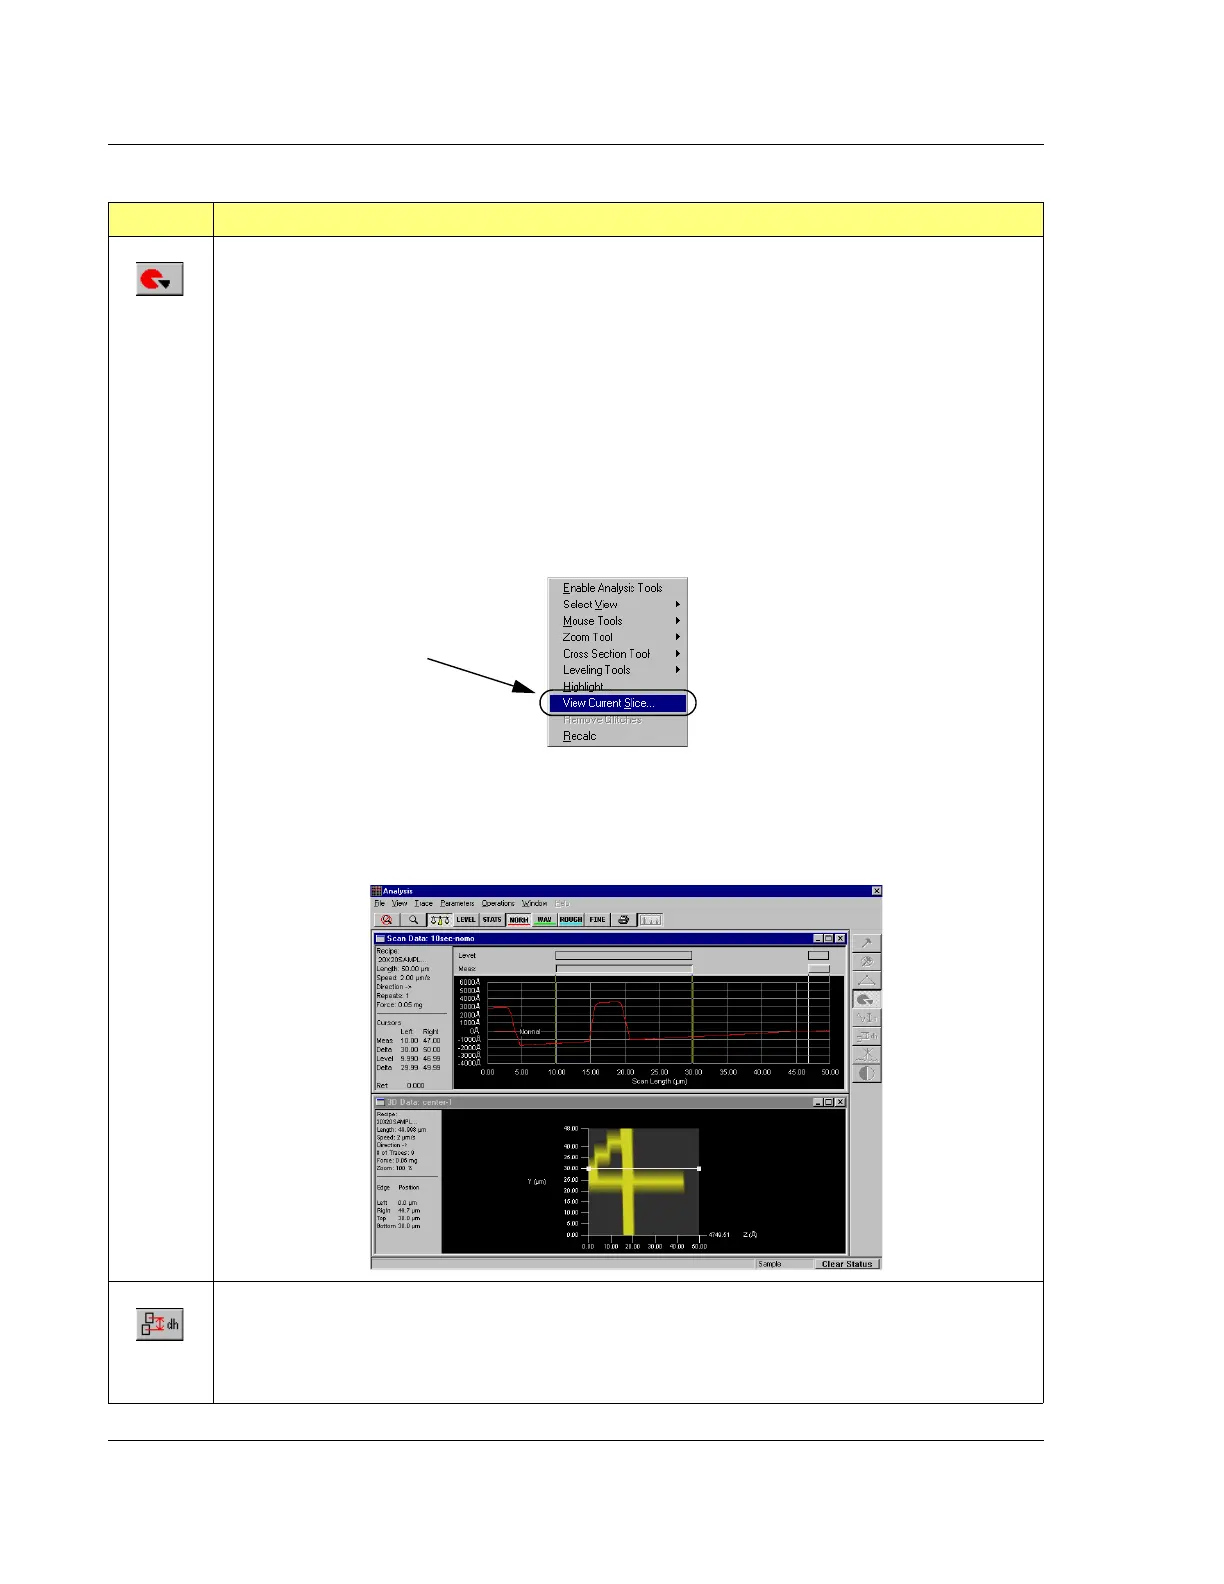
Activate Slicing Tool. This button activates the tool that allows the user to slice the image down from
the top surface to the foundation of the image and display a 2D image of the cross section at the slice.
This tool provides three options (see also Table 7.14) for the slice: horizontal, vertical, and diagonal.
(Diagonal can be adjusted to any angle.) All three options can be adjusted to any length. (See Table
7.9, in the
Current Slice section.)
Procedure:
a. When this tool is clicked, a slice line is displayed on the 3D image in the chosen
orientation.
b. Click and hold while dragging the slice line to the desired location on the image.
c. Adjust the length of the slice by using the click-and-drag procedure with one of the handles
at the end of the slice line.
d. Right-click to display the Right-click menu. (See below.)
e. Click
View Current Slice (shown above) to view the current slice trace. To display both the
2D image along with the 3D image (as illustrated below), click
Window, then choose
Cascade. (See Creating and Saving 2D Slice Data from a 3D Scan on page 7-41 for
information on creating a slice and saving current slice data.)
Activate Step Height Tool. This button activates the tool that places two boxes on the image surface.
Using using the click-and-drag procedure with the center of each box, it can be moved to a new
location on the image surface. It can then be resized using the corner handles. The software
determines the difference between the average height in one box and the average height in the other
box. This difference is automatically calculated as the boxes are moved or resized.
Table 7.6 Analysis Side Toolbar Buttons (Continued)
Button Description of Action
In the View menu, click
View Current Slice to
display the 2D image at
the slice indicated in the
3D image.
 Loading...