0142530-000 AB KLA-Tencor Confidential 7-15
3/13/09
KLA-Tencor P-16+ / P-6 User’s Guide Analyzing 3D Scan Data - 3D Analysis Screen Features
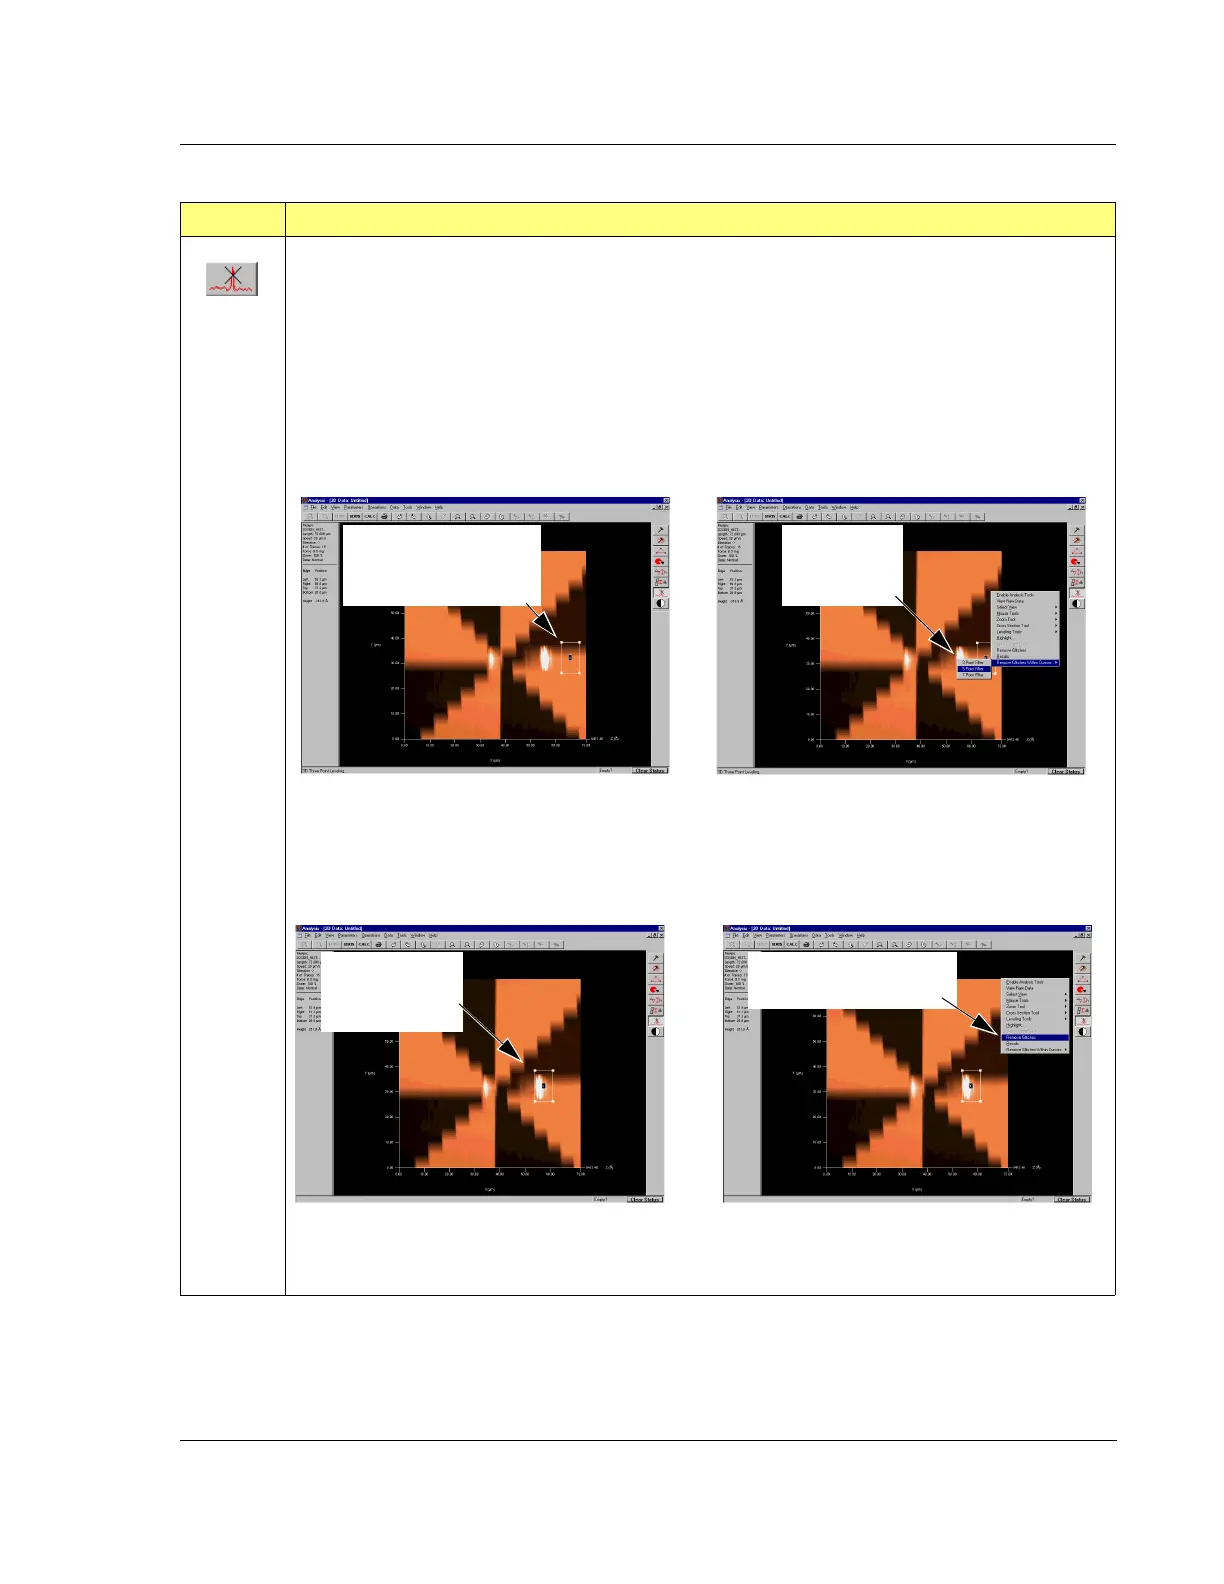
Activate 3D Glitch Removal Tool.
This button activates the 3D glitch removal option. The tool is used in the following manner:
1. Activate the glitch removal button by clicking on it. A box is displayed at the bottom right of the
top view of the 3D image.
2. Drag the box over an area that presents the identical but correct formation of the area that
contains the glitch. Resize the box to capture only those attributes and only the size that is to be
corrected in removing the glitch. (See left side illustration below. Note that it is important to
gather enough data points for the system to make the analysis and remove the glitch.)
3. Right-click to display the right-click menu.
4. Move cursor to
Remove Glitches Within Cursors and choose the median filter to be used; 3 x 3,
5 x 5, or 7 x 7. (See right side illustration above.) (For more information on median filters, see
also Median Filter for 2D and 3D Data on page 3-45.)
5. Move the box over the glitch area, placing it in the same relative position that the initial box was
placed. (See left side illustration below.)
6. Right-click to display the right-click menu. (See right side illustration above.)
7. Move the cursor to
Remove Glitches and click.(See right side illustration above.) The glitch is
removed using the chosen filter and the data gathered in the first box.
Table 7.6 Analysis Side Toolbar Buttons (Continued)
Button Description of Action
Place and resize glitch
removal box in a position
modeling desired data.
In right-click
menu choose
filter option.
Move the glitch
removal box over
the glitch area.
In right-click menu, choose
Remove Glitches.