User Guide 580
Configuring DHCP Service Configuration Examples
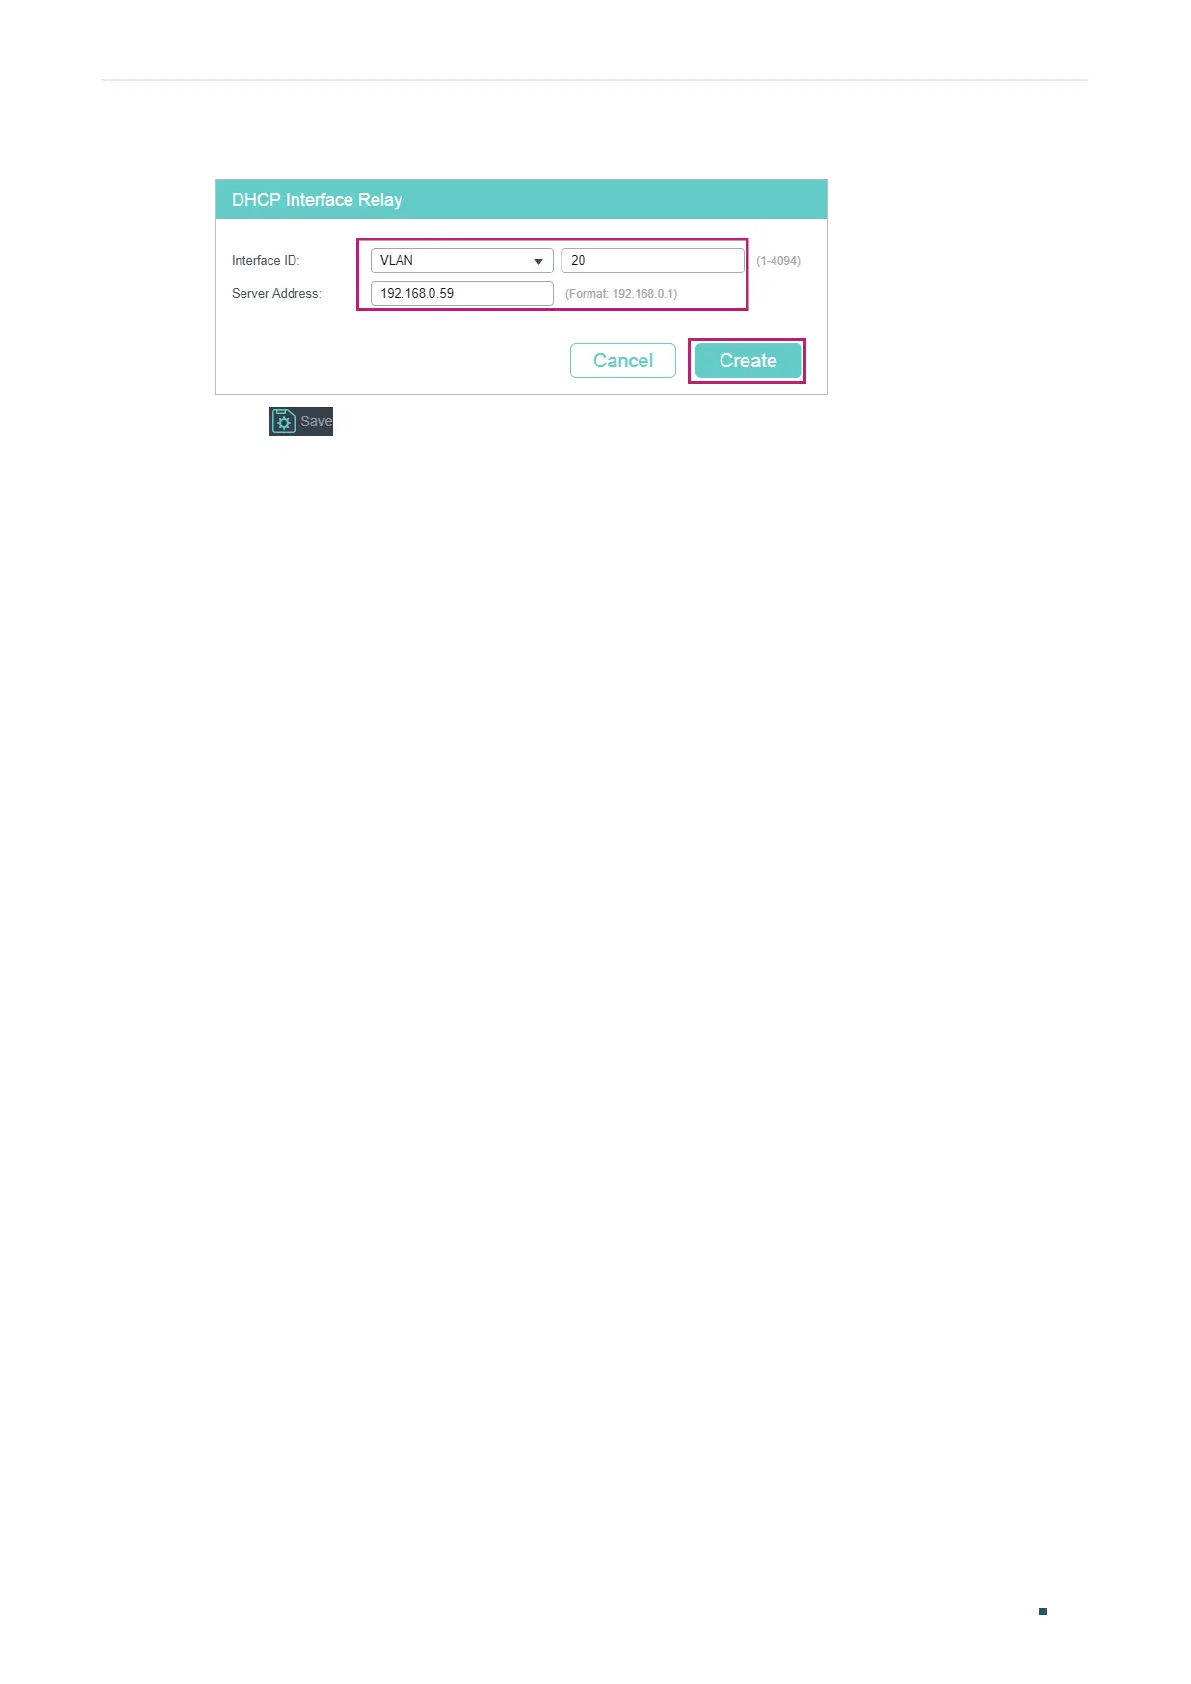
Figure 5-18 Specify DHCP Server for Interface VLAN 20
3) Click to save the settings.
5.2.4 Using the CLI
■ Configurting the DHCP Server
1) Enable DHCP service globally.
Switch#configure
Switch(config)#service dhcp server
2) Create DHCP pool 1 and configure its network address as 192.168.2.0, subnet mask
as 255.255.255.0, lease time as 120 minutes, default gateway as 192.168.2.1; Create
DHCP pool 2 and configure its network address as 192.168.3.0, subnet mask as
255.255.255.0, lease time as 120 minutes, default gateway as 192.168.3.1.
Switch(config)#ip dhcp server pool pool1
Switch(dhcp-config)#network 192.168.2.0 255.255.255.0
Switch(dhcp-config)#lease 120
Switch(dhcp-config)#default-gateway 192.168.2.1
Switch(dhcp-config)#exit
Switch(config)#ip dhcp server pool pool2
Switch(dhcp-config)#network 192.168.2.0 255.255.255.0
Switch(dhcp-config)#lease 120
Switch(dhcp-config)#default-gateway 192.168.3.1
Switch(dhcp-config)#exit
3) Create two static routing entries to make sure that the DHCP server can reach the
clients in the two VLANs.
Switch(config)# ip route 192.168.2.0 255.255.255.0 192.168.0.1
Switch(config)# ip route 192.168.3.0 255.255.255.0 192.168.0.1
Switch(config)#end
 Loading...