Configuring DHCP Service Configuration Examples
User Guide
587
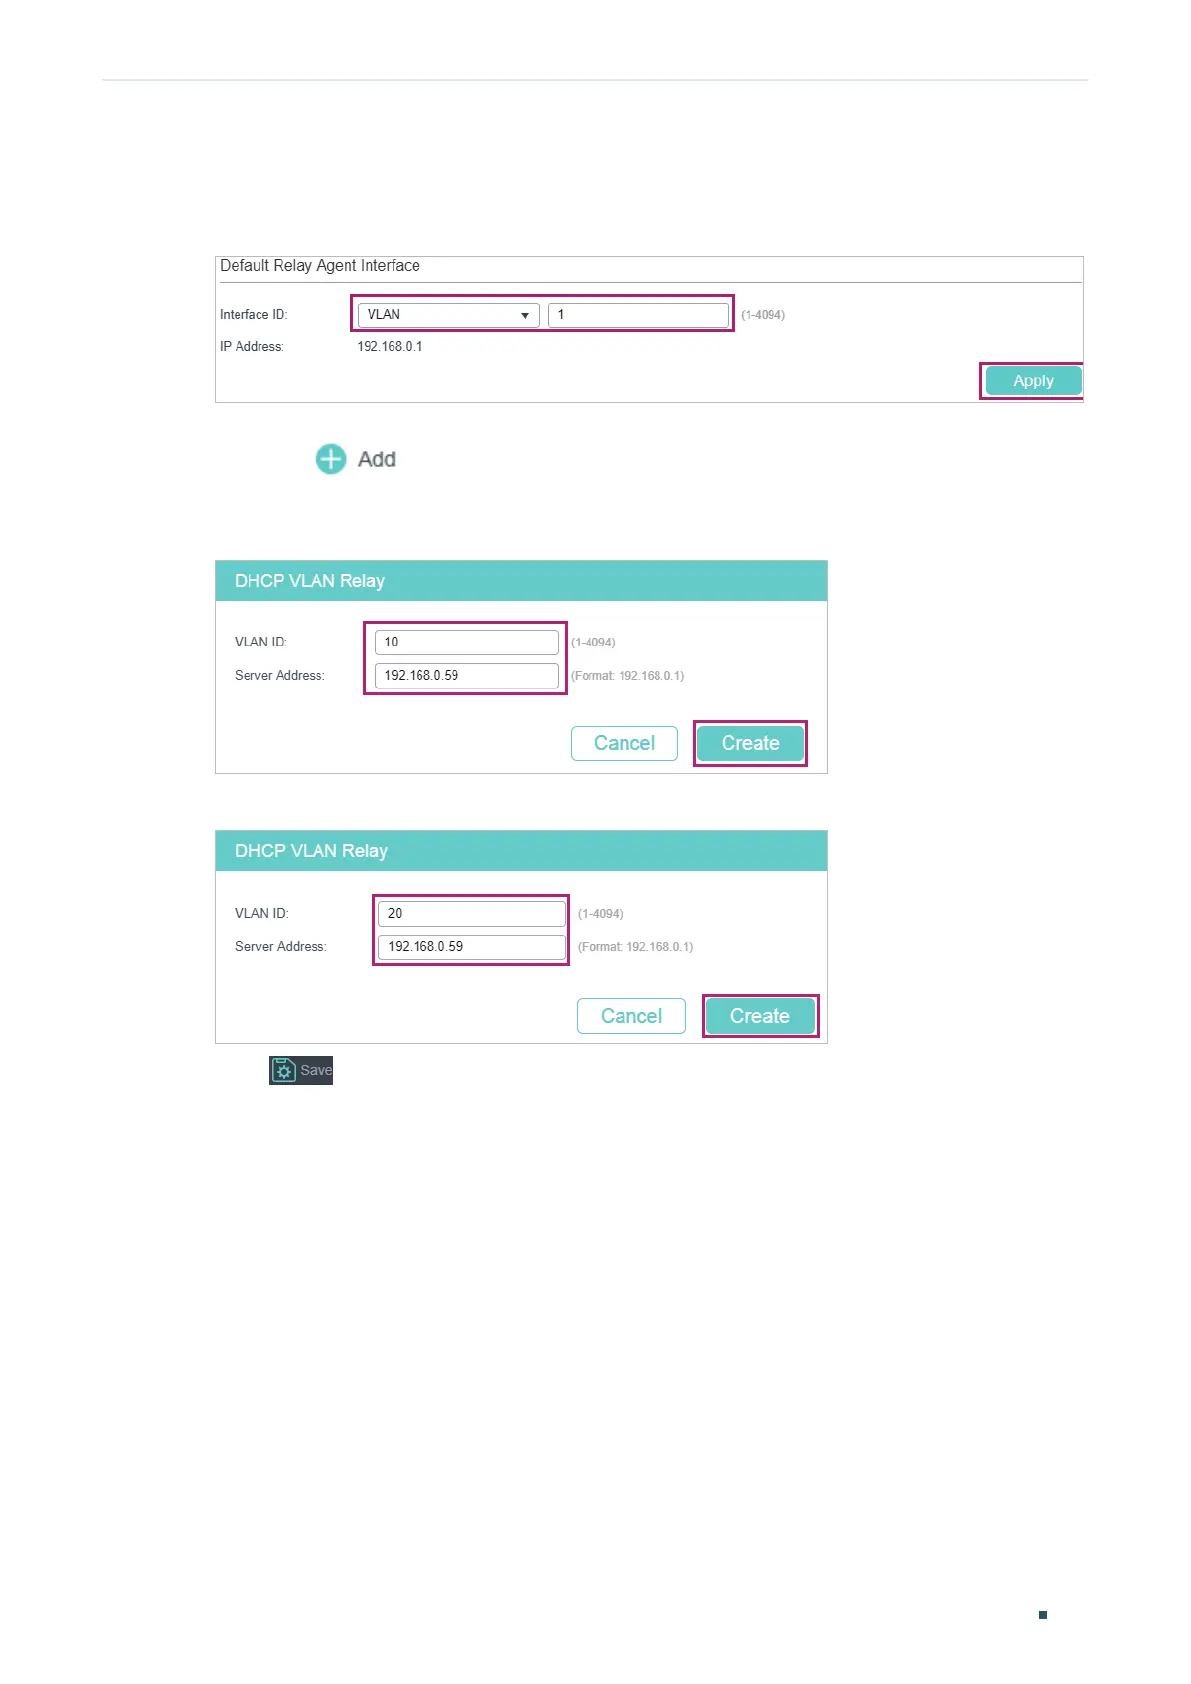
VLAN interface 1 (the default management VLAN interface) as the default relay-agent
interface. Click Apply.
Figure 5-25 Specify the Default Relay Agent Interface
3) Choose the menu L3 FEATURES > DHCP Service > DHCP Relay > DHCP VLAN Relay
and click
to load the following page. Specify the DHCP server address for the
clients in VLAN 10 and VLAN 20.
Figure 5-26 Specify DHCP Server for Interface VLAN 10
Figure 5-27 Specify DHCP Server for Interface VLAN 20
4) Click to save the settings.
5.3.4 Using the CLI
■ Configurting the DHCP Server
1) Enable DHCP service globally.
Switch#configure
Switch(config)#service dhcp server
2) Create a DHCP pool and name it as “pool” and configure its network address as
192.168.0.0, subnet mask as 255.255.255.0, lease time as 120 minutes, default gateway
as 192.168.0.1.
Switch(config)#ip dhcp server pool pool
Switch(dhcp-config)#network 192.168.0.0 255.255.255.0
 Loading...