Issue 3.0
3-72 Installing the SV9100 Chassis
3. Connect the ground wire to all chassis. Refer to 3.3.3 Install
Grounding on 19” Chassis on page 3-19 for complete details on
grounding the system.
4. Refer to 3.3.5 Install AC Power Cords on 19” Chassis on page 3-20 to
continue installation of the chassis or, Chapter 6 paragraph 2.1
Installation and Safety Precautions on page 4-4 for installation of
blades.
SECTION 6 STAND MOUNTING THE CHASSIS
6.1 Stand Mounting the 19” (CHS2UG-US) Chassis
A single or multiple chassis can be stand mounted. Controlling and Expansion
chassis can be stand mounted using the CHS2UG STAND KIT (K) and CHS2UG
STAND KIT (EXT).
6.1.1 CHS2UG-US Chassis Installation
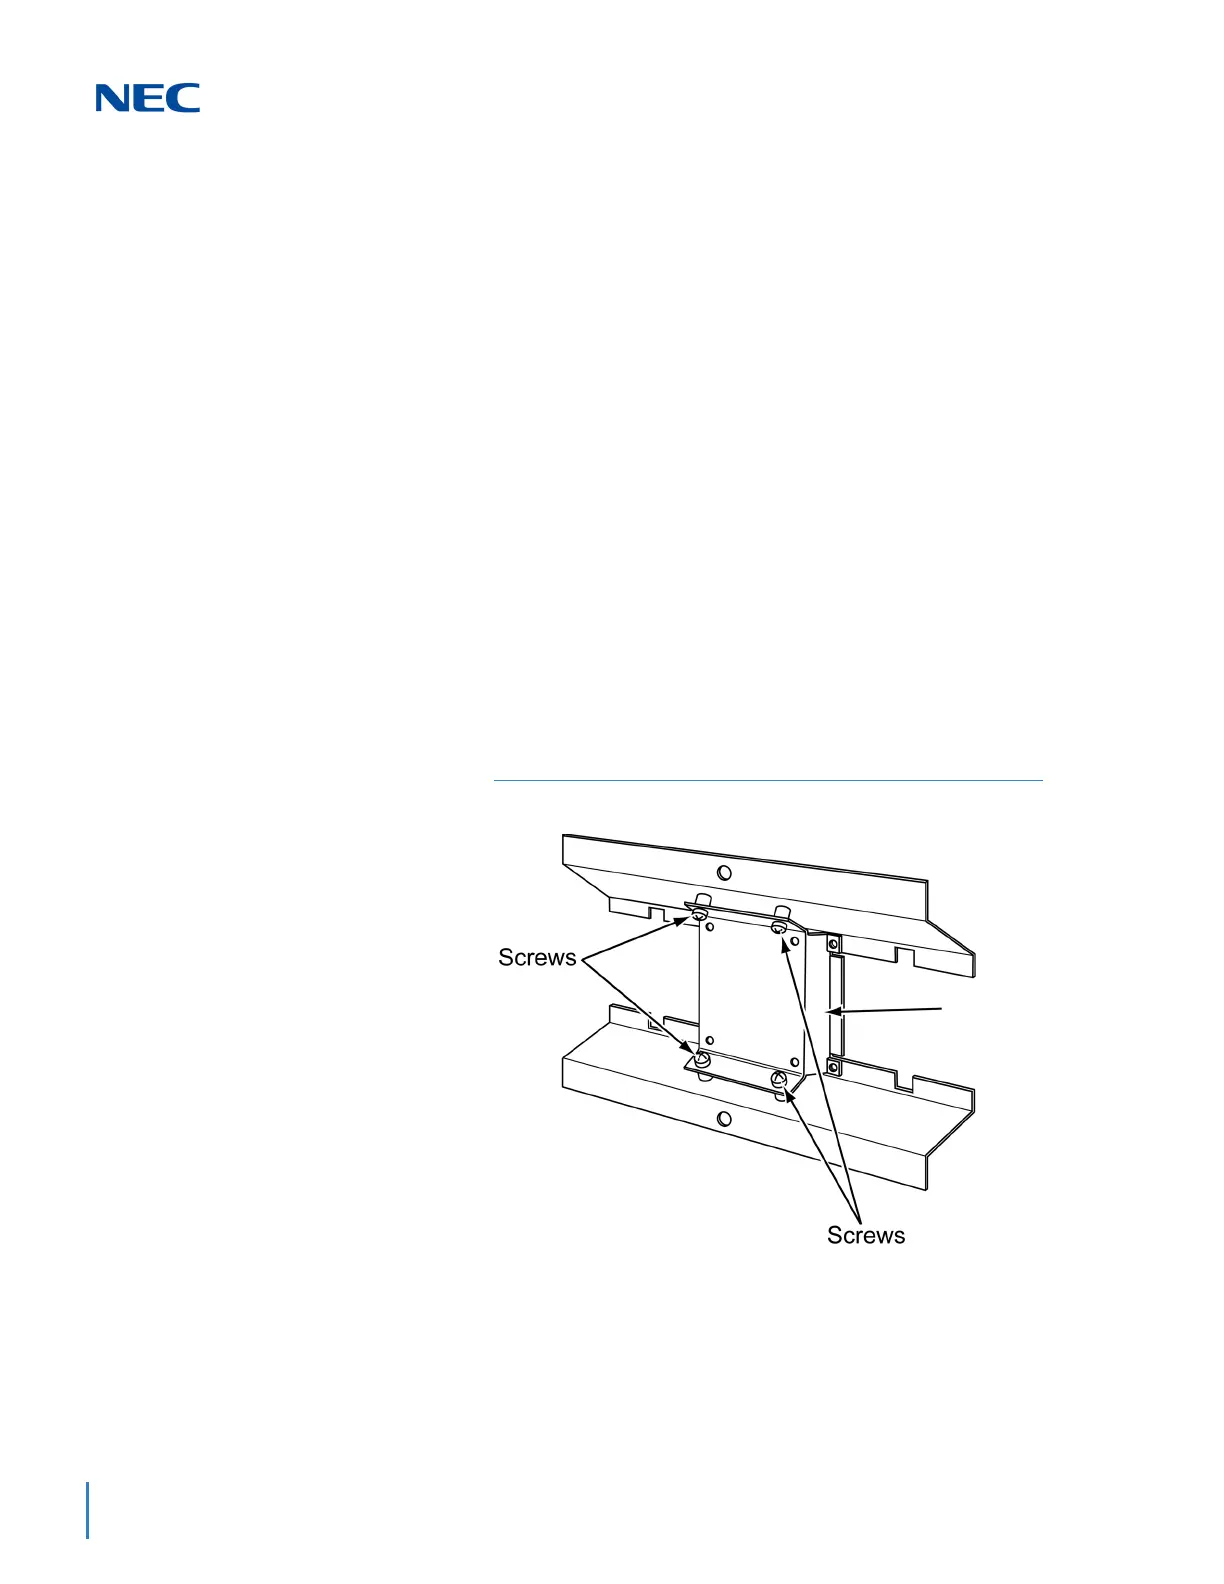
1. Using the supplied screws, assemble the CHS2UG STAND KIT (K)
and CHS2UG STAND KIT (EXT) (refer to Figure 3-89 Assemble
Stand Mount with Screws).
2. Secure the CHS2UG-US chassis to the assembled CHS2UG STAND
KIT (K), see Figure 3-90 Secure CHS2UG-US Chassis to CHS2UG
STAND KIT (K) with Screws on page 3-73.
Figure 3-89 Assemble Stand Mount with Screws

 Loading...


