Issue 3.0
9-130 Installing SV9100 Optional Equipment
13.4.1 APR-L UNIT Switch Settings
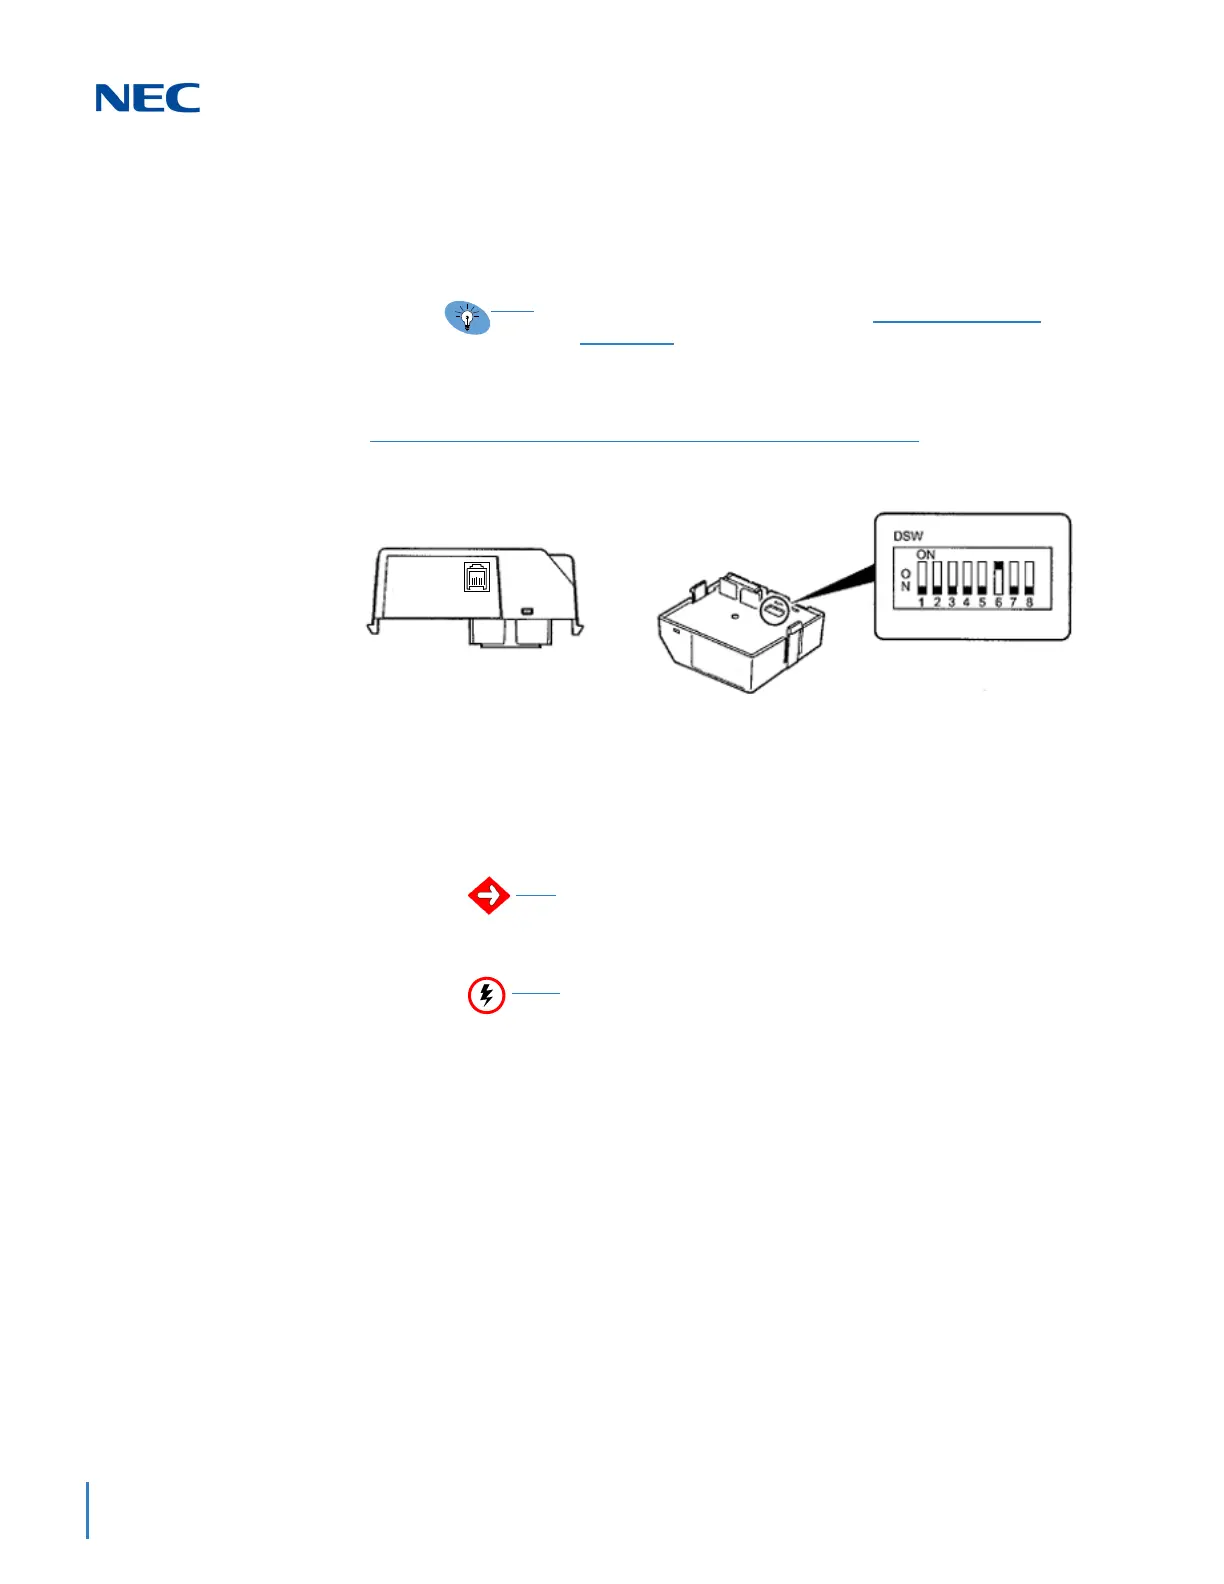
Figure 9-112 APR-L UNIT shows the location of the switches. The DIP
switches (DSW) allow a technician to configure the unit for specific settings.
Set the DIP switches on the APR adapter to the required position.
13.4.2 Installing the APR-L UNIT
Perform the following to connect the APR-L UNIT to the Bottom Option
Interface located underneath the DTL multiline terminal.
1. Unplug the line cord from the multiline terminal.
2. Turn the DTL multiline terminal upside down.
3. Lower the tilt leg to the first position (refer to Figure 9-113 Separate
Tilt Leg from Leg Support on page 9-131).
Due to the location of the switches, set switches prior to
installation of ADA-L UNIT on DTL/ITL multiline terminal.
Figure 9-112 APR-L UNIT
Only ONE APR-L UNIT can be installed.
To prevent possible damage to the APR-L UNIT or the DTL
multiline terminal during installation or removal, disconnect
the line cord/LAN cable and the AC/DC adapter from the
DTL multiline terminal.

 Loading...


