16. Status Display
355
As an example, the switching procedure for setting the picture scan line number to 42
when 3G-B-DL (1920×1080/59.94P) is applied is shown below.
1. Data dump is displayed.
2. Set F•4 DISPLAY to PICTURE.
3. Use the V POS knob to set PIC LINE No. to 42.
4. Set F•4 DISPLAY to STREAM1.
The line number display changes to I/F LINE No.21.
This indicates that the line number in which the picture scan line number 42 is stored for
transmission is 21.
The relationship of other 3G-B-DL line numbers is shown below.
Table 16-6 3G-B-DL line number relationship
Picture scan line number (PIC LINE No.)
Line number during transmission (I/F LINE No.)
16.5.2 Moving the Display Position
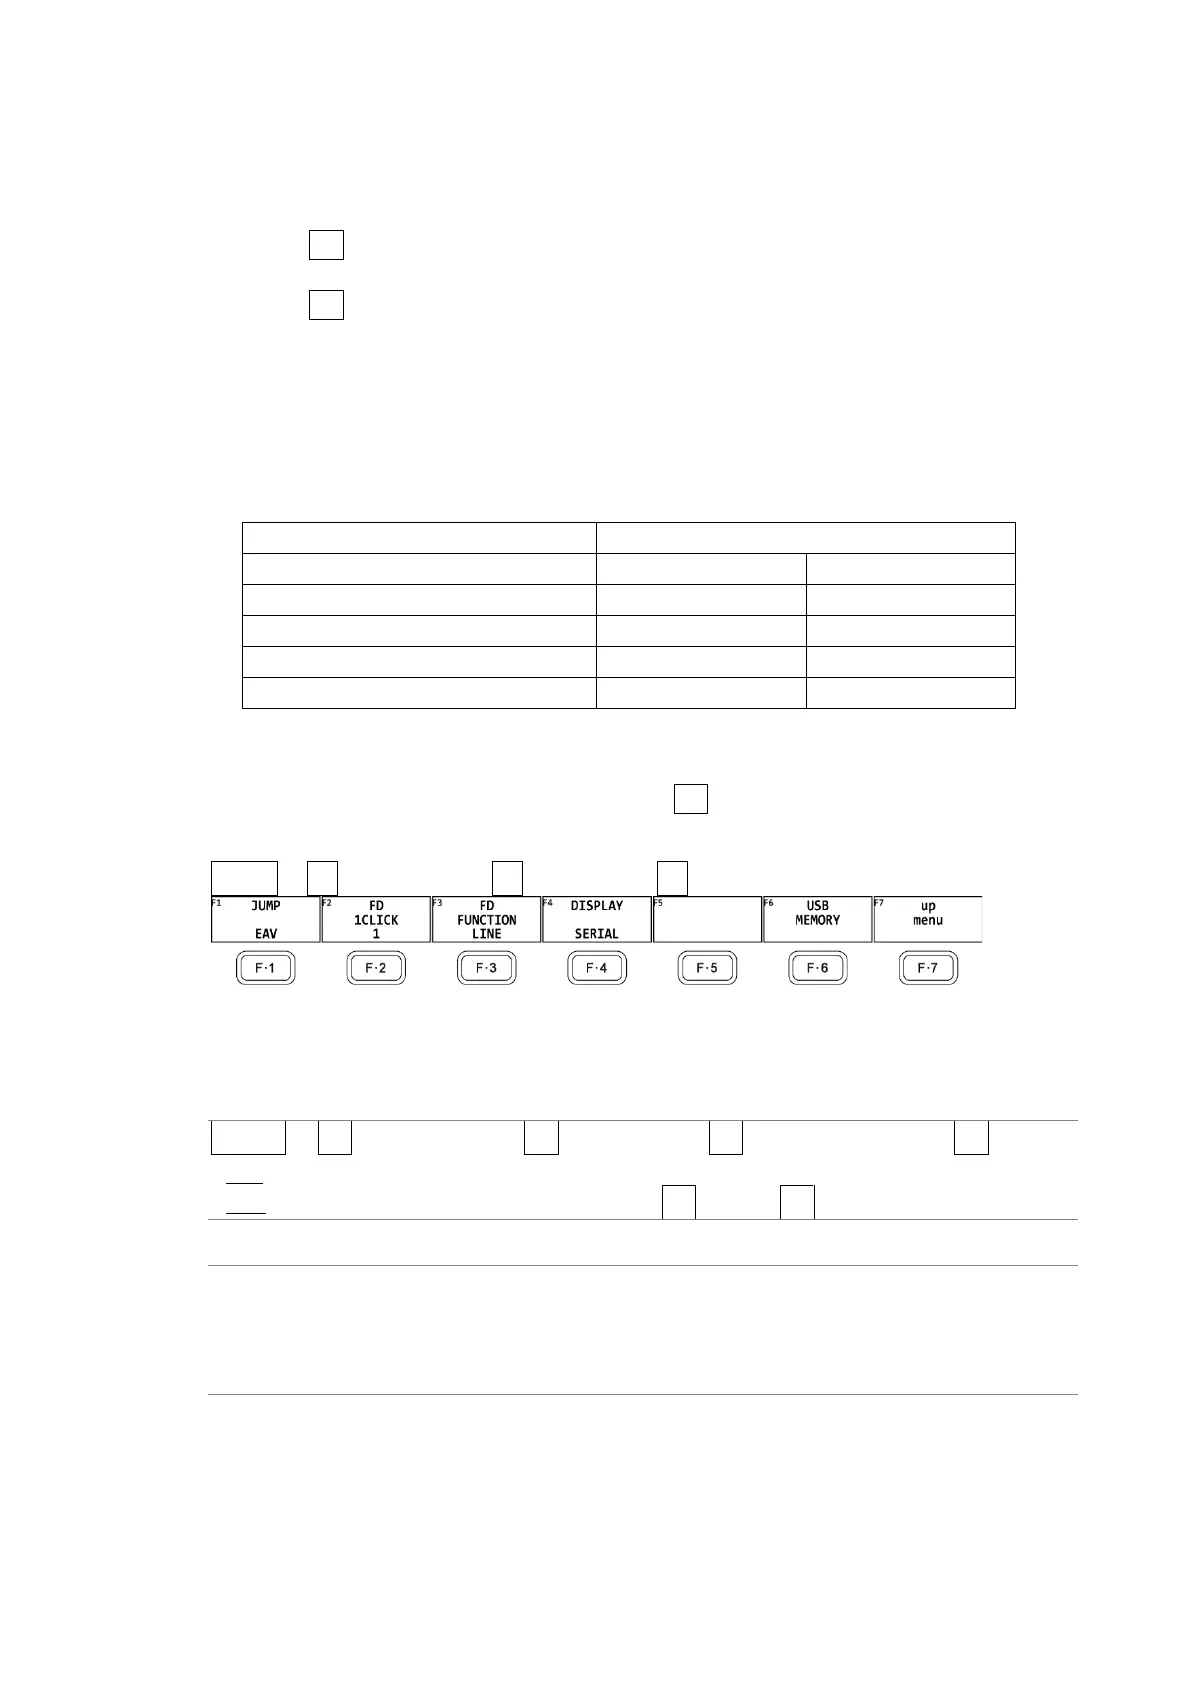
To configure data dump operation settings, press F•1 DUMP OPERATION on the DATA DUMP
menu.
STATUS → F•2 SDI ANALYSIS → F•1 DATA DUMP → F•2 DUMP OPERATION →
Figure 16-10 DUMP OPERATION menu
To move the data dump sample number to a specific location, follow the procedure below.
Procedure
STATUS → F•2 SDI ANALYSIS → F•1 DATA DUMP → F•2 DUMP OPERATION → F•1 JUMP
: EAV / SAV
: END / START (when the input signal is 4K and F•5 LINK or F•5 SUB is set to PICTURE)
Settings
EAV: The display starts with the EAV sample number.
SAV: The display starts with the SAV sample number.
END: The last sample number is displayed.
START: The display starts with sample number 0.