19. Network Control
465
Table 19-4 MEASUREMENT WITH DISPLAY description
Switches the display mode.
This is the measurement screen.
You cannot click this area. Set the tab menu using the F•D button.
Click to control the menu.
Double-click slowly to change to the next item.
Use the F•D button to change values.
This button corresponds to holding down the MULTI key (layout
selection).
This button corresponds to holding down the PRESET key (preset
registration).
“>” and “<” correspond to turning the knob to the right and left
respectively. The number of “<” or “>” corresponds to the amount of
change.
The V•POS, H•POS, and F•D buttons correspond to the behavior
performed when the corresponding button is pressed.
Click this button after selecting the file format (BMP or JPG) to display
a measurement screen in a separate window.
Right-click the screen and click “Save picture as” to save the image in
the specified file format. If this method does not work, use
“DOWNLOAD” in the upper left of the screen to save it.
Hides the menu.
To show it again, click the function menu area.
Set the screen’s auto update interval to FAST, NORMAL, or SLOW.
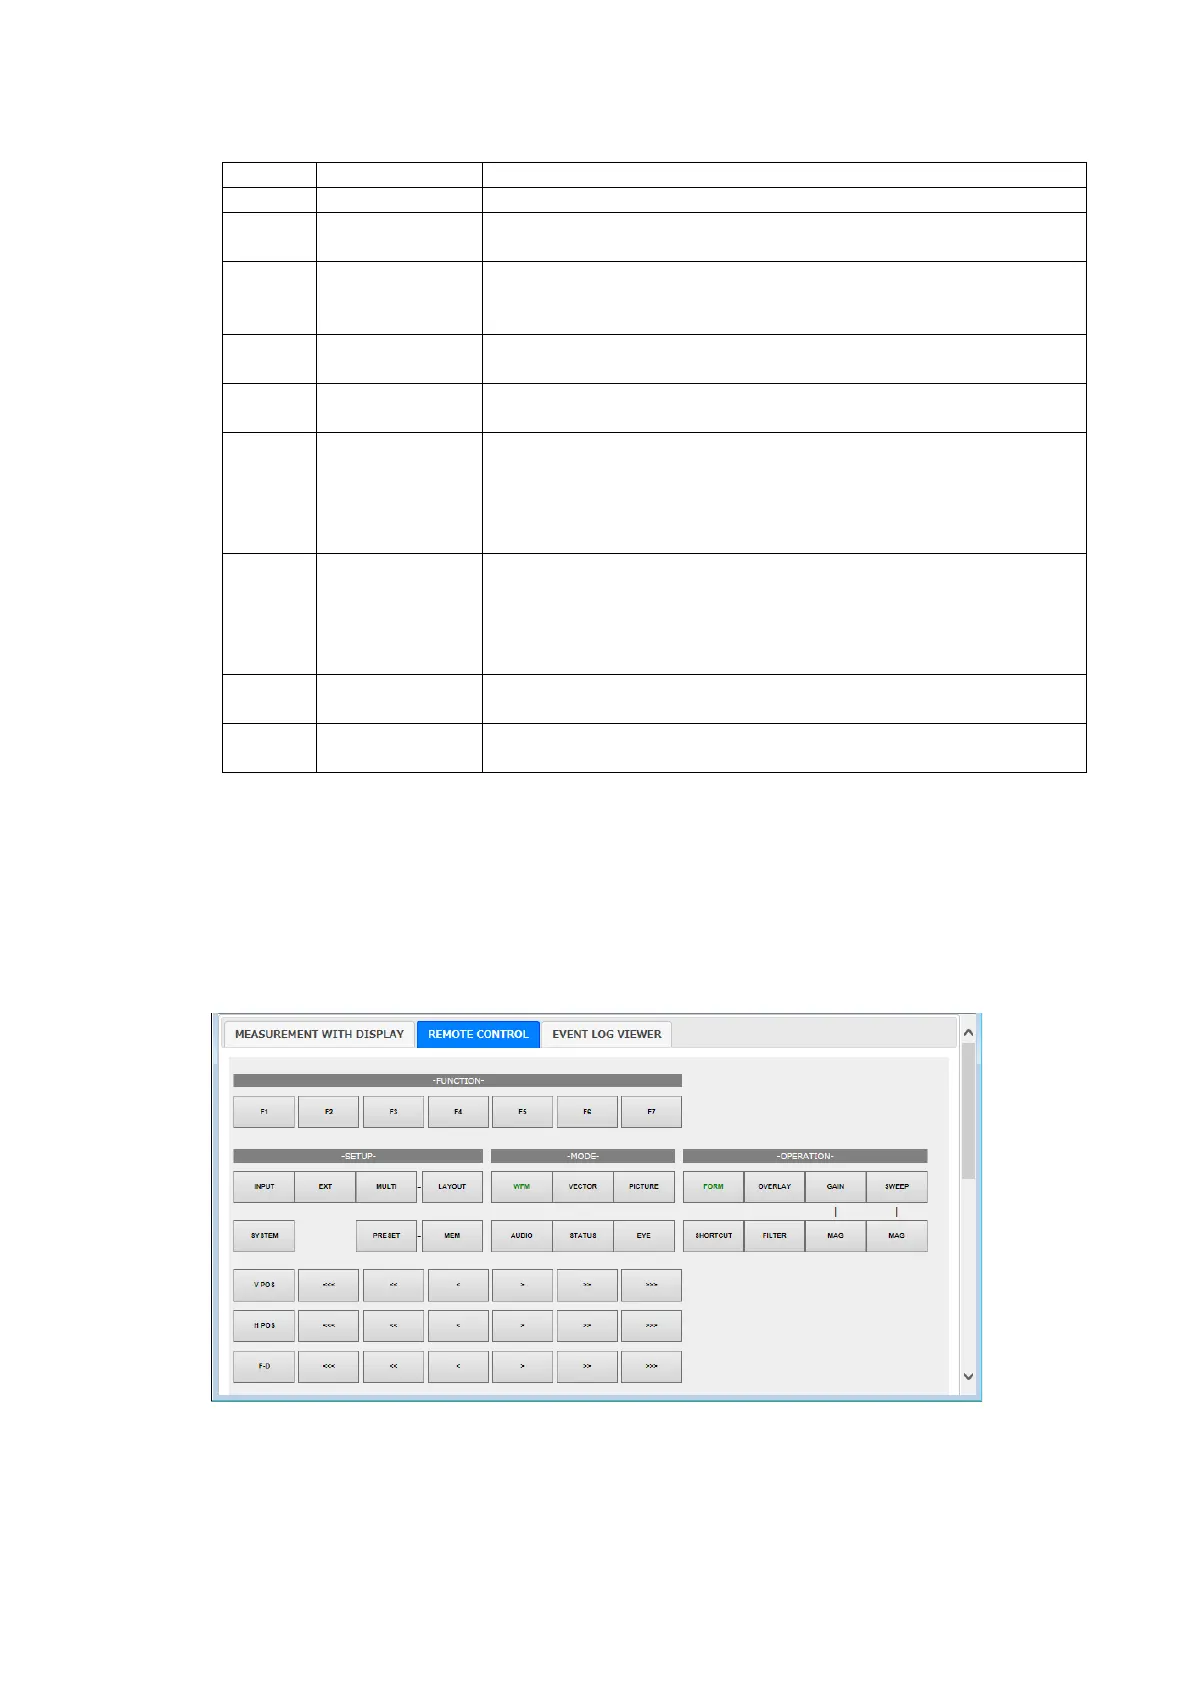
19.4.5 REMOTE CONTROL
On the REMOTE CONTROL tab, the instrument is controlled by clicking the control buttons.
As this mode does not display a measurement screen, select this mode when you want to
control the instrument while looking at its screen.
The descriptions of the control buttons are the same as in section 19.4.4, “MEASUREMENT
WITH DISPLAY.”
Figure 19-8 REMOTE CONTROL