13. Picture Screen
279
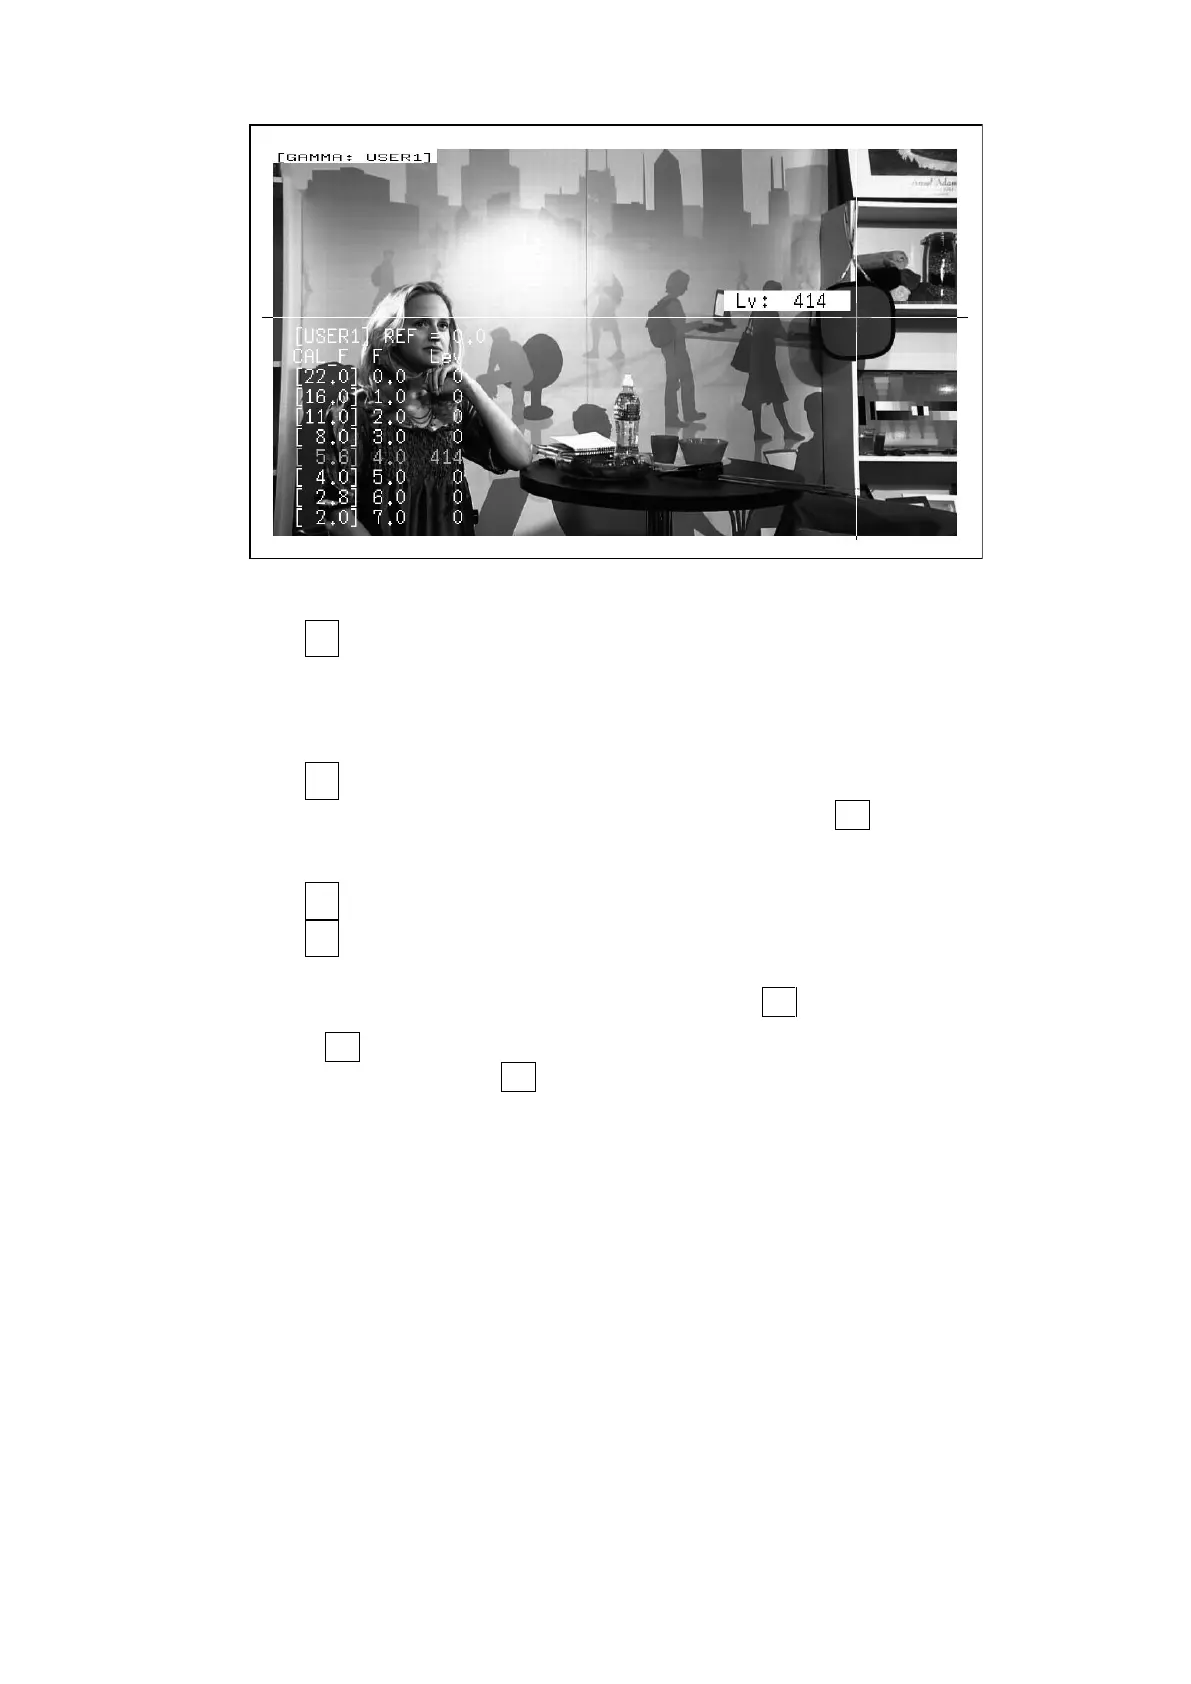
Figure 13-25 User-defined correction table creation screen
7. Press F•1 TABLE CLEAR.
All the values in the user-defined correction table that is currently being edited are
initialized. Be sure to initialize the values first when you create a new user-defined
correction table.
8. Press F•1 CLEAR YES.
To cancel the initialization of the user-defined correction table, F•3 CLEAR NO.
9. Place the cursors over the 18 % gray chart.
10. Press F•5 CAL F, and select 5.6.
11. Press F•4 CAL SET.
The luminance level when the camera f Stop value is F5.6 is input into Lev in the user-
defined correction table. To delete a line of data, press F•3 1 DATA CLEAR.
12. Change F•5 CAL F and the camera f Stop value together in the following order: 4.0, 2.8,
2.0, 8.0, 11.0, 16.0, 22.0. F•4 CAL SET each time you change the value to input the
luminance level for each value.
Do not change the lighting or the position of the 18 % gray chart.
Also, make sure that the Lev value for f Stop values 22.0 to 2.0 increases linearly.