d-Color MF4003/MF3303
F DISASSEMBLY/REASSEMBLY > 4. d-Color MF4003/MF3303
F-13
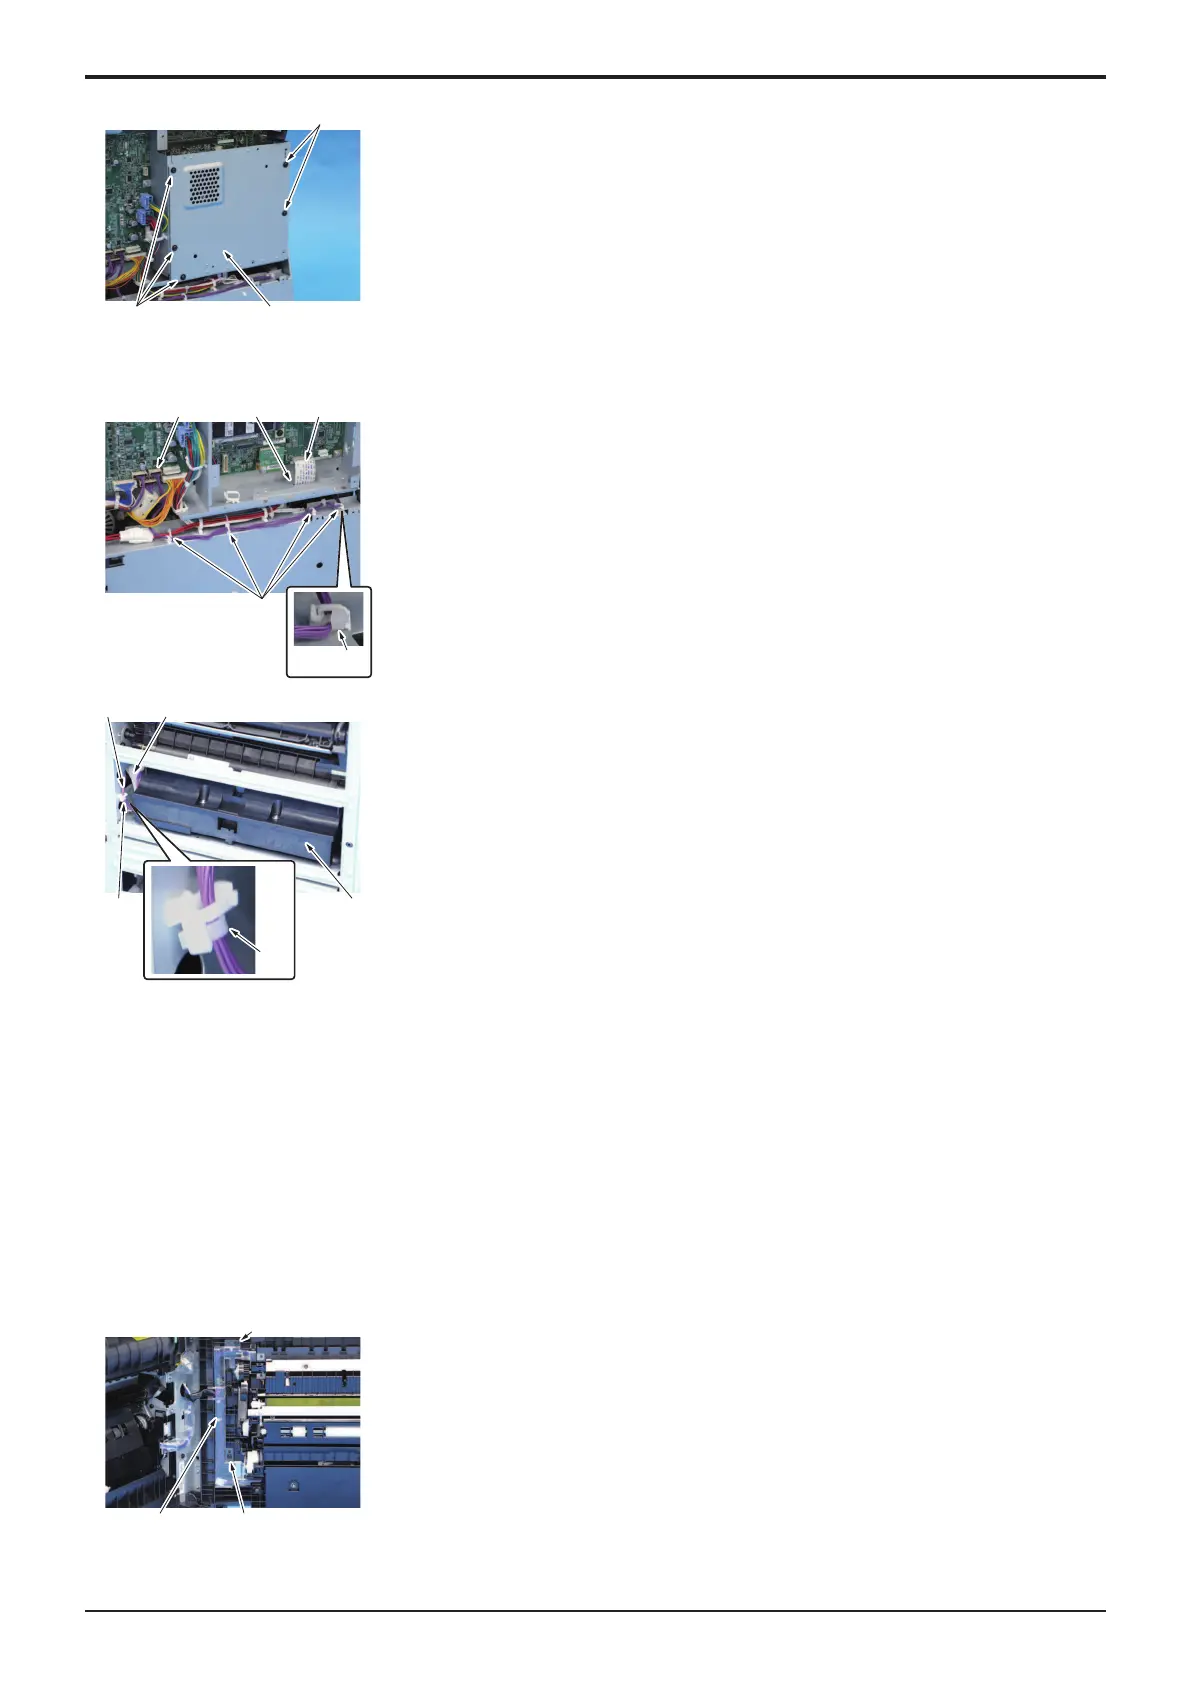
9. Remove five screws [1], and remove the plate [2].
10. Remove the fax kit.
F.5.1 Fax Kit
11. Disconnect the flat cable [1], and pass it through the hole [2].
12. Disconnect the connector [3], and remove the harness from four wire saddles
[4].
NOTE
▪ When routing the harness through the wire saddle, make sure that
the cable tie [5] is located in the position (in front of the wire saddle)
shown in the illustration.
13. Remove the harness from the wire saddle [1].
14. Slide out the harness [2] and the flat cable [3] to remove the PH unit [4].
NOTE
▪ When routing the harness through the wire saddle, make sure that
the cable tie [5] is located in the position (under the wire saddle)
shown in the illustration.
15. To reinstall, reverse the order of removal.
16. Turn ON the main power switch.
17. Select [Service Mode] -> [Machine] -> [Color Registration Adjustment] to adjust the value for correcting the color shift to 0.
18. Select [Service Mode] -> [Imaging Process Adjustment] -> [Stabilizer] -> [Initialize + Image Stabilization] and perform the function.
19. Select [Service Mode] -> [Machine] -> [Main Scanning Direction Zoom] to adjust the zoom in main scanning direction.
20. Select [Service Mode] -> [Imaging Process Adjustment] -> [Stabilizer] -> [Stabilization Only] and perform the function.
21. Repeat the step 18 and 19 until the Main Scanning Direction Zoom Adjustment is met.
22. Select [Service Mode] -> [Machine] -> [Color Registration Adjustment] and perform the adjustment for correcting the color shift.
23. Select [Service Mode] -> [Machine] -> [Printer Area] -> [Printer Image Centering Side 1] to adjust the side of print position for each paper
source.
24. Select [Service Mode] -> [Machine] -> [Printer Area] -> [Prt. Image Center. Side 2 (Dup)] to adjust the side of 2-sided print position for each
paper source.
4.2.32nd transfer pressure unit
1. Open the right door.
2. Remove two screws [1], and remove the cover [2].

 Loading...