d-Color MF4003/MF3303
F DISASSEMBLY/REASSEMBLY > 4. d-Color MF4003/MF3303
F-36
F.4.1.3 Rear cover
2. Remove the DC power supply.
F.4.3.4 DC power supply (DCPS)
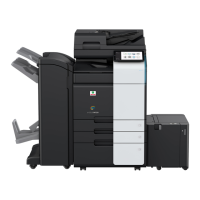
3. Disconnect the connector [1].
4. Remove four screws [2] and remove the main motor [3].
NOTE
▪ When installing the motor, try to insert it straight, and take care not
to damage the gears.
▪ When removing or installing the motor, do not hold the rotor but hold
the plate of the motor or the board.
▪ When installing the motor, use care not to mistake in the kind of the
mounting screws (M3x5 mm).
5. To reinstall, reverse the order of removal.
4.4.2Color motor (M2)
1. Remove the toner filter assy.
E.3.1.8 Replacing the toner filter
2. Remove the rear cover.
F.4.1.3 Rear cover
3. Remove the left cover.
F.4.1.2 Left cover
4. Remove the PWB box.
F.4.2.7 PWB box
5. Remove the DC power supply.
F.4.3.4 DC power supply (DCPS)
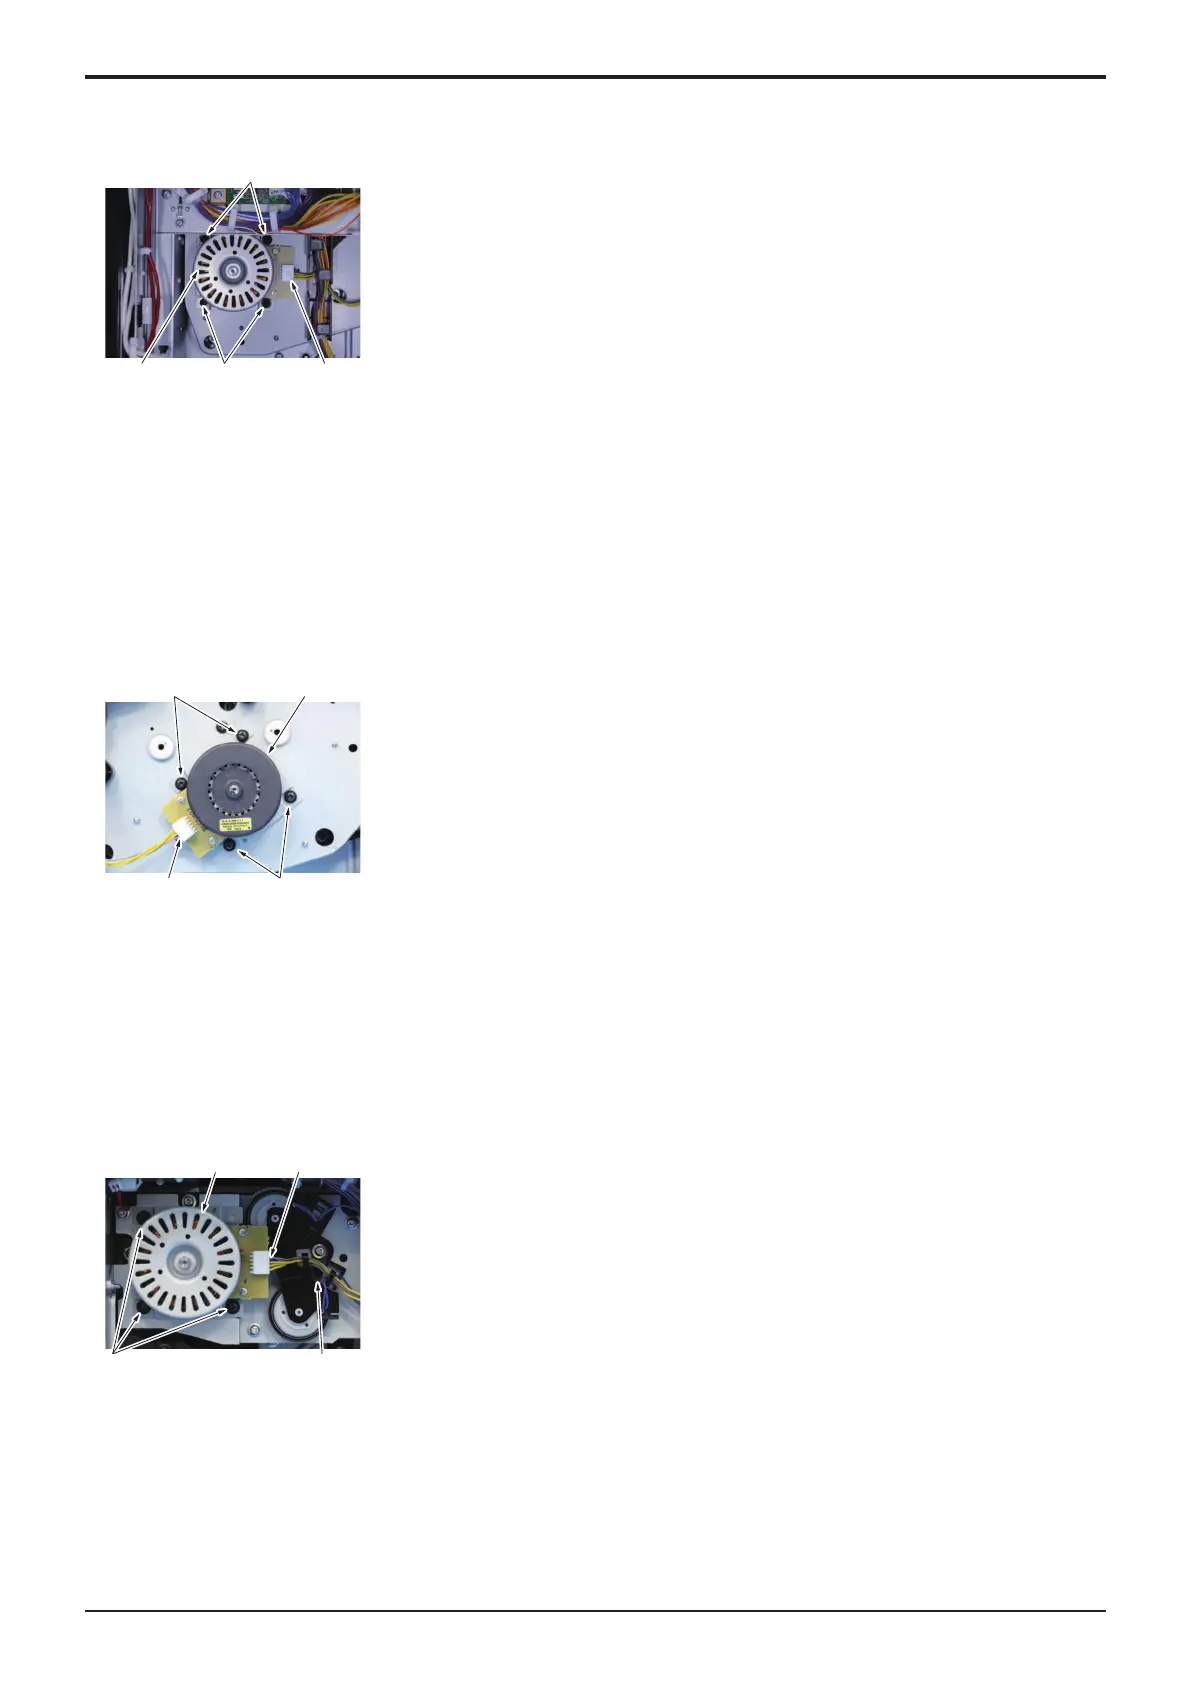
6. Disconnect the connector [1].
7. Remove four screws [2], and remove the color motor [3].
NOTE
▪ When installing the motor, try to insert it straight, and take care not
to damage the gears.
▪ When removing or installing the motor, do not hold the rotor but hold
the plate of the motor or the board.
▪ When installing the motor, use care not to mistake in the kind of the
mounting screws (M3x5 mm).
8. To reinstall, reverse the order of removal.
4.4.3Fusing motor (M3)
1. Remove the toner filter assy.
E.3.1.8 Replacing the toner filter
2. Remove the rear cover.
F.4.1.3 Rear cover
3. Remove the left cover.
F.4.1.2 Left cover
4. Remove the PWB box.
F.4.2.7 PWB box
5. Remove the harness from the harness guide [1].
6. Disconnect the connector [2].
7. Remove three screws [3] and remove the fusing motor [4].
NOTE
▪ When installing the motor, try to insert it straight, and take care not
to damage the gears.
▪ When removing or installing the motor, do not hold the rotor but hold
the plate of the motor or the board.
▪ When installing the motor, use care not to mistake in the kind of the
mounting screws (M3x5 mm).
8. To reinstall, reverse the order of removal.
4.4.4Toner supply motor/YM (M4), Toner supply motor/CK (M5)
1. Remove the waste toner bottle.
E.3.1.9 Replacing the waster toner bottle
2. Remove the toner cartridge.
E.3.1.6 Replacing the toner cartridge
3. Remove the imaging unit.
E.3.1.7 Replacing the imaging unit

 Loading...