d-Color MF4003/MF3303
I SERVICE MODE > 7. Imaging Process Adjustment
I-15
7. Imaging Process Adjustment
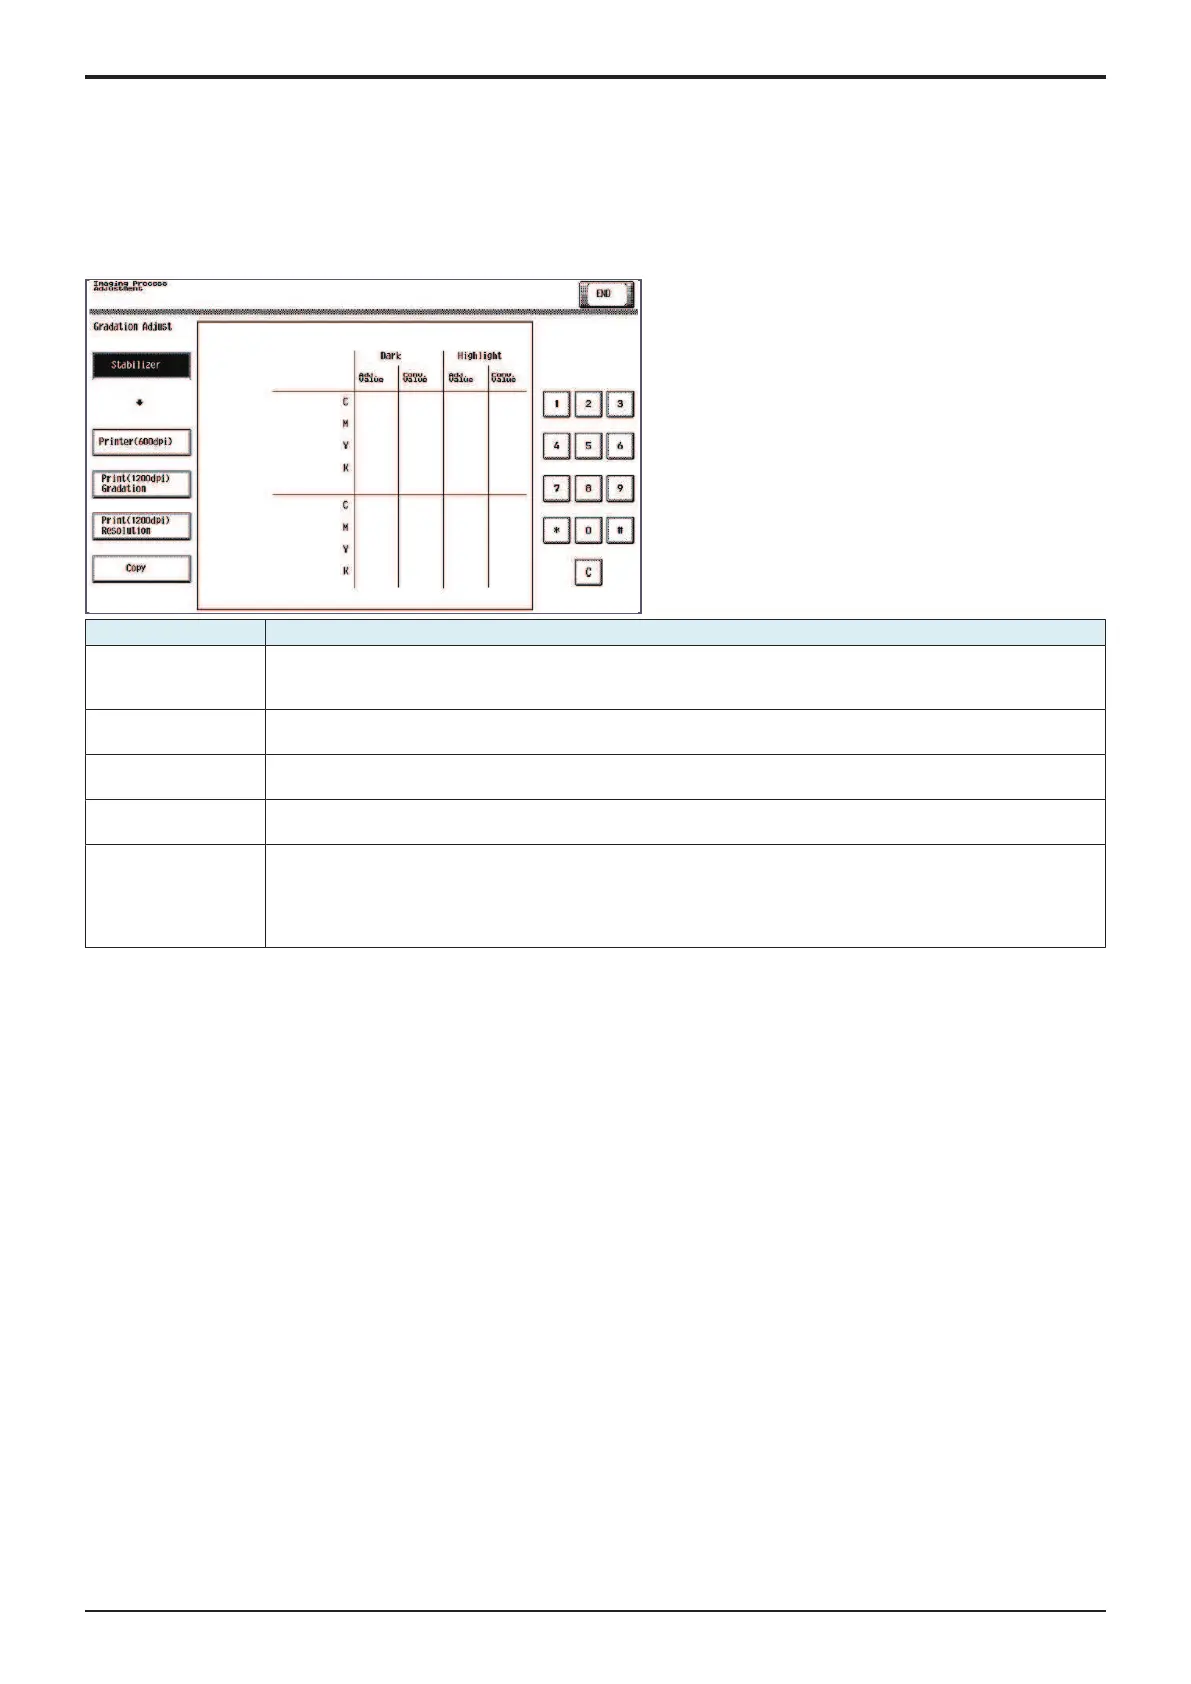
7.1Gradation Adjust
• To make an automatic adjustment of gradation based on the test pattern produced and the readings taken by the scanner.
• Color reproduction performance becomes poor.
• The drum unit, developing unit, or transfer belt unit has been replaced.
• The Adj. Values of “Dark” and “Highlight” shown on the gradation adjust screen represent how much corrections are made to produce an
ideal image output. Conv. Value shows the difference from the ideal image density.
• The closer the Conv. Value to 0, the more ideal the image.
Mode key Function
Stabilizer The image stabilization is performed. The controller reflects the image stabilization result in the gradation adjustment
table to update the table.
After the image stabilization is performed, [Printer] / [Copy] key will become selectable.
Printer(600dpi) Detect the gradation reproducibility of the gradation reproduction method (gradation screen, resolution screen) for
600 dpi print mode, and correct the gradation adjustment table.
Print(1200dpi)
Gradation
Detect the gradation reproducibility of the gradation reproduction method (gradation screen) for 1200 dpi print mode,
and correct the gradation adjustment table.
Print(1200dpi)
Resolution
Detect the gradation reproducibility of the gradation reproduction method (resolution screen) for 1200 dpi print mode,
and correct the gradation adjustment table.
Copy Detect the gradation reproducibility of the following gradation reproduction methods, and correct the gradation
adjustment table.
• Compression screen (reduce the data volume by 1bit from 8bit while maintaining above a certain quality of
characters/images)
• FFET (reproduce the character edges smoothly without using the screen)
<Procedure>
NOTE
▪ When executing the gradation adjustment, make sure to use the white paper for color copy.
1. Touch [Stabilizer] and the Start key to perform image stabilization.
NOTE
▪ Before executing Gradation adjust, be sure to perform Stabilizer.
2. Select a gradation adjustment item.
3. Press the Start key to let the machine produce a test pattern.
NOTE
▪ When the image stabilization performed in step 3 is NG, the Start key stops functioning.
▪ When one of the alert codes, P-5, P-6, P-7, P-8, P-9, and P-28 is on the screen and [Printer] is selected, the Start key stops
functioning.
4. Place the test pattern produced on the original glass.
NOTE
▪ Set the test pattern according to the instructions displayed on the control panel.
5. Place ten blank sheets of paper on the test pattern and lower the original cover.
6. Press the Start key. (The machine will then start scanning the test pattern.)
7. Touch [OK] and repeat steps from 4 through 8 twice. (a total of three times)
8. Touch [Gradation Adjust] to display the Adj. Values and Conv. Values of each color (C, M, Y and K) for Dark and Highlight.
9. Use the following procedures to check the Conv. Value.
• Dark: 0 ± 100 and Highlight: 0 ± 60: It completes the adjustment procedure.
• If neither Dark nor Highlight falls outside the ranges specified above: Perform steps from 4 to 8.
• If the convergence falls within the specified range after the second Gradation Adjustment, further adjustment may not be necessary.
NOTE
▪ If a fault is detected, “0” is displayed for all values. In that case, after turning off the main power switch, turn it on again more
than 10 seconds after and then make the gradation adjustment again.
▪ If either dark or highlight still remains outside the specified ranges perform [Service Mode] -> [Imaging Process Adjustment] ->
[Max Image Density Adj].
▪ If a total of four sequences of gradation adjust do not bring the values into the specified range, check the image.
▪ If the image is faulty, perform the troubleshooting procedures for image problems.

 Loading...