d-Color MF4003/MF3303
L TROUBLESHOOTING > 16. IMAGE QUALITY PROBLEM
L-133
Step Section Check item Result Action
7 Fusing unit Dirt or foreign matter on paper path or separation claw of
the fusing unit.
YES Clean. (Disassembling the fusing
unit is prohibited.)
8 Fusing unit Scratches on roller, pad, and belt in fusing unit. YES Replace the fusing unit.
NO • Replace the high voltage unit.
• Replace the base board.
Scanner troubleshooting procedure
Step Section Check item Result Action
1 Original Original is damaged or dirty. YES Change the original.
2 Original Type Select [Copy] -> [Original Type] and change the setting,
and the image trouble is eliminated.
YES Correct the setting.
3 When original glass is
being used: Service Mode
-> Scan Area
Select [Service Mode] -> [Machine] -> [Scan Area] ->
[Image Position: Leading Edge] and make the necessary
adjustment, and the image trouble is eliminated.
NO Go to the next step.
4 When original glass is
being used
Original glass or original pad is dirty. YES Clean.
NO Replace the CIS module.
5 When DF is being used:
1st side
Original reading glass is dirty. YES Clean.
NO Replace the CIS module.
6 When DF is being used:
2nd side
CIS glass is dirty. YES Clean.
NO Replace the DF CIS module assy.
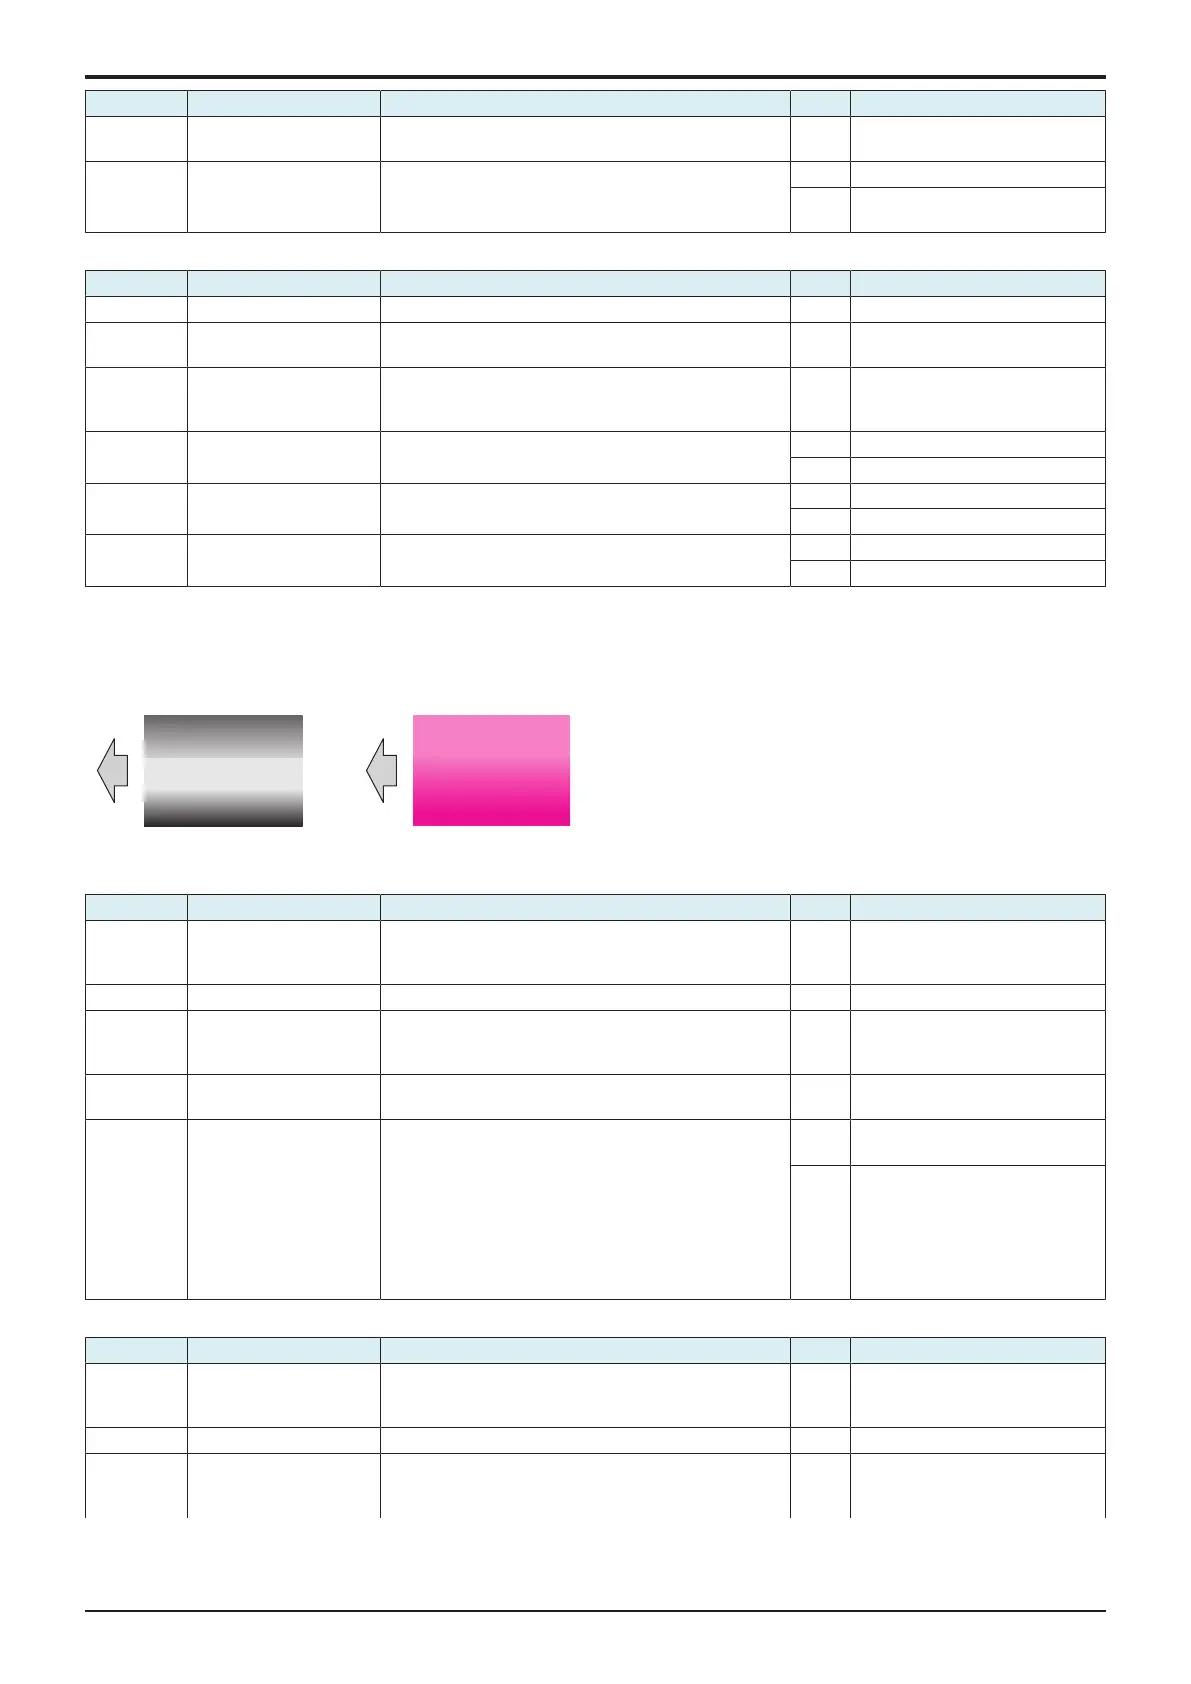
16.3.4Uneven density 1
Typical faulty images
The arrow in the exemplary image troubles indicates the paper feeding direction.
Initial troubleshooting procedure
Step Section Check item Result Action
1 Paper Setting The paper to be used for printing does not match the
paper type and size of paper setting selected on the
machine.
YES Make the paper setting again on
the machine.
2 IDC sensor IDC sensor is dirty. YES Clean.
3 Service Mode ->
Stabilizer
Select [Service Mode] -> [Imaging Process Adjustment] -
> [Stabilizer] -> [Stabilization Only] and the image
trouble is eliminated.
NO Go to the next step.
4 Service Mode ->
Gradation Adjust
Select [Service Mode] -> [Imaging Process Adjustment] -
> [Gradation Adjust] and the image trouble is eliminated.
NO Go to the next step.
5 Image check • Select [Service Mode] -> [Test Mode] -> [Halftone
Pattern].
Select "SINGLE", "HYPER", "Error diffusion", "1-
Sided", "CMYK", and "Full Bleed", enter "64" for
Density, and load tray 2 with A4 paper. Press the
start key. This runs a print cycle for C, M, Y, and K
in that order.
• Check the image after printing and the abnormal
image occurs only with one color.
YES Go to the 1-color troubleshooting
procedure.
NO Go to the 4-color troubleshooting
procedure.
1-color troubleshooting procedure
Step Section Check item for the faulty color Result Action for the faulty color
1 Service Mode -> TCR
Level Setting
Select [Service Mode] -> [Imaging Process Adjustment] -
> [TCR Level Setting] and make the necessary
adjustment, and the image trouble is eliminated.
NO Go to the next step.
2 Write section Dirt or foreign matter on the dust-proof glass of the PH. YES Clean the PH window.
3 Charging section Foreign matter on charging roller. YES Lightly wipe the surface clean of
foreign matter using hydro-wipe
(65AA-99##).

 Loading...