09/03
2-191
DC 3535/2240/1632, WC M24
9-383, 9-390
Status Indicator RAPs
Initial issue
9-383 ATC Sensor (K)
The ATC Sensor (K) detects an insufficient amount of developer material
Initial Actions
• Go to the 9-413 RAP and verify the correct operation of the Black Dispense Motor and the
Developer Clutch (K).
• Check that Toner/Developer is present.
• Check the ATC Sensor (K) for contamination. Ensure that the sensor is seated correctly.
Procedure
NOTE: To clear this fault, enter dC131 and set the value of NVM location 752-112 to 0.
Record the value in NVM location 752-324, then set the value to 1. Perform ADJ 9.3. After the
measurement has completed, restore the value. The ATC Sensor (K) Fail judgement is OK.
YN
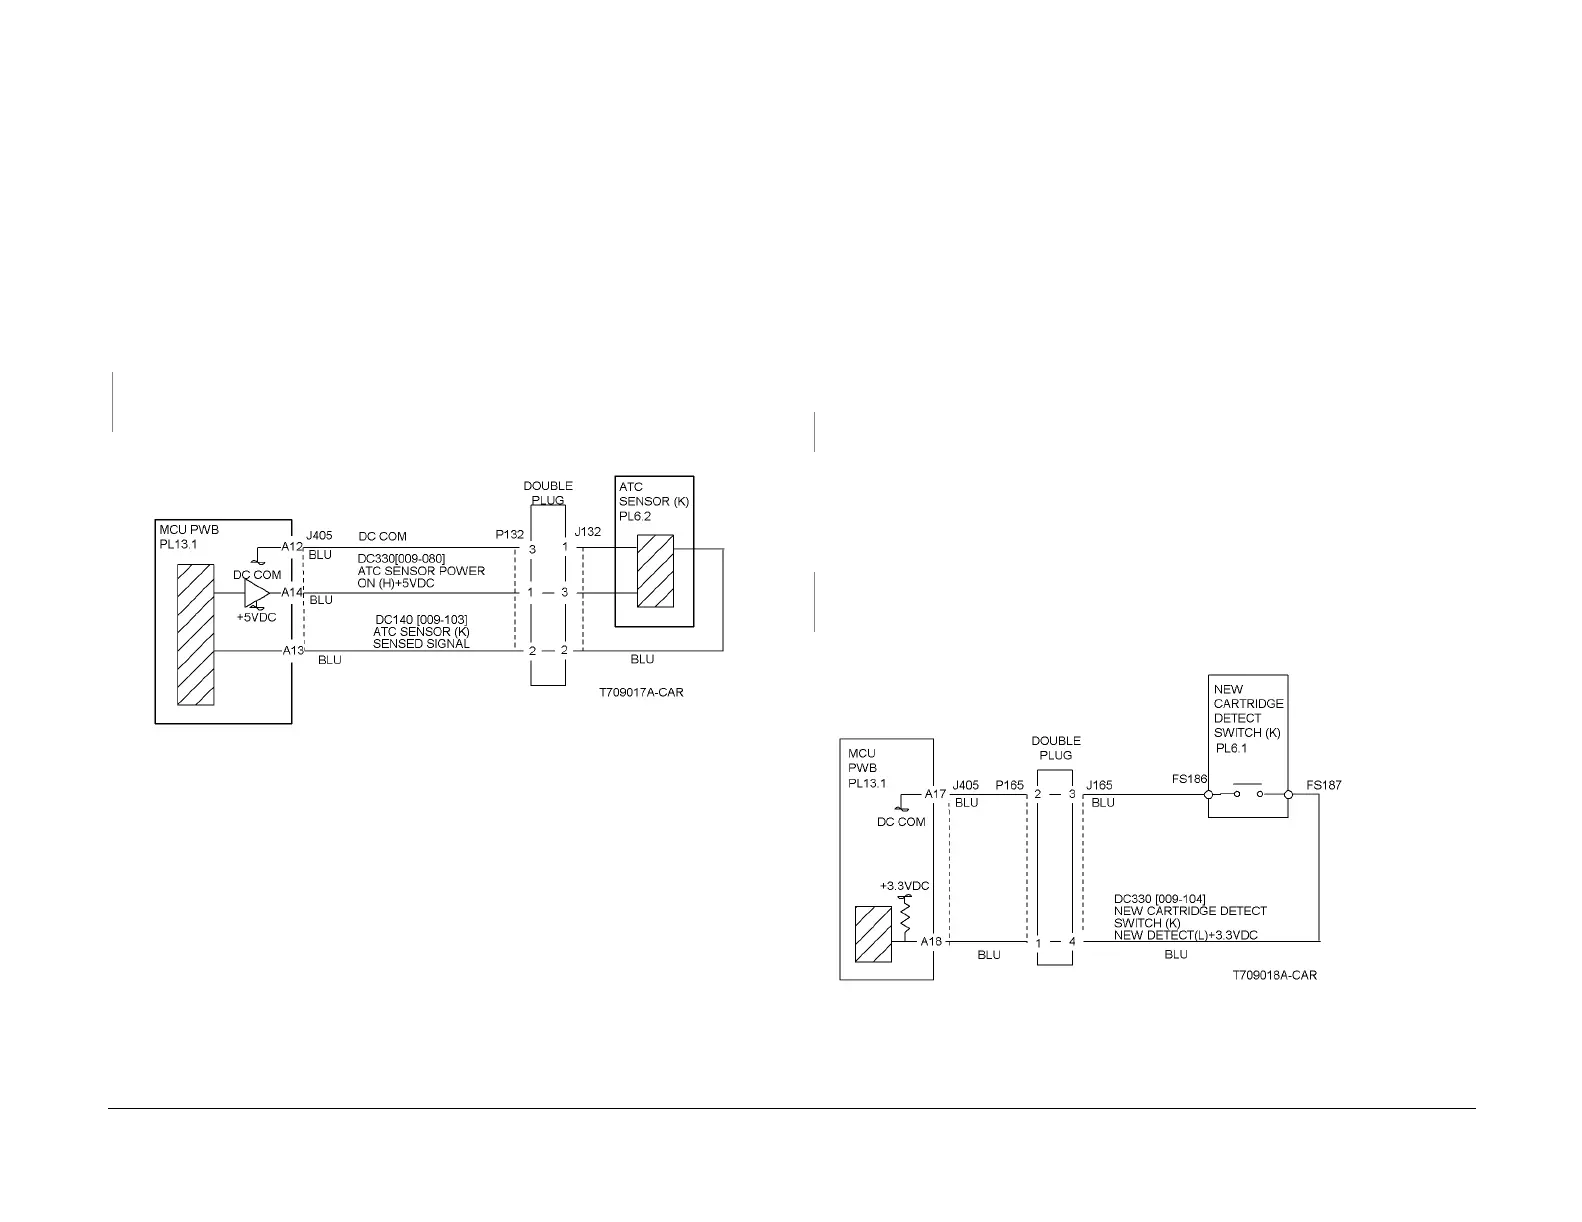
Refer to Figure 1 and check connector P/J132. If the check is OK, replace the ATC Sen-
sor (K) (PL 6.2). If the problem continues, replace the MCU PWB (PL 13.1).
After checking that no failures are detected during normal operation, go to call close out.
Figure 1 9-383 Rap Circuit Diagram - ATC Sensor K
9-390 New Toner Cartridge (K)
The New Cartridge Detect Switch (K) was not engaged to reset the Accumulative Dispense
time NVM value to 0 when a new cartridge was installed.
Initial Actions
• Re-install the Toner Cartridge ensuring that the Dispense Motor and the Toner Cartridge
are engaged.
• Check that the New/Old Detection Switch (metal part) at the rear of the Toner Cartridge is
raised. If the New/Old Detection Switch is not raised, lift it up, then set NVM location 752-
686 (Accumulative Dispense Time Value K) to 0.
• Check that the Dispense Motor is operating; check dC330 [009-004, Dispense Motor (K)].
If the motor energizes, even briefly, check for clumping in the cartridge. Turn the auger
gear by hand and/or shake the cartridge to loosen the toner.
Procedure
Disconnect P/J405 from the MCU PWB. The fault has cleared.
YN
Replace the MCU PWB. (PL 13.1).
Remove the black toner cartridge and check the Dispense Motor Assembly for wear or dam-
age.
Disconnect FS186/ FS187 at both edges of the New Cartridge Detect Switch (K).
Check continuity at both edges of the New Cartridge Detect Switch (K). There is continuity
when the Switch is not engaged.
YN
Check the wire between J405-A18 and FS187 on the New Cartridge Detect Switch (K) for
a short circuit to the frame (Figure 1).
Replace the New Cartridge Detect Switch (K). (PL 16.1).
Figure 1 9-390 Rap Circuit Diagram - New Toner Cartridge

 Loading...


