09/03
4-154
DC 3535/2240/1632, WC M24
ADJ 5.3
Initial issue
Repairs and Adjustments
ADJ 5.3 DADF Parallelism
Purpose
Enable parallel Document placement and image scan.
Check
WARNING
To avoid personal injury or shock, do not perform repair or adjustment activities with
the power switch on or electrical power applied to the machine.
1. Remove Front Cover. (PL 20.1)
2. Remove Entrance Tray. (PL 20.1)
3. Remove the Document Transport. (REP 5.17)
4. Check DADF Parallelism.
a. Manually hold down the DADF.
b. Check that the distance between the DADF Rear Frame and the Rear Registration
Edge is 20 ±1 mm (Figure 1).
c. Perform the same check at the left end of the DADF.
If 20 ±1 mm is not measured in each check, or the measurements are different, go to
the adjustment.
Otherwise DADF Parallelism is good.
Figure 1 Checking DADF Parallelism
Adjustment
CAUTION
The DADF Parallelism must be made within ±1mm of the specified range.
CAUTION
When removing the Rear Cover, disconnect LED Connector on DADF PWB.
1. Remove Rear Cover (REP 5.18).
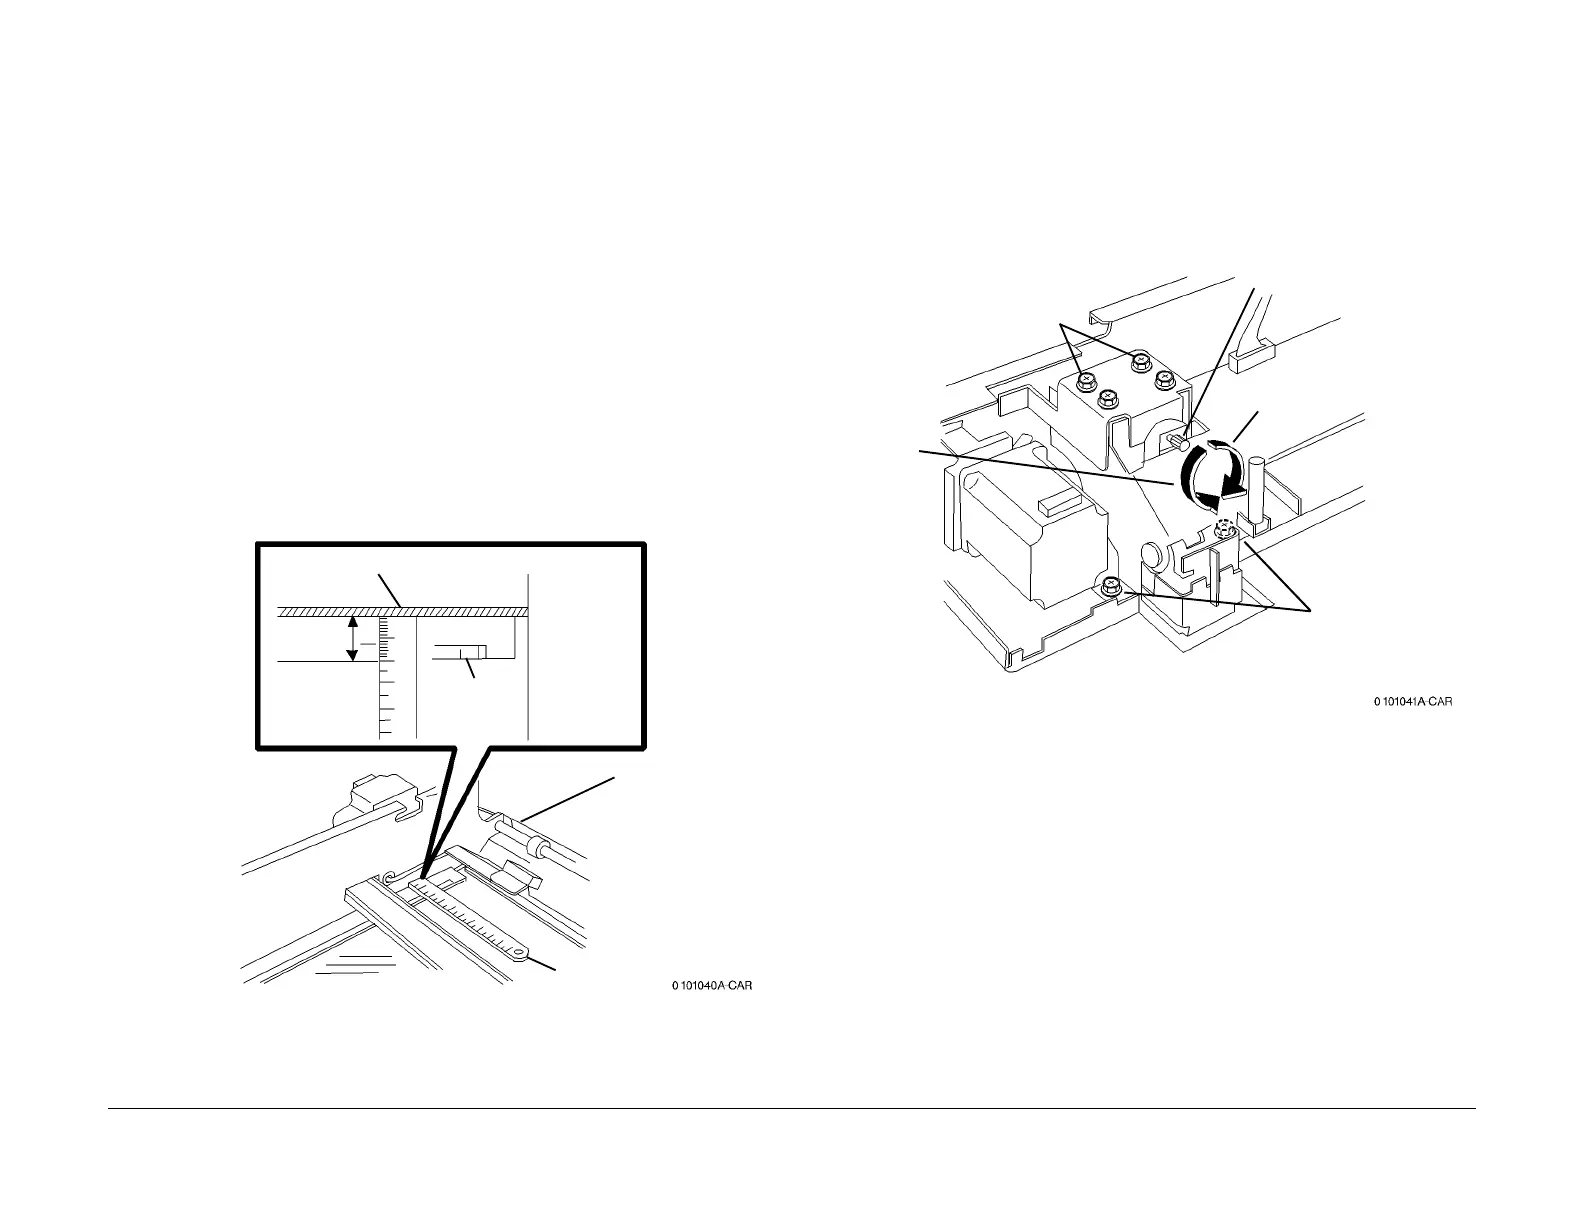
2. Adjust DADF Parallelism (Figure 2).
Figure 2 Adjusting DADF Parallelism
3. Adjust Left Counterbalance if required.
4. Repeat the check.
DADF Rear Frame
20 mm
Rear
Registration
Edge
Scale
Right End
of DADF
DADF Moves
to Rear
DADF Moves
to Front
1
Loosen
Screws (4)
2
Loosen
Screws (2)
3
Adjust Screw
4
Tighten
Screws (6)

 Loading...


