09/03
4-30
DC 3535/2240/1632, WC M24
REP 5.10
Initial issue
Repairs and Adjustments
REP 5.10 Set Gate Solenoid Assembly
Parts List on PL 20.5
Removal
WARNING
To avoid personal injury or shock, do not perform repair or adjustment activities with
the power switch on or electrical power applied to the machine.
1. Open DADF Top Cover.
2. Remove the DADF Front Cover (PL 20.1).
3. Remove the Entrance Tray (PL 20.1).
4. Remove Lower Chute Assembly (REP 5.8).
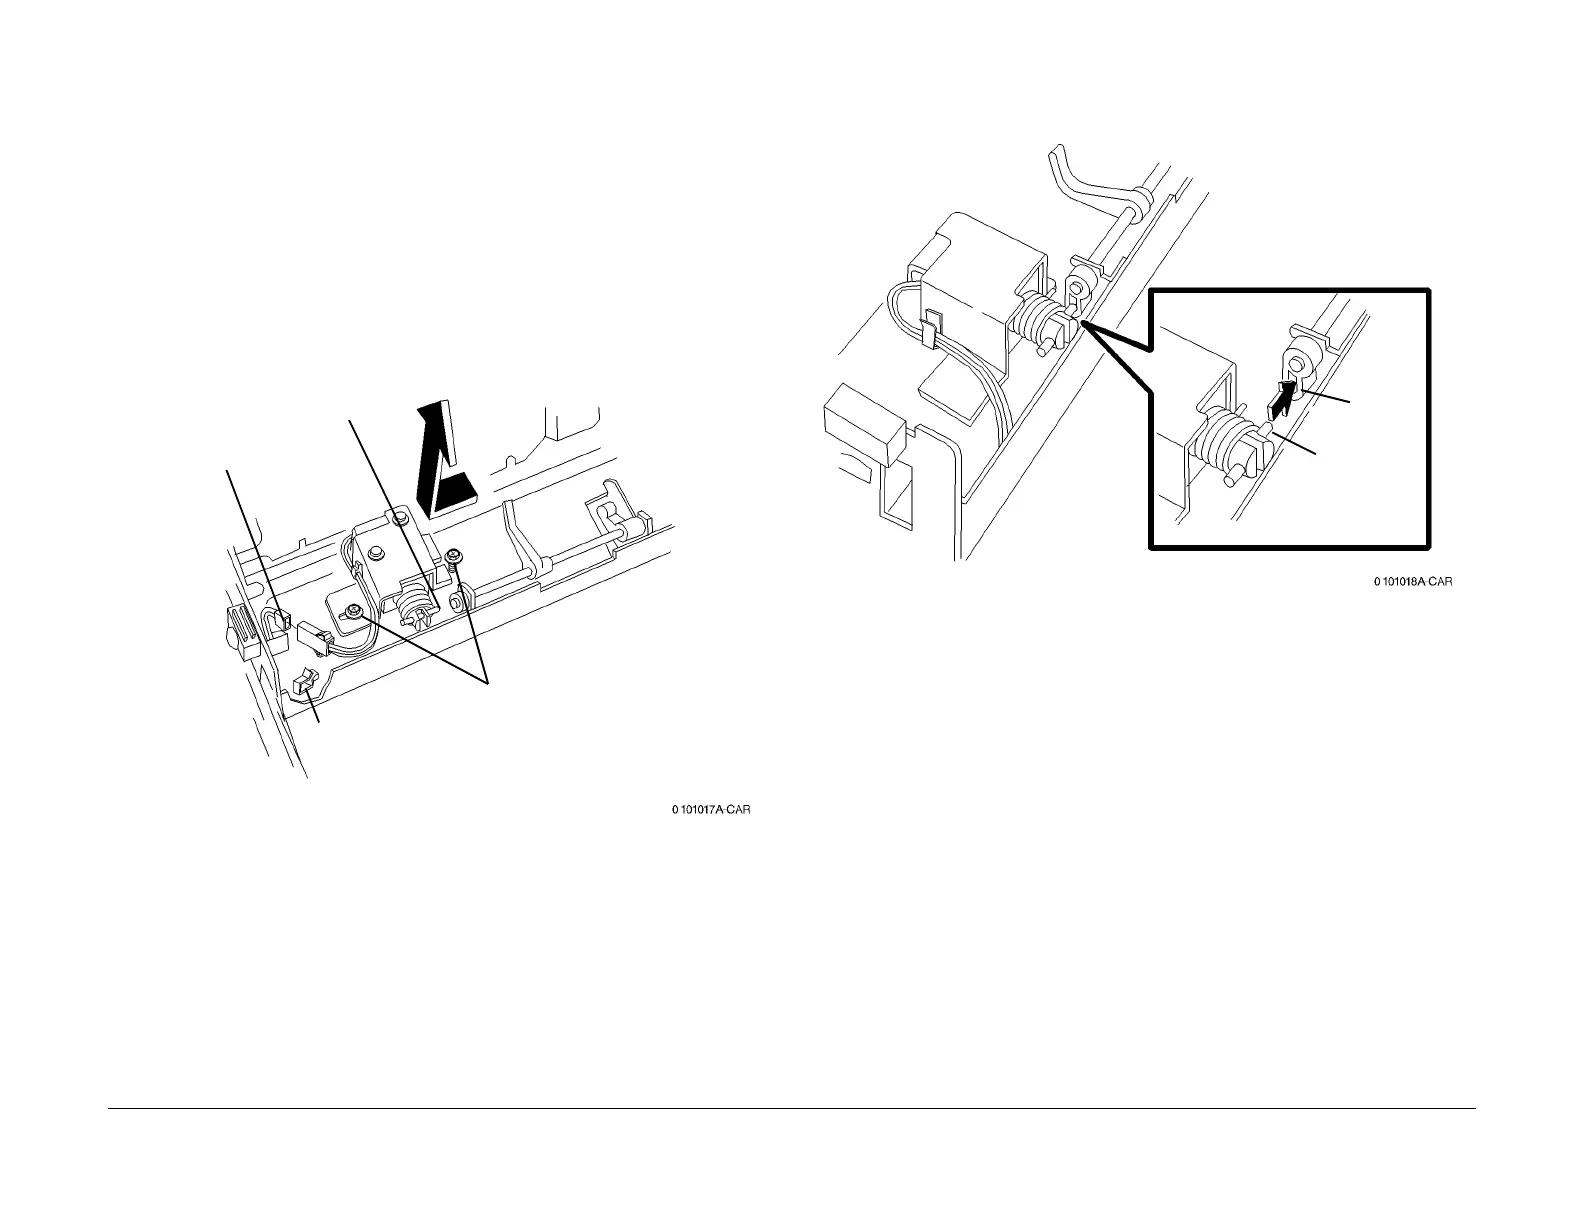
5. Remove Set Gate Solenoid Assembly (Figure 1).
Figure 1 Removing Set Gate Solenoid Assembly
Replacement
1. Engage pin with slot (Figure 2).
Figure 2 Engaging Pin with Slot
2
Disconnect
3
Release clamp
and remove wire
4
Loosen screws
(2) and remove
solenoid
1
Make note of pin
engagement
Pin
Slot

 Loading...


