09/03
2-147
DC 3535/2240/1632, WC M24
7-291
Status Indicator RAPs
Initial issue
7-291 Tray 3 Lift (TTM)
The Tray 3 Level Sensor does not detect tray lift.
Initial Actions
Pull out Tray 3 and empty the paper stock, then:
• Manually turn the gear on the left side of Tray 3 to check that the Bottom Plate moves up
and down smoothly.
• Check that the Tray 3 Level Sensor Actuator (PL 16.9) is properly seated and operates
smoothly.
• Gently push Tray 3 in to check that the drive transmission is firmly engaged.
• Ensure that Tray 3 is properly closed.
Procedure
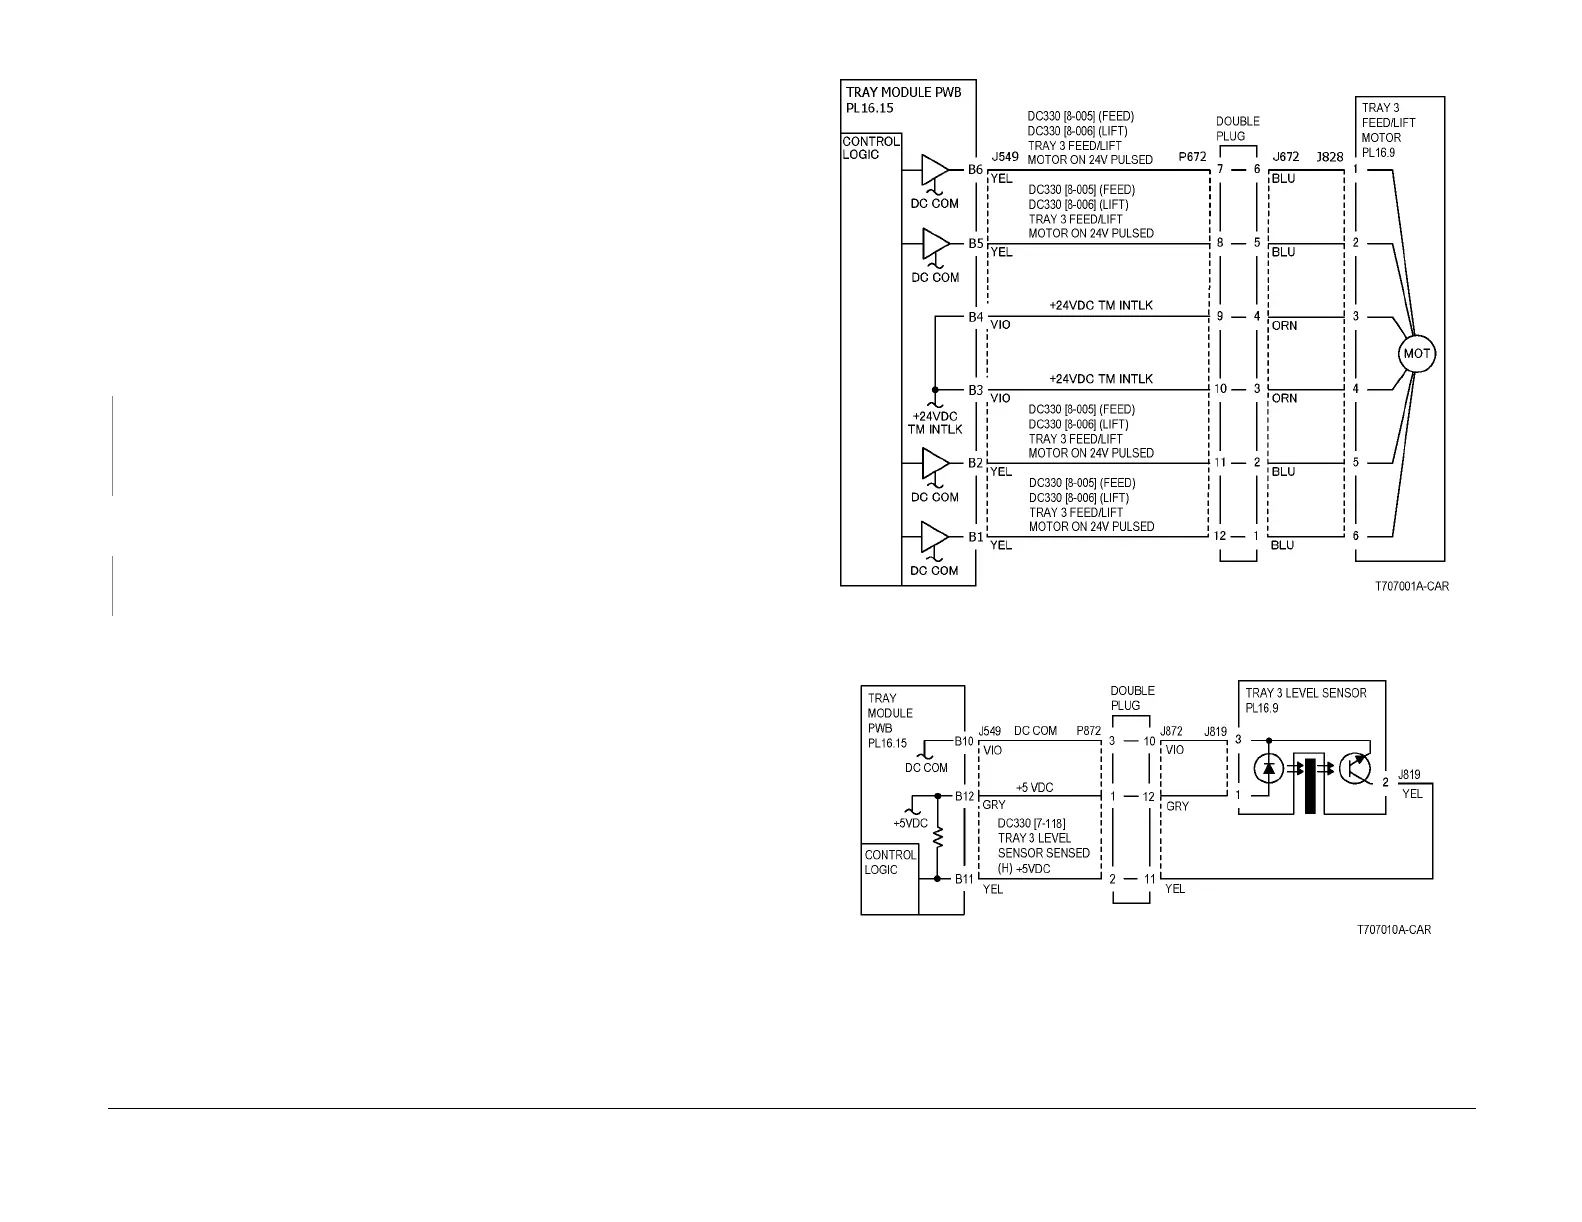
Enter dC330 [008-006] and press Start. The Tray 3 Feed/Lift Motor (PL 16.9) energizes.
YN
Press Stop. Check the circuit of the Tray 3 Feed/Lift Motor (Figure 1). Check the wires
from the Tray Module PWB to the Tray 3 Feed/Lift Motor for an open circuit. If the wires
are good, replace the Tray 3 Feed/Lift Motor (PL 15.7). If the problem still exits, replace
the Tray Module PWB (PL 15.9)
Press Stop. Enter dC330 [007-118] and press Start. Open and close Tray 3. The display
changes.
YN
Press Stop. Check the circuit of the Tray 3 Level Sensor (Figure 2). Refer to the OF 99-2
RAP for troubleshooting procedure.
Press Stop.
• Check the Tray 3 Feed / Lift Motor and its associated gears (PL 16.9) for damage, con-
tamination or misalignment.
• Check the Tray 3 Tray Cables, Pulleys and associated gears (PL 16.3) for damage, con-
tamination or misalignment.
• Ensure that the connectors shown in the circuit diagrams (Figure 1, Figure 2) are securely
connected and that the wires are not damaged.
• Replace the Tray 3 Level Sensor (PL 16.9).
• If these checks are OK, replace the Tray Module PWB (PL 16.15).
Figure 1 7-291 RAP Circuit Diagram - Tray 3 Lift/Feed Motor (TTM)
Figure 2 7-291 RAP Circuit Diagram - Tray 3 Level Sensor (TTM)

 Loading...


