09/03
4-12
DC 3535/2240/1632, WC M24
REP 1.12
Initial issue
Repairs and Adjustments
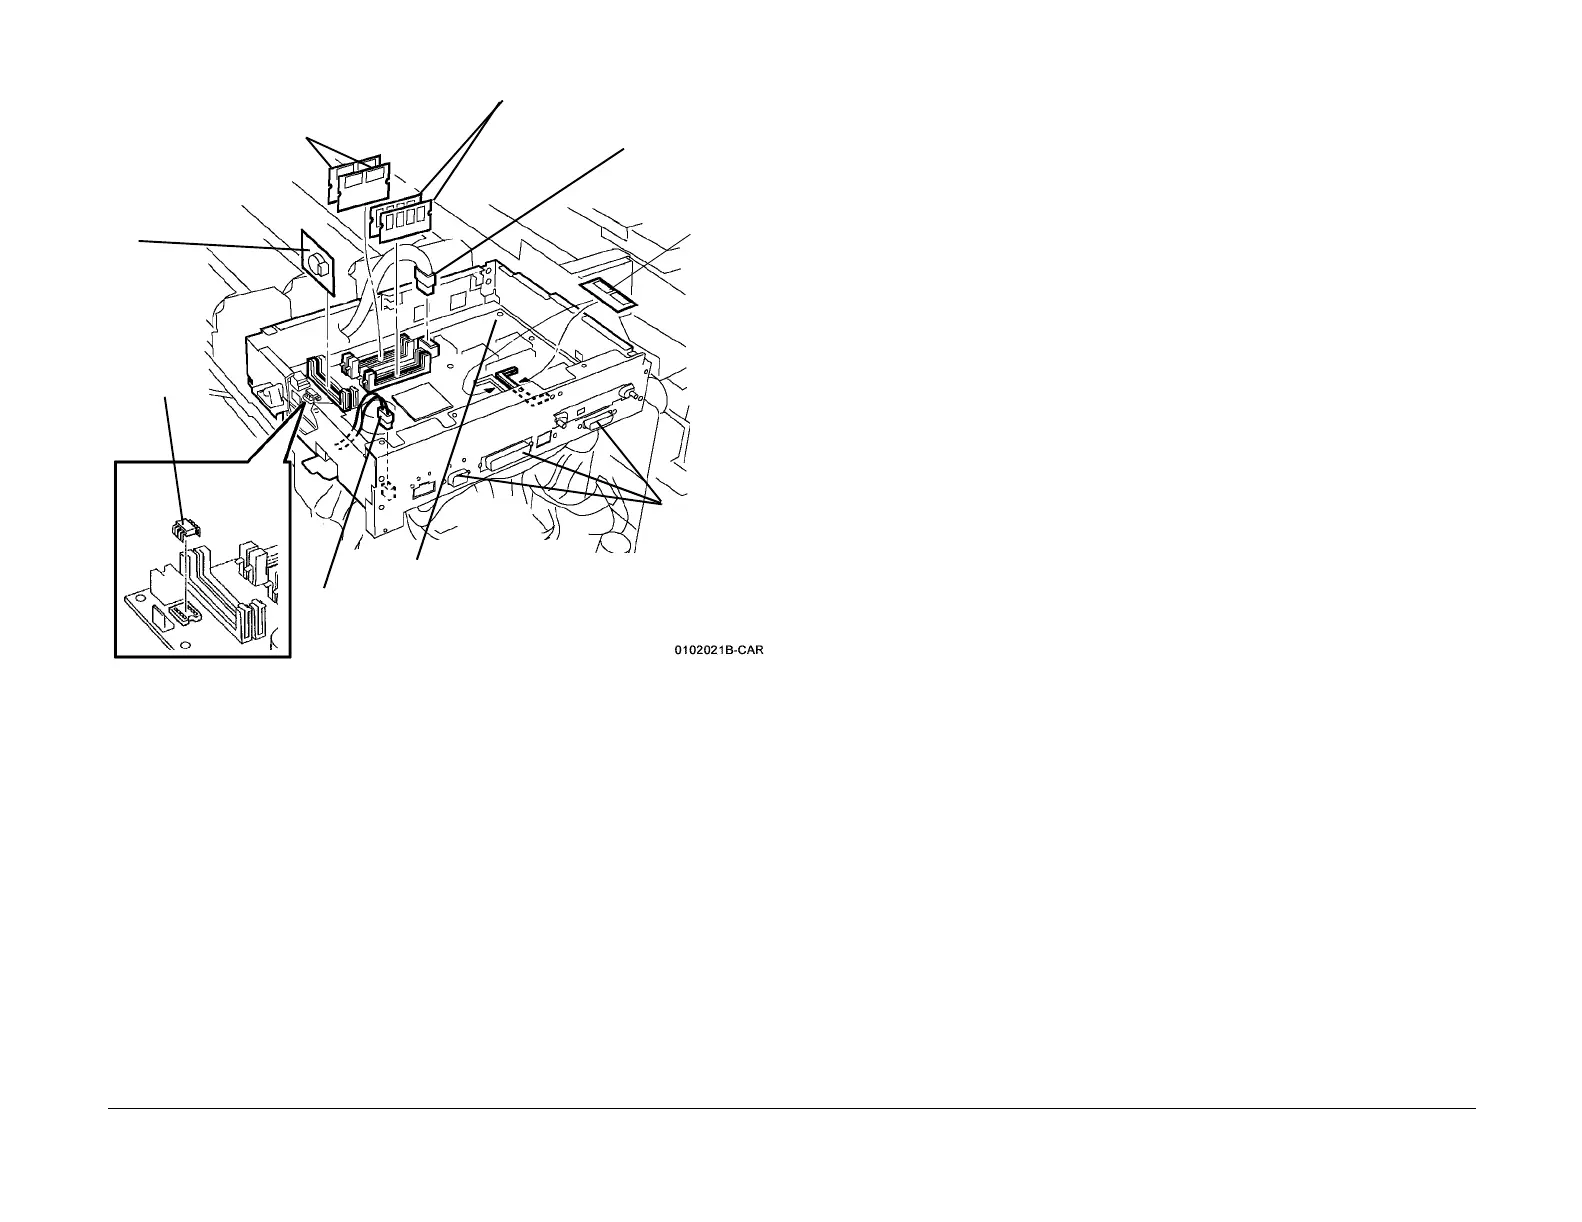
Figure 4 Removing ESS PWB
Replacement
1. Reinstall the NVM PWB and the ROM/RAM/EPROMs that were removed from the original
PWB. Discard the MAC ROM from the new ESS PWB and install the MAC ROM removed
from the old ESS PWB.
CAUTION
GP10 is used to maintain the integrity of the serial number and billing data when one or more
serialized PWBs must be replaced. Never replace all three listed PWBs at the same time. If
any of the PWBs needs replacing, only replace them one at a time.
• ESS NVM PWB (PL 13.1).
• MCU NVM PWB (PL 13.1).
• ESS PWB (PL 13.1).
Failure to comply with GP 10 could result in catastrophic NVM corruption.
2. Follow the procedure in GP 10, to verify that the serial numbers and billing information is
correct.
3. If a good Machine Settings floppy is available, exit, then reenter the PWS Tool. Select
Read from Floppy when starting the tool. If no floppy is available, or if the data on the
existing floppy is questionable, go to step 5.
4. Go to dC351 and select Restore Machine Settings. When restoration is complete, go to
step 7.
5. If a good Machine Settings floppy is not available, or if the data on the existing floppy is
questionable, go to dC351. In the Special Batch Write area, select the appropriate market
region, then press the Batch Write NVM button.
6. Using the resources gathered in step 1 of the removal procedure, reenter NVM data to
restore the machine configuration.
7. Ensure that the network information (IP address, etc.) is correct. Contact the customer’s
system administrator to configure, if necessary.
8. Go to dC351 and select Save Machine Settings. Save the settings to floppy disk per the
procedure.
2
Remove
ESS
NVM
3
Remove PS-1 ROM (ALL) and
PS-2 ROM (DC2240/1632)
4
Remove RAM
1
Remove
MAC
ROM
8
Disconnect
Fan P/J310
9
Remove Screws (9, DC2240/1632) /
(7, DC3535) and remove ESS PWB.
Lift straight up to disconnect P/J460
on bottom of PWB
7
Remove
jacks from
plate
6
Remove
RAM (2)
5
Disconnect Connec
tor

 Loading...


