09/03
9-5
DC 3535/2240/1632, WC M24
Token Ring Installation
Installation
Initial issue
10. Place the new Chassis Assembly Riser over the ESS PWB and align the holes in the
Chassis with the screw holes in the ESS PWB. Align the connector on the bottom of the
Assembly with the matching connector on the ESS PWB and press firmly.
11. Reinstall the 4 screws removed in step 9.
12. Install the new ESS Rear Panel Assembly using the hardware removed from the original
Rear Panel:
• Reinstall the connectors removed in step 8, using the original hardware
• Install the panel using the 5 screws retained from original.
• Reinstall the Blind Panel and the Option Panel.
• Reconnect the GND wire.
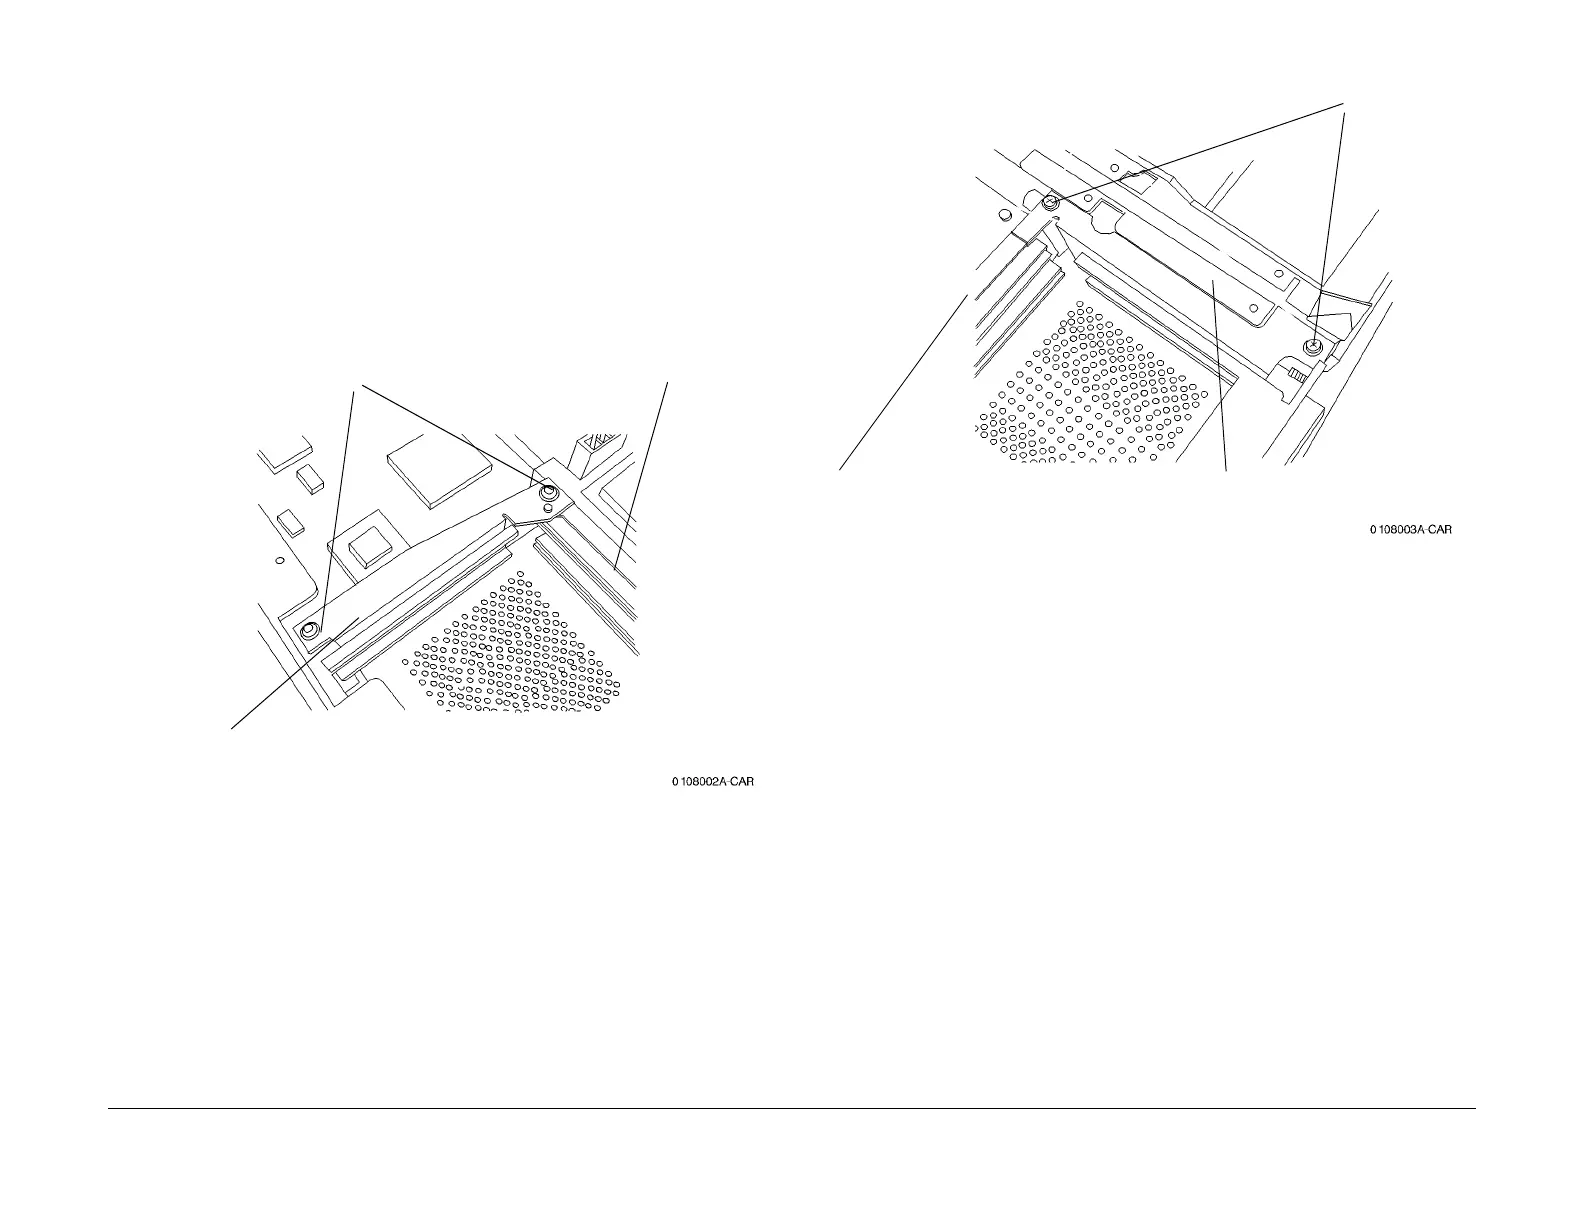
13. Install the Left Hand Bracket using the screws. (Figure 3).
Figure 3 Installing the LH Bracket
14. Install the Right Hand Bracket using (2) screws. (Figure 4).
Figure 4 Installing the RH Bracket
15. Insert the Token Ring PWB into the lower slot, ensuring the connectors mate correctly.
16. Tighten the thumbscrews on the front of the PWB.
17. Reinstall the ESS Top Cover and DIMM Cover (PL 13.1).
18. Replace the machine covers:
• Top Cover (REP 14.1).
• Right Cover (REP 14.3).
NOTE: In the following step ensure that you reconnect the connectors.
• Rear Cover (REP 14.2).
19. Reinstall the Finisher Assembly if removed.
20. Reconnect the Power Cords and Scan Cable.
21. Connect network cable to the Token Ring PWB.
22. Check that the Green LED on the Token Ring PWB is lit (Figure 5).
Riser
LH
Bracket
1
Install
screws (2)
rear of
machine
rear of
machine
Riser
RH Bracket
1
Install screws
(2)
 Loading...


