MFP Controller Options
SM 1-177 D014/D015/D078/D079
Installation
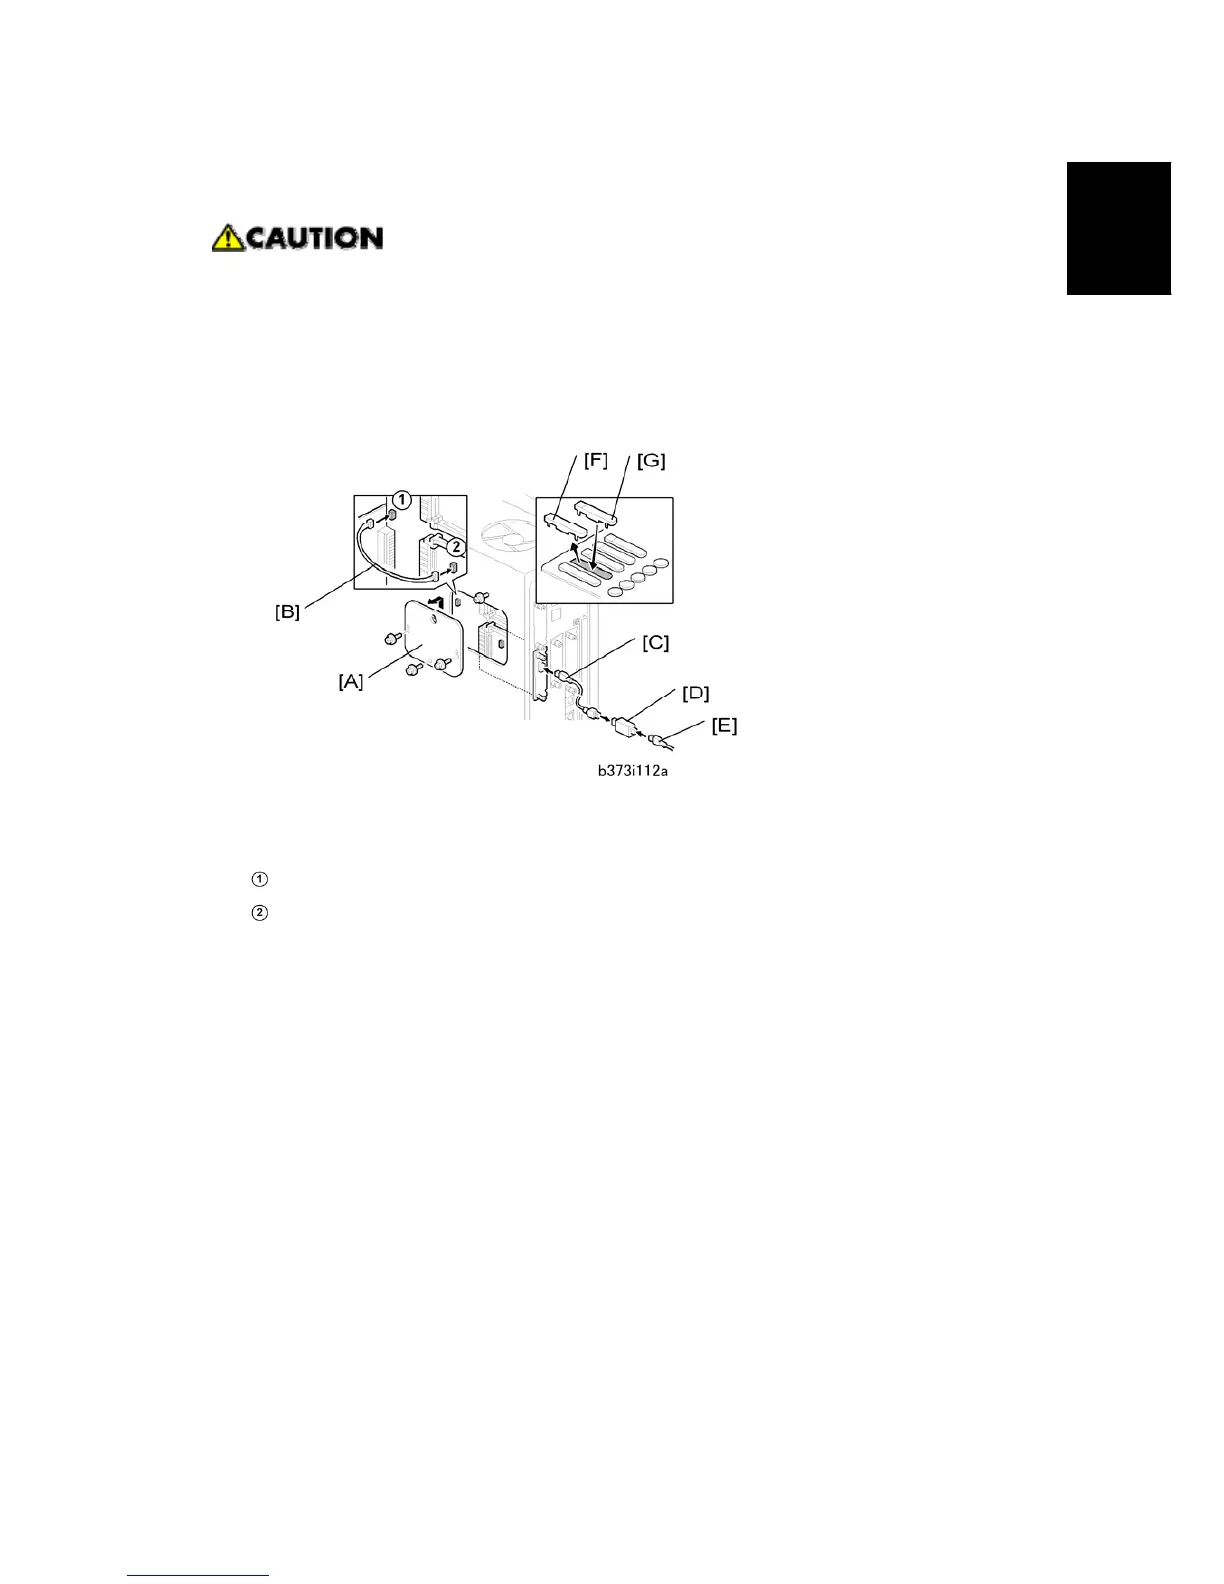
Turn the machine off and unplug the machine before continuing the procedure.
2. Remove the cover [A] of Slot A ( x 2).
3. Install the Copier Connection Kit Board B328 [B] in Slot A and fasten it ( x 2).
4. Remove the rear upper cover.
5. Remove the controller box cover [A] ( x 3).
6. Connect the power repeater cable [B] to:
CN594
CN4
7. Reattach the controller box cover and rear upper cover.
8. Repeat Steps 1 to 6 to install the connection kit on the second machine.
9. Connect the end of the interface cable [C] to the connection PCB.
10. If additional cable is required, connect the cables [E] with repeater hubs [D].
11. On the operation panel of each machine, remove the second cover [F] from the bottom
("Printer").
12. Install the appropriate key on each machine.
Attach the "Printer/Other Function" key [G] (or its equivalent symbol for EU) if the
printer/scanner option is installed.
-or-
Attach the "Other Function" key [G] (or its equivalent symbol for EU) if the
printer/scanner option is not installed.
13. Attach the other end of the connection cable to the connection PCB installed in the
other machine.
Rev. 03/2008