EPSON AcuLaser CX11/CX11F Revision B
TROUBLESHOOTING MFP Maintenance Mode 139
3.3.2.2 Memory Check
Memory contents of the fax unit can be displayed (Read) on the panel and can be
changed (Write).
When you select “Memory Check” and press [Right], the screen as shown below will
be displayed. Select (Highlight) either Read or Write and press [Right] to proceed to
the entry screen.
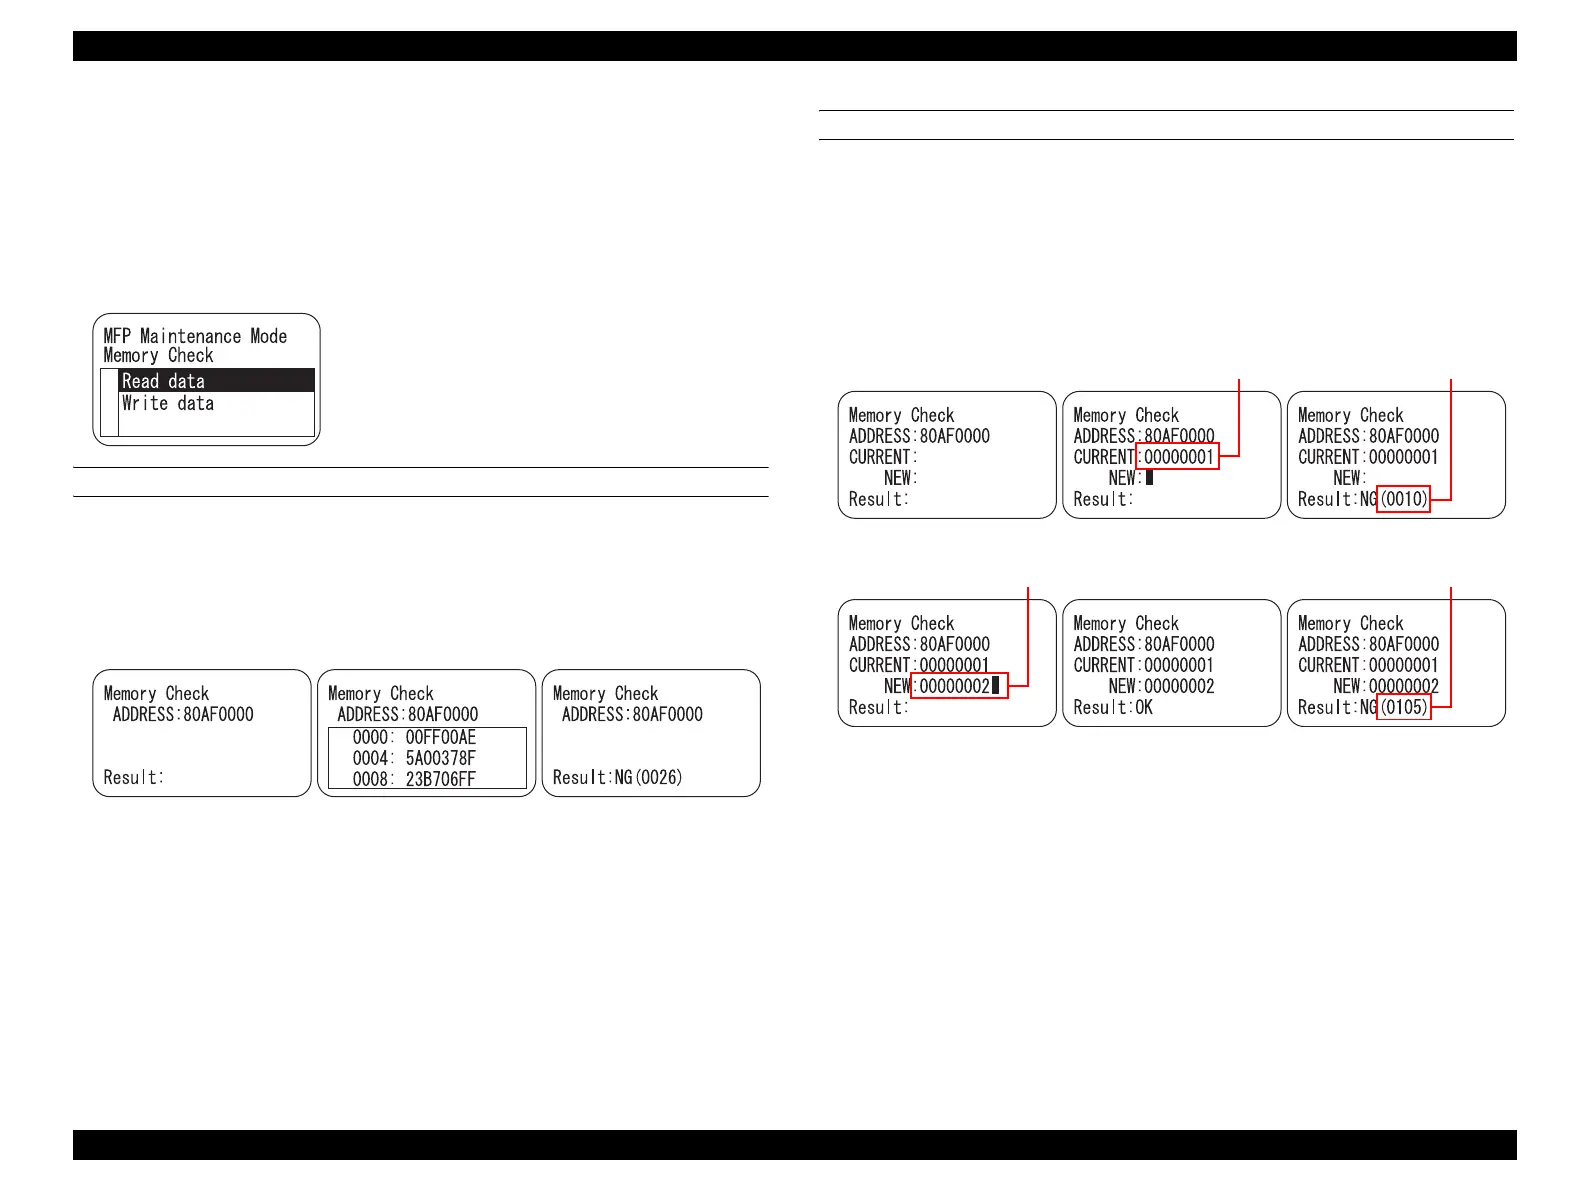
MEMORY CHECK: READ
When an address in the memory is input with the numeric keypad, 64-byte data is
retrieved from the specified address. If the data is read properly, last four digits of the
specified address and 4 byte of data set to the address are displayed in a line. When
failed to read the memory, “NG” is displayed with numbers that indicate the error.
Memory Check: Example of the Read Screen
Note : When the [Stop] button is pressed during the Memory Read, the display returns to the
previous screen (Memory Check initial screen).
MEMORY CHECK: WRITE
When an address is input with the numeric keypad, current setting values in the address
are displayed beside “CURRENT”. When new setting values are entered beside
“NEW”, overwrite process is executed. “OK” is displayed when the process is
completed normally, “NG” is displayed with numbers that indicate the error when
failed to overwrite the specified memory area.
Memory Check: Example of the Write Screen
Note : When the [Stop] button is pressed during the Memory Write, the display returns to the
previous screen (Memory Write initial screen).
When Address is Entered Display of the Read Data When Failed to Read Data
When Address is Entered Display of Current Setting When Failed to Read
Current Data
When New Setting is Entered Overwriting Completed
Normally
When Failed to Overwrite
Current Setting Values
Enter new setting
Numbers that indicate
error contents
Numbers that indicate the error
 Loading...


