EPSON AcuLaser CX11/CX11F Revision B
DISASSEMBLY AND ASSEMBLY Printer 424
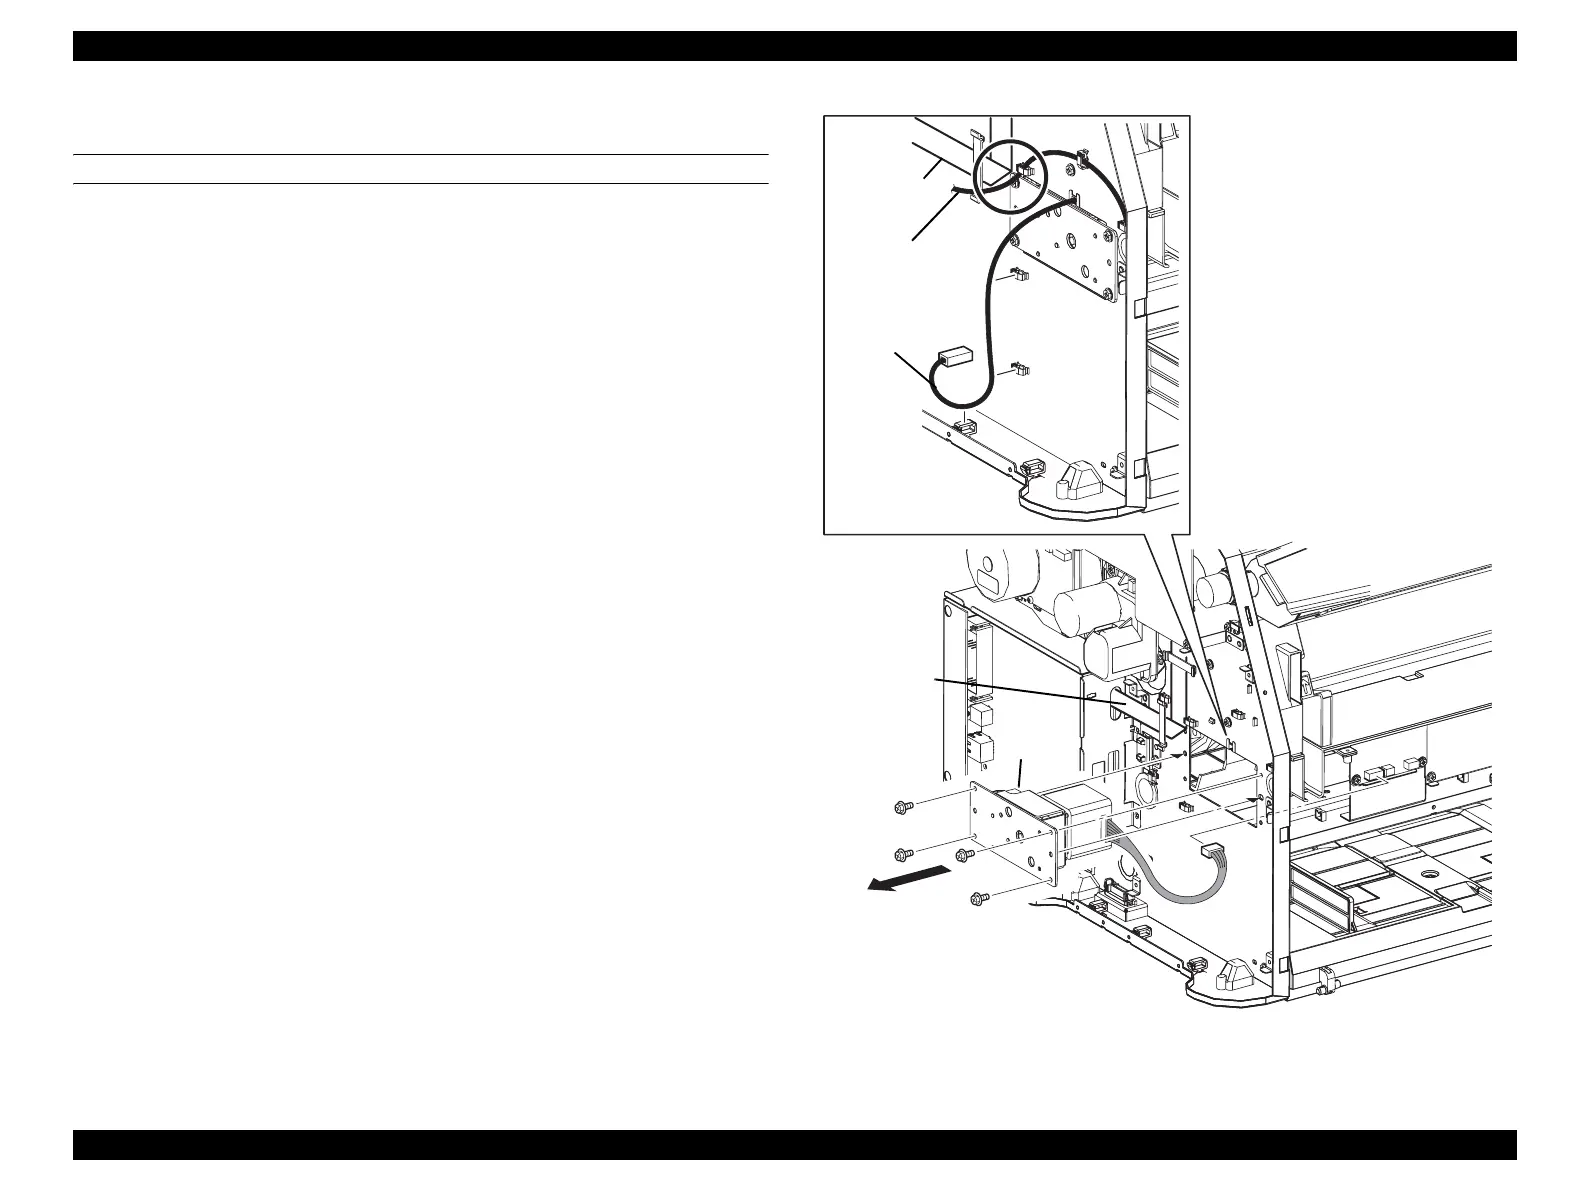
4.2.10.5 MOT ASSY ROT
REMOVAL
1. Remove COVER ASSY RH. (p326)
2. Remove COVER ASSY LH. (p321)
3. Remove COVER MSI. (p317)
4. Remove COVER FRONT L and COVER FRONT ASSY U. (p318)
5. Remove LV/HVPS. (p435)
6. Unclamp the clamp fastening WIRE ASSY DEVE, and remove WIRE ASSY
DEVE.
7. Disconnect connector (P/J433) from PWB ASSY ROT.
8. Remove the 4 screws (silver, with flange, 6 mm) fastening MOT ASSY ROT to
the main unit.
9. Remove MOT ASSY ROT from the main unit.
Figure 4-107. Removal of MOT ASSY ROT
Leg_Sec03_101EB
CAUTION
Leg_Sec03_101EB
CAUTION
FFC-ASSY
ESS
WIRE ASSY
BTR
WIRE ASSY
DEVE
FFC-ASSY
ESS
6)
9)
8)
8)
8)
8)
7)
FFC-ASSY
ESS
manuals4you.commanuals4you.com
 Loading...


