EPSON AcuLaser CX11/CX11F Revision B
DISASSEMBLY AND ASSEMBLY Printer 457
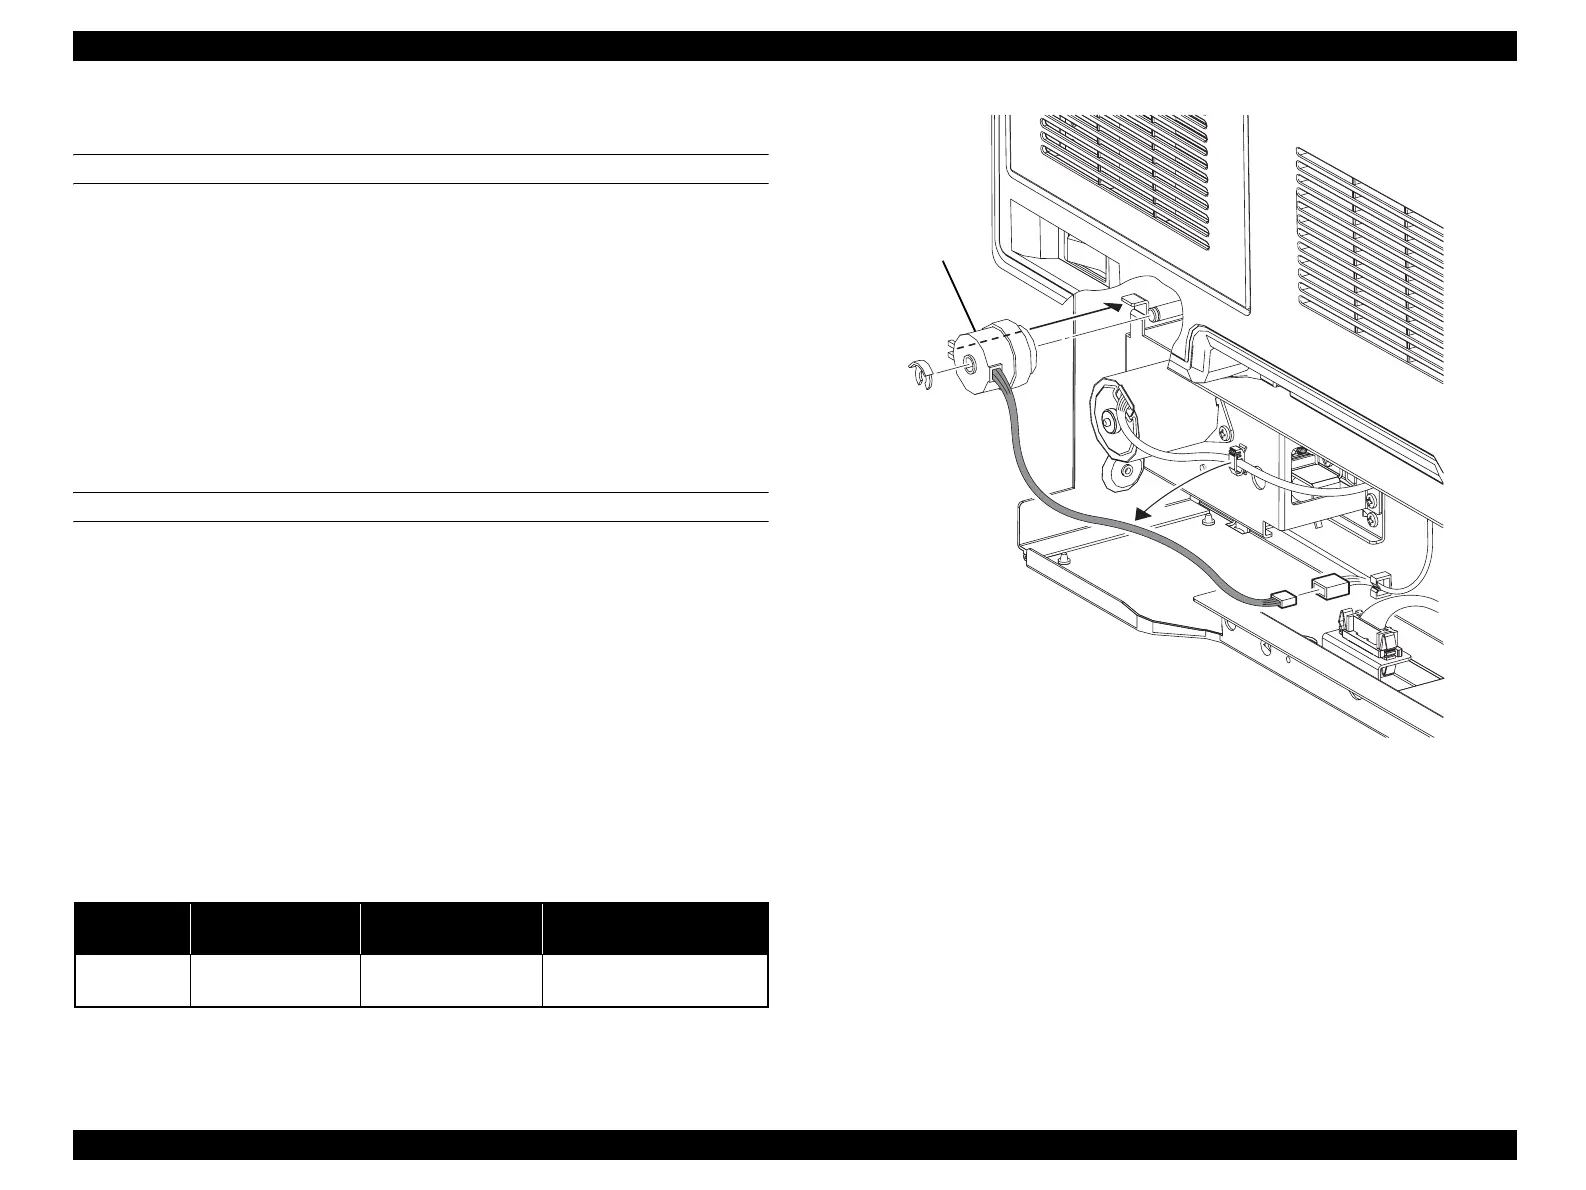
4.2.12.15 CLUTCH ASSY FEED
REMOVAL
1. Remove COVER LEFT 500. (p449)
2. Unclamp the clamp on DRIVE ASSY FEED, and remove the harness on
CLUTCH ASSY FEED.
3. Disconnect connector (P/J609) from CLUTCH ASSY FEED.
4. Remove the KL ring fastening CLUTCH ASSY FEED to 500 PAPER FEEDER
ASSY.
5. Remove CLUTCH ASSY FEED from 500 PAPER FEEDER ASSY.
REINSTALLATION
1. Match the hole position of CLUTCH ASSY FEED with the D cut surface on the
shaft of ROLL ASSY TURN 500, and attach CLUTCH ASSY FEED so that the
protrusion of DRIVE ASSY FEED enters the concave portion on CLUTCH ASSY
FEED.
2. Fasten CLUTCH ASSY FEED to 500 PAPER FEEDER ASSY with the KL ring.
3. Connect connector (P/J609) to CLUTCH ASSY FEED.
4. Fasten the harness on CLUTCH ASSY FEED with the clamp on DRIVE ASSY
FEED.
5. Attach COVER LEFT 500. (p449)
Figure 4-134. Removal of CLUTCH ASSY FEED
Table 4-23. Symptoms when the connector is Loose
Connector
No.
Panel Indication Symptom
Error Caused by Connector
Disconnection
P/J609
Ready → Paper Jam E Paper Jam
No paper is loaded in the 500-
sheet Cassette
Leg_Sec03_025EA
5)
2)
4)
3)
 Loading...


