EPSON AcuLaser CX11/CX11F Revision B
DISASSEMBLY AND ASSEMBLY Printer 446
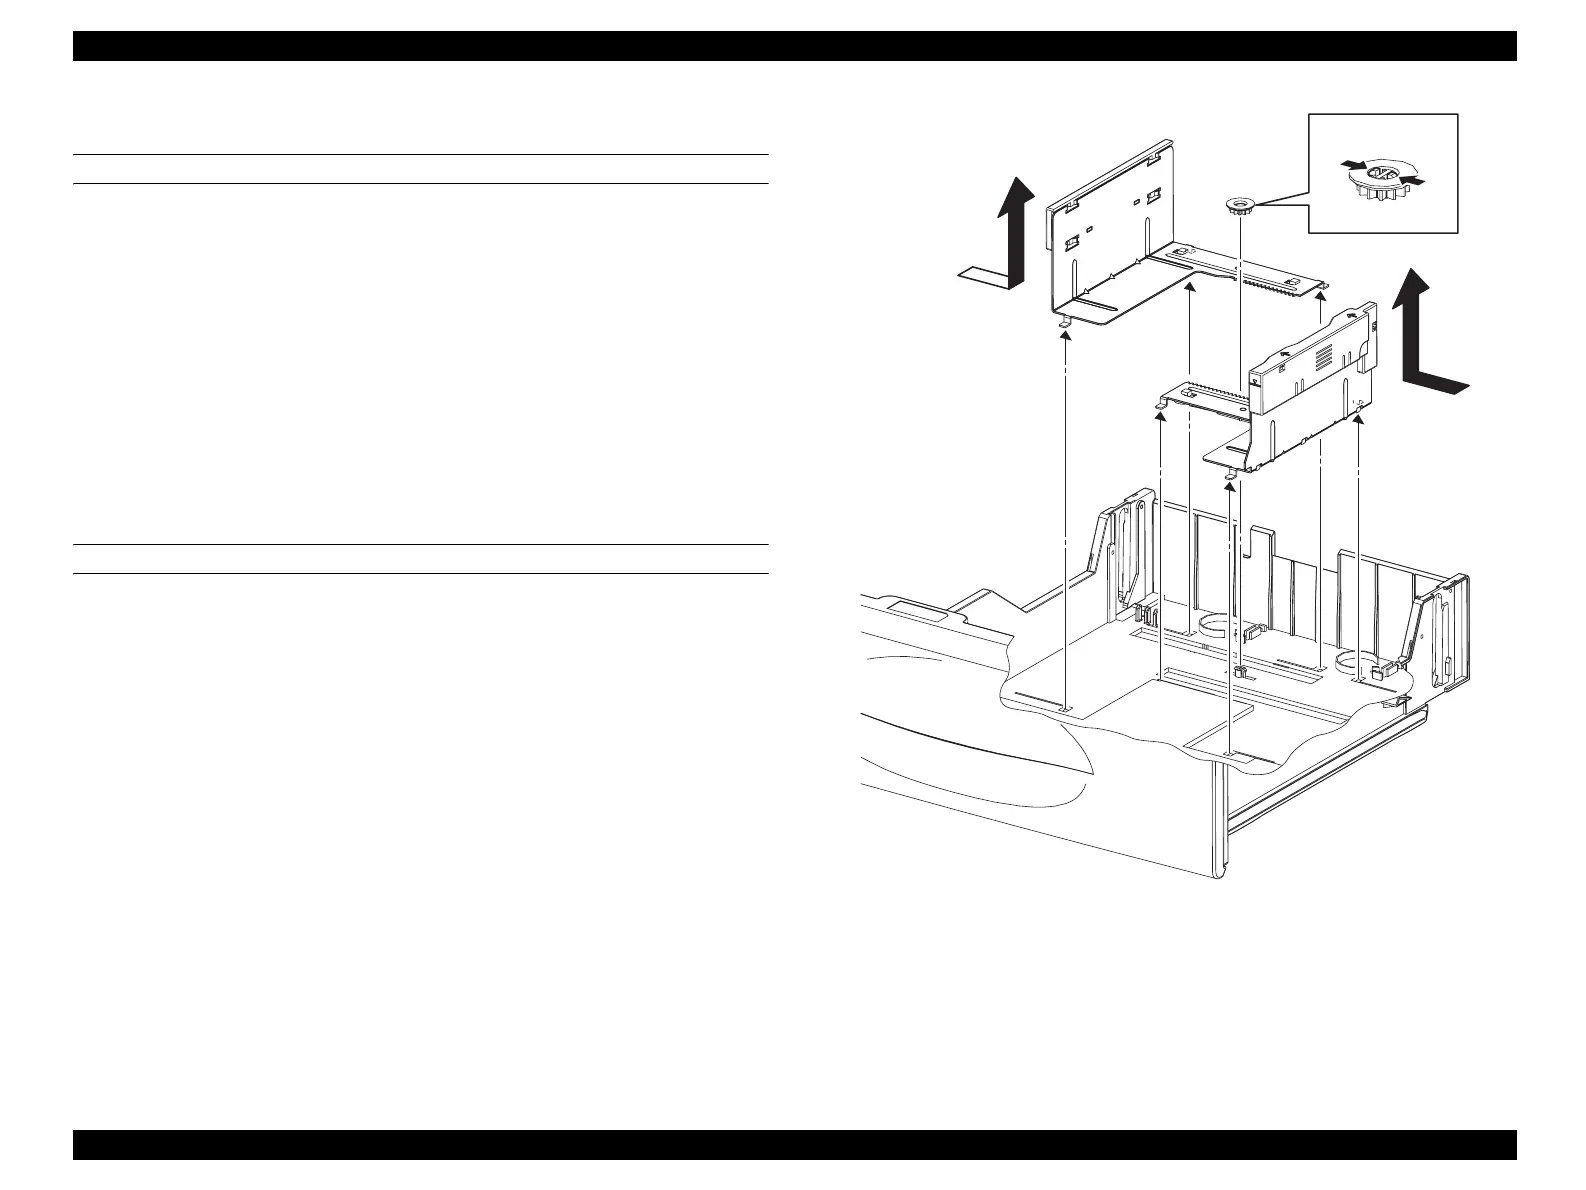
4.2.12.4 GUIDE PAPER L ASSY 500ÅAGUIDE PAPER R ASSY 500
REMOVAL
1. Remove 500 PAPER CASSETTE ASSY. (p442)
2. Remove PLATE ASSY BOTTOM 500. (p444)
3. Unhook the hook on CASSETTE 500 fastening PINION 12, and remove PINION
12.
4. Slide GUIDE PAPER L ASSY 500 to the right, match the 3 protrusions on
GUIDE PAPER L ASSY 500 with the notches on CASSETTE 500, and lift up to
remove.
5. Slide GUIDE PAPER R ASSY 500 to the left, match the 3 protrusions on GUIDE
PAPER R ASSY 500 with the notches on CASSETTE 500, and lift up to remove.
REINSTALLATION
1. Match the 3 protrusions on GUIDE PAPER R ASSY 500 with the notches on
CASSETTE 500, and attach.
2. Match the 3 protrusions on GUIDE PAPER L ASSY 500 with the notches on
CASSETTE 500, and attach.
3. Set GUIDE PAPER L ASSY 500 and GUIDE PAPER R ASSY 500 to their
maximum open states, attach PINION 12 to CASSETTE 500, and fasten with the
hooks.
4. Attach PLATE ASSY BOTTOM 500. (p449)
5. Attach 500 PAPER CASSETTE ASSY. (p442)
Figure 4-123. GRemoval of GUIDE PAPER L ASSY 500 and GUIDE PAPER R
ASSY 500
Leg_Sec03_515EA
5)
4)
3)-2
3)-1
manuals4you.commanuals4you.com

 Loading...


