EPSON AcuLaser CX11/CX11F Revision B
DISASSEMBLY AND ASSEMBLY ADF Section 497
4.4.1.5 ADF HINGE
REMOVAL
1. Remove the Scanner. (p306)
2. Remove the ADF Unit. (p481)
3. Remove the ADF COVER R. (p492)
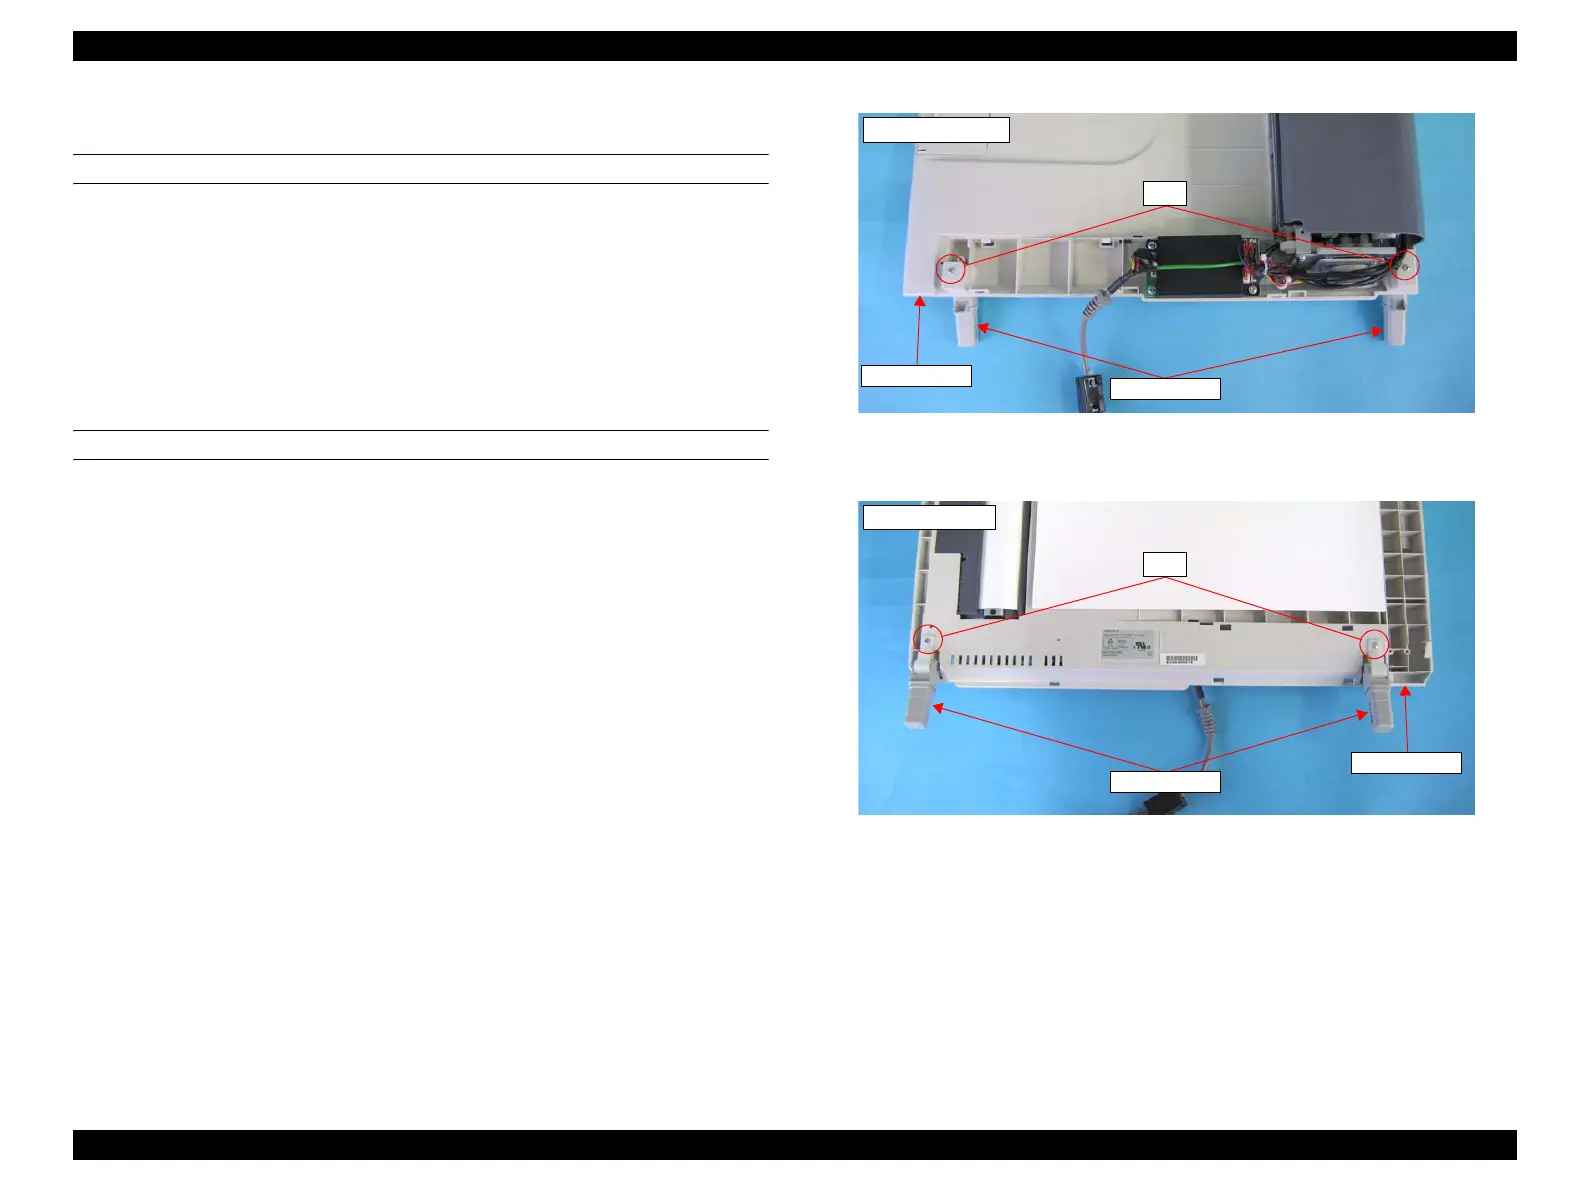
4. Remove the two screws (M3 x 12 mm, P-type, P-head) that secure the left and
right ADF HINGEs to the SDH COVER, and remove the two ADF HINGEs.
REINSTALLATION
1. Secure the left and right ADF HINGEs to the SDH COVER with the two screws
(M3 x 12mm, P-type, P-head).
2. Attach the ADF COVER R. (p492)
3. Attach the ADF Unit. (p481)
4. Install the Scanner. (p306)
Figure 4-180. Removal of ADF HINGE (1)
Figure 4-181. Removal of ADF HINGE (2)
Obverse Side
4)-1
ADF HINGE
SDH COVER
Reverse Side
4)-2
ADF HINGE
SDH COVER
 Loading...


