EPSON AcuLaser CX11/CX11F Revision B
DISASSEMBLY AND ASSEMBLY Printer 336
4.2.3.6 PLATE BOTTOM ASSY MSI
REMOVAL
1. Remove COVER ASSY RH. (p326)
2. Remove COVER ASSY LH. (p321)
3. Remove COVER MSI. (p317)
4. Remove COVER FRONT L and COVER FRONT ASSY U. (p318)
5. Remove FRAME ASSY-PH. (p352)
6. Remove MSI ASSY. (p329)
7. Remove SOLENOID PICK UP. (p344)
8. Remove ROLL ASSY MSI. (p331)
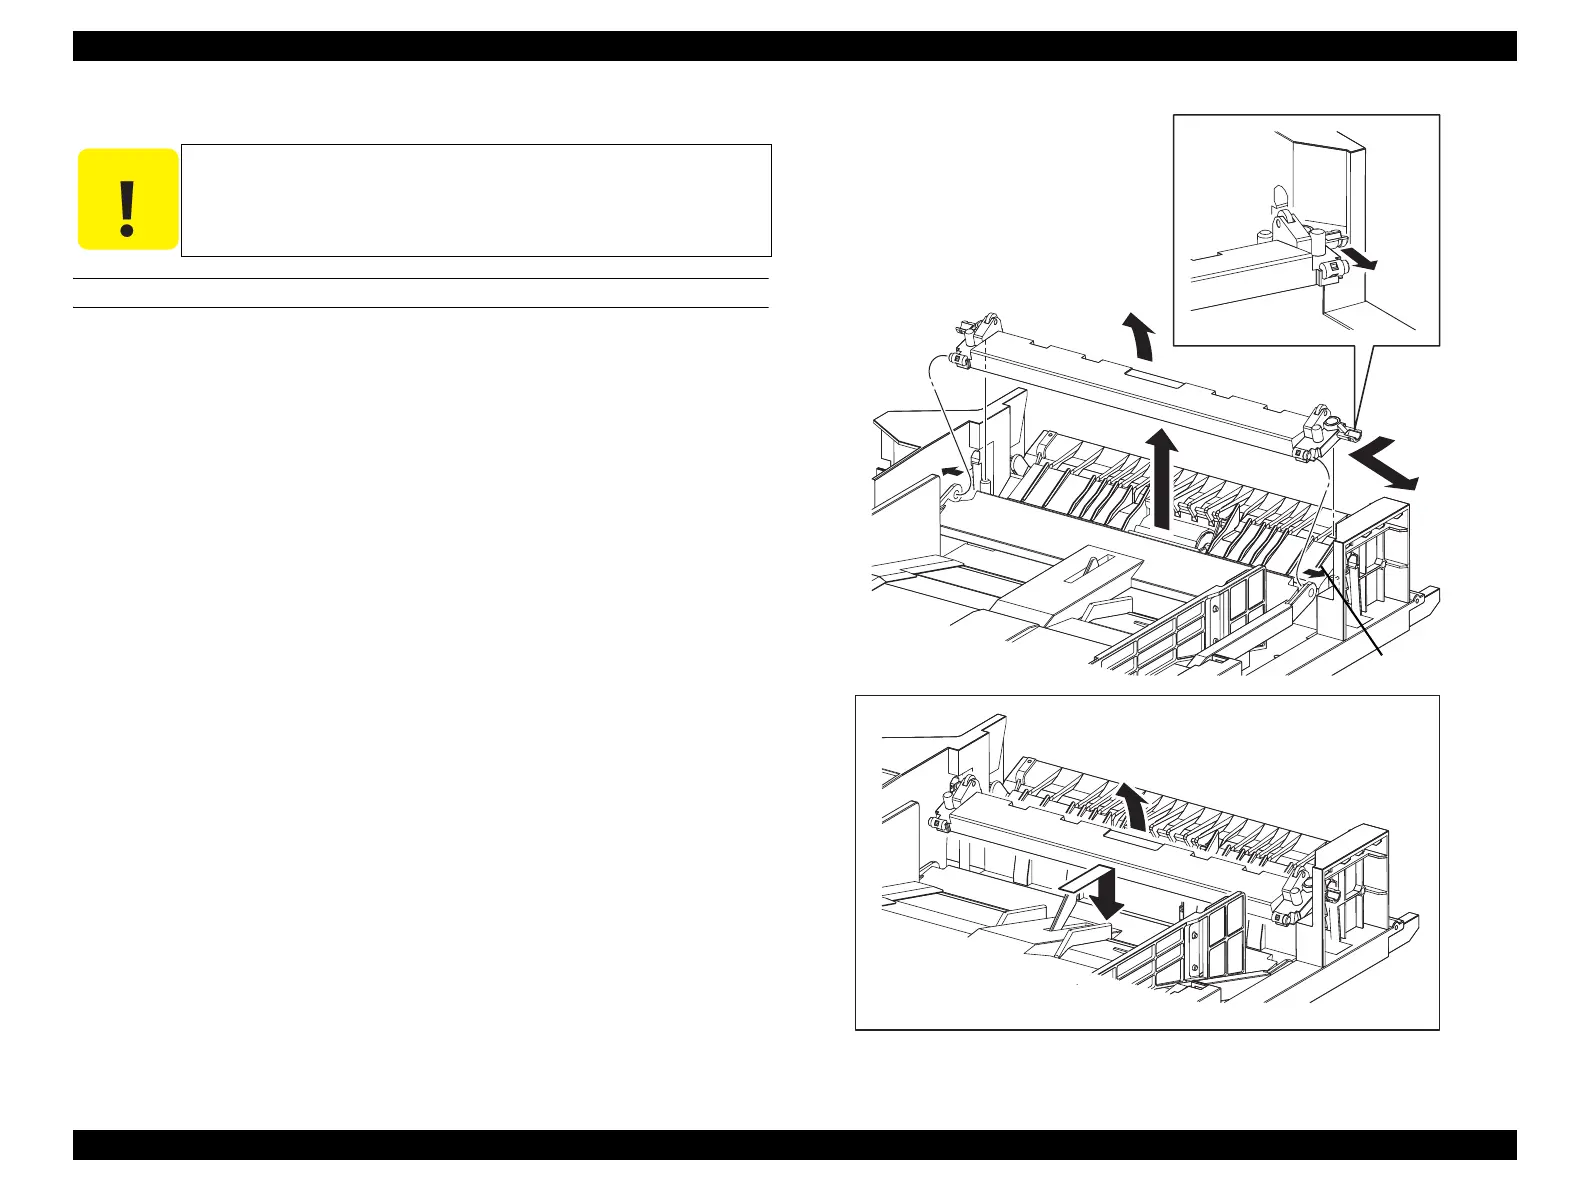
9. Remove the holes on PLATE BOTTOM 2 from the boss on PLATE BOTTOM
ASSY MSI while extending the attachment sections on the left and right of
PLATE BOTTOM 2.
10. Lift up PLATE BOTTOM ASSY MSI, and remove the holes on the left and right
of PLATE BOTTOM ASSY MSI from the left and right shafts of MSI ASSY.
11. Remove the right side of PLATE BOTTOM ASSY MSI from the right-side notch
of MSI ASSY, and remove PLATE BOTTOM ASSY MSI.
Figure 4-31. Removal of PLATE BOTTOM ASSY MSI
C A U T I O N
Step numbers with [ ] in the figure indicate the step of
reinstallation.
Leg_Sec03_047FA
CHECK POINT
10)-2
11)-1
11)-2
10)-1
9)
9)
[2)]
manuals4you.commanuals4you.com
 Loading...


