EPSON AcuLaser CX11/CX11F Revision B
DISASSEMBLY AND ASSEMBLY Printer 450
4.2.12.8 CHUTE FDR ASSY 500
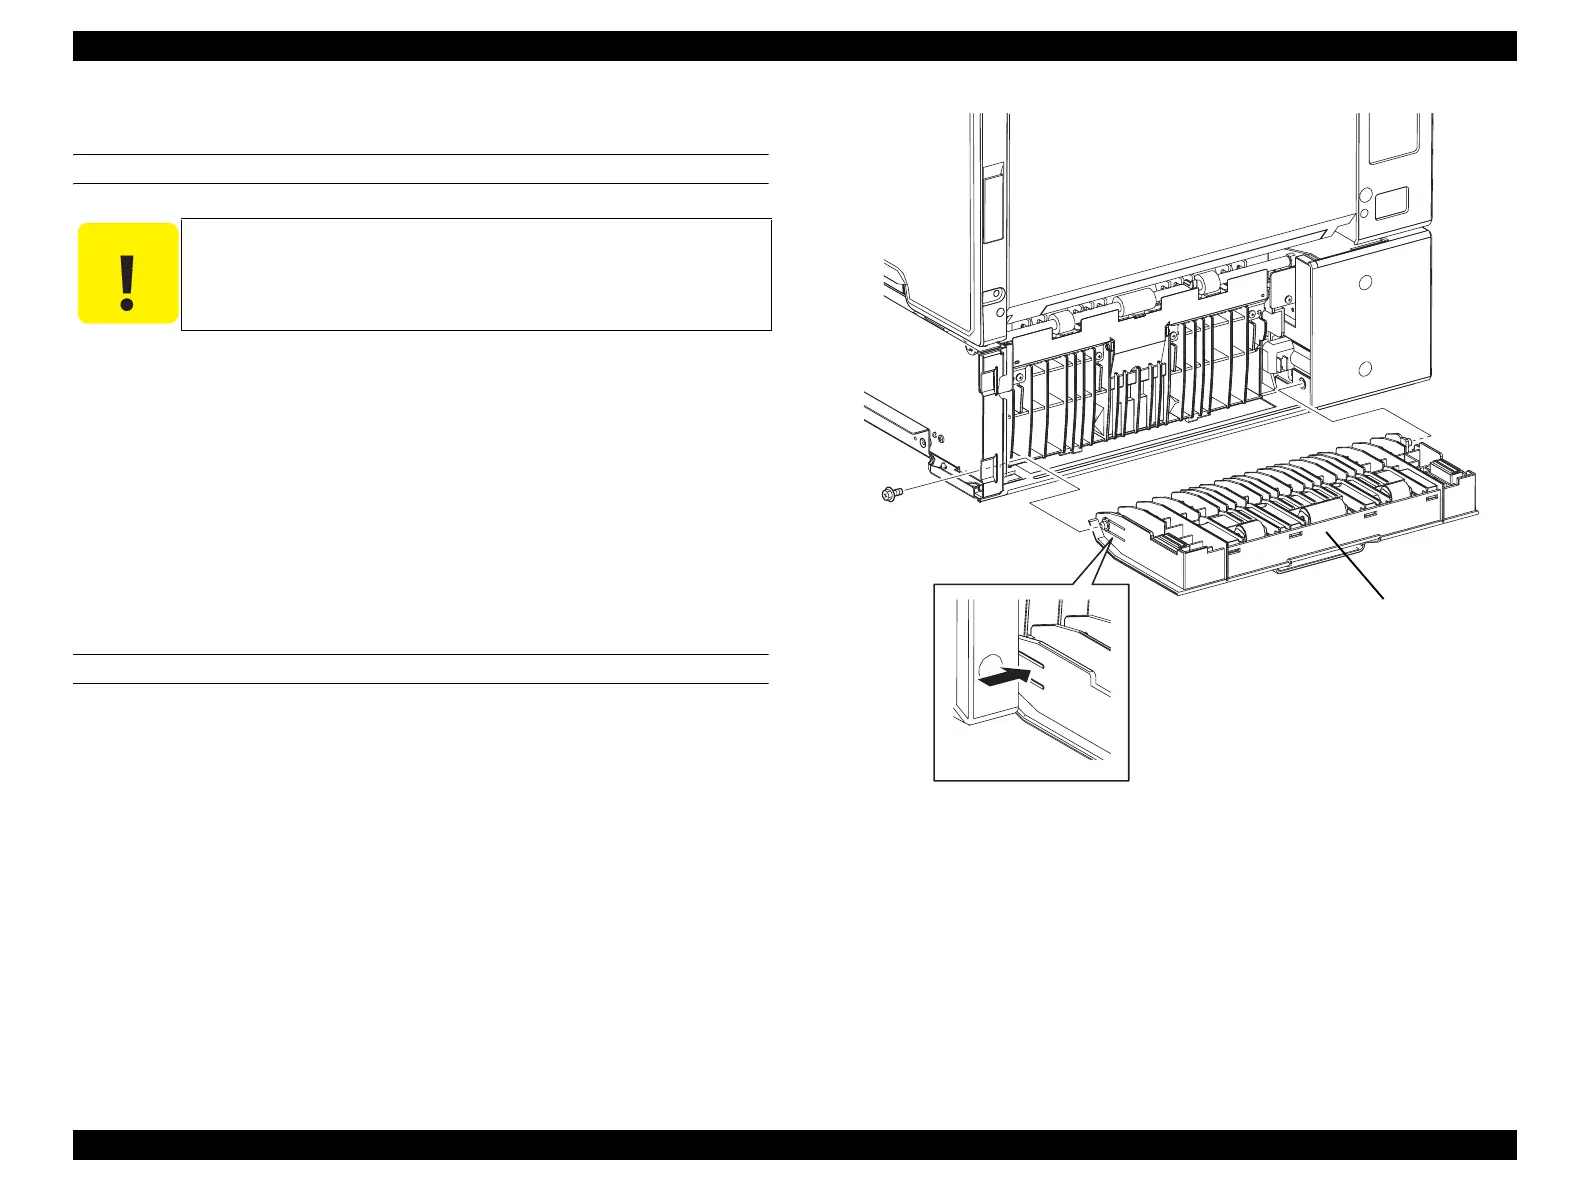
REMOVAL
1. Remove 500 PAPER CASSETTE ASSY. (p442)
2. Remove COVER RIGHT 500. (p451)
3. Remove the screw (silver, with flange, tapping, 8 mm) fastening CHUTE FDR
ASSY 500.
4. Open CHUTE FDR ASSY 500.
5. Press the attachment section on the right side of CHUTE FDR ASSY 500 with
your finger to bend down, draw out the boss on the right side from the hole on 500
PAPER FEEDER ASSY, and remove CHUTE FDR ASSY 500.
REINSTALLATION
1. With CHUTE FDR ASSY 500 slightly open, insert the boss on the left side into
the hole on 500 PAPER FEEDER ASSY, then attach CHUTE FDR ASSY 500 to
500 PAPER FEEDER ASSY while bending down the boss on the right side.
2. Close CHUTE FDR ASSY 500.
3. Fasten CHUTE FDR ASSY 500 with the screw (silver, with flange, tapping, 8
mm).
4. Attach COVER RIGHT 500. (p451)
5. Attach 500 PAPER CASSETTE ASSY. (p442)
Figure 4-127. Removal of CHUTE FDR ASSY 500
C A U T I O N
When performing the following work, take care not to damage the
boss on CHUTE FDR ASSY 500.
Leg_Sec03_021EA
3)
5)-2
5)-1
manuals4you.commanuals4you.com
 Loading...


