EasyManuals Logo

Epson AcuLaser CX11 Service Manual

Epson AcuLaser CX11
668 pages
To Next Page IconTo Next Page
To Previous Page IconTo Previous Page
Page #322 background imageLoading...
Page #322 background image
EPSON AcuLaser CX11/CX11F Revision B
DISASSEMBLY AND ASSEMBLY Printer 324
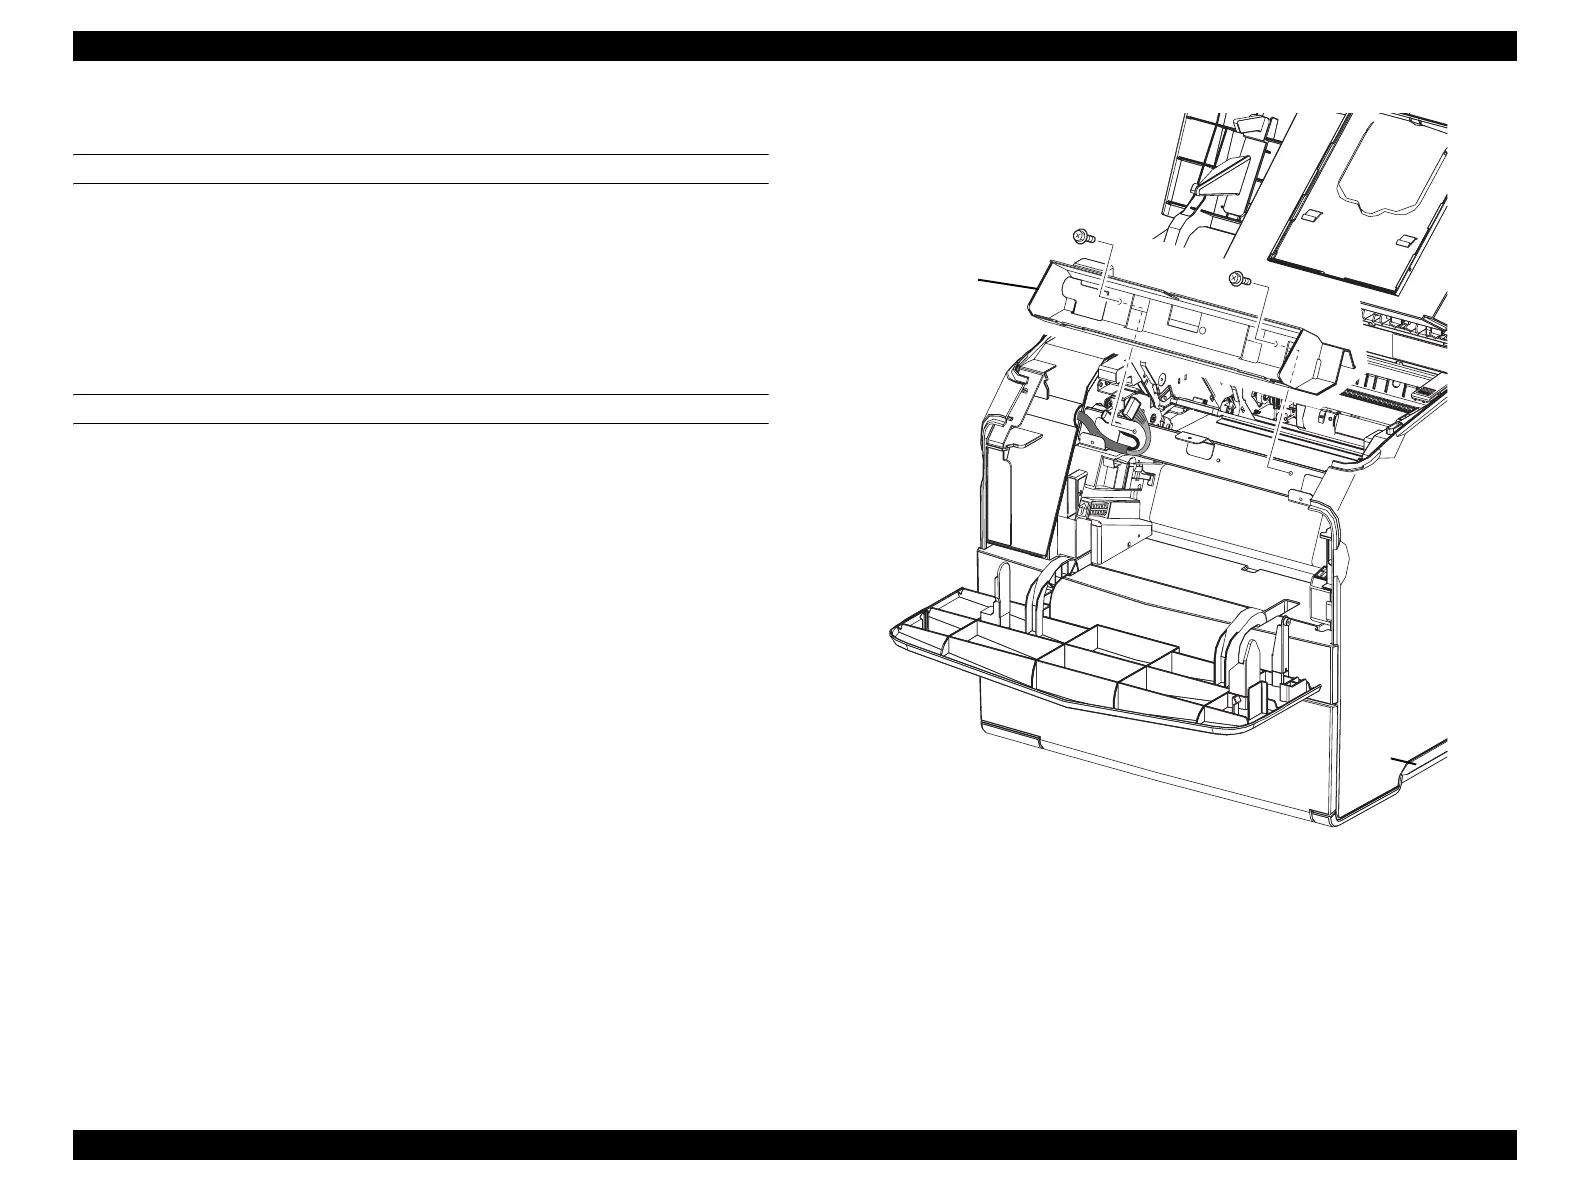
4.2.2.15 COVER INNER TOP
REMOVAL
1. Remove OP PANEL. (p320)
2. Remove the 2 screws (silver, with flange, 6 mm) fastening COVER INNER TOP
to the main unit.
3. Remove COVER INNER TOP from the main unit.
REINSTALLATION
1. Match the hole on COVER INNER TOP with the boss on the main unit.
2. Fasten COVER INNER TOP to the main unit with the 2 screws (silver, with
flange, 6 mm).
3. Attach OP PANEL. (p320)
Figure 4-19. Removal of COVER INNER TOP
Leg_Sec03_187EB
3)
2)
2)
manuals4you.commanuals4you.com

Table of Contents

Other manuals for Epson AcuLaser CX11

Questions and Answers:

Question and Answer IconNeed help?

Do you have a question about the Epson AcuLaser CX11 and is the answer not in the manual?

Epson AcuLaser CX11 Specifications

General IconGeneral
BrandEpson
ModelAcuLaser CX11
CategoryAll in One Printer
LanguageEnglish

Related product manuals