EPSON AcuLaser CX11/CX11F Revision B
DISASSEMBLY AND ASSEMBLY Printer 413
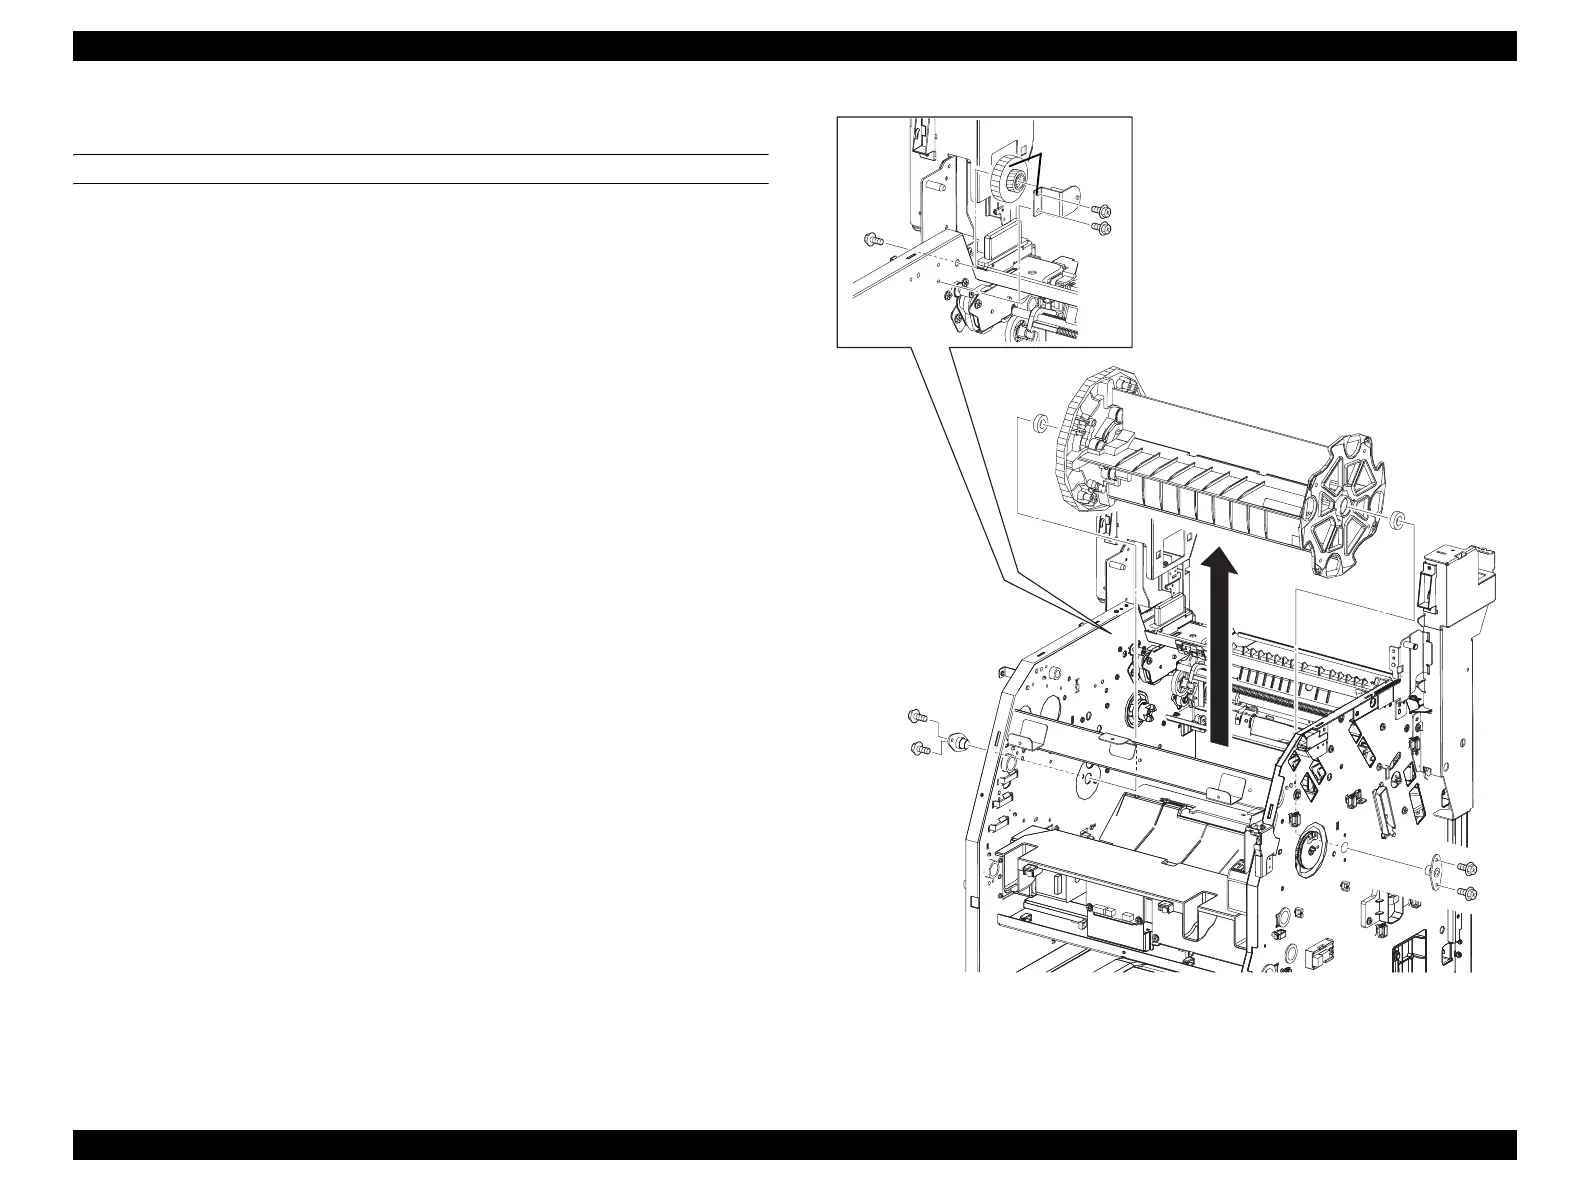
4.2.8.7 FRAME ASSY-ROTARY
REMOVAL
1. Remove COVER ASSY RH. (p326)
2. Remove COVER ASSY LH. (p321)
3. Remove FUSER ASSY. (p415)
4. Remove COVER ASSY TOP. (p308)
5. Remove 2ND BTR ASSY. (p374)
6. Remove COVER MSI. (p317)
7. Remove COVER FRONT L and COVER FRONT ASSY U. (p318)
8. Remove COVER INNER TOP. (p324)
9. Remove PWBA MCU. (p432)
10. Remove LV/HVPS. (p435)
11. Remove CHASSIS ASSY ESS. (p440)
12. Remove DRIVE ASSY PRO. (p421)
13. Remove MOT ASSY MAG. (p423)
14. Remove LATCH ASSY-ROTARY. (p404)
15. Remove SENSOR ROTARY HOME POSI. (p409)
16. Remove FRAME ASSY-PH. (p352)
17. Remove BCR CLN XERO ASSY. (p399)
18. Remove SENSOR TR-0. (p387)
19. Remove GUIDE CRU ASSY D. (p388)
20. Remove GUIDE CRU ASSY AD. (p393)
21. Remove HOUSING ASSY-DEVE. (p410)
22. Remove the three screws (silver, with flange, 6 mm) that secure the BRACKET
ASSY 2ND GEAR to the main unit.
Figure 4-98. Removal of FRAME ASSY-ROTARY
Leg_Sec03_096RA
28)
27)
26)
25)
25)
22)
22)
18)
22)
28)
24)
24)
26)
 Loading...


