EPSON AcuLaser CX11/CX11F Revision B
DISASSEMBLY AND ASSEMBLY ADF Section 524
4.4.3.9 SENSOR ARM
REMOVAL
1. Remove the Scanner. (p306)
2. Remove the ADF Unit. (p481)
3. Remove the ADF COVER R. (p492)
4. Remove the PAPER GUIDE ASSY. (p526)
5. Remove the ADF COVER C. (p496)
6. Remove the ADF BASE ASSY. (p498)
7. Remove the CONNECTOR UNIT ACEMU. (p523)
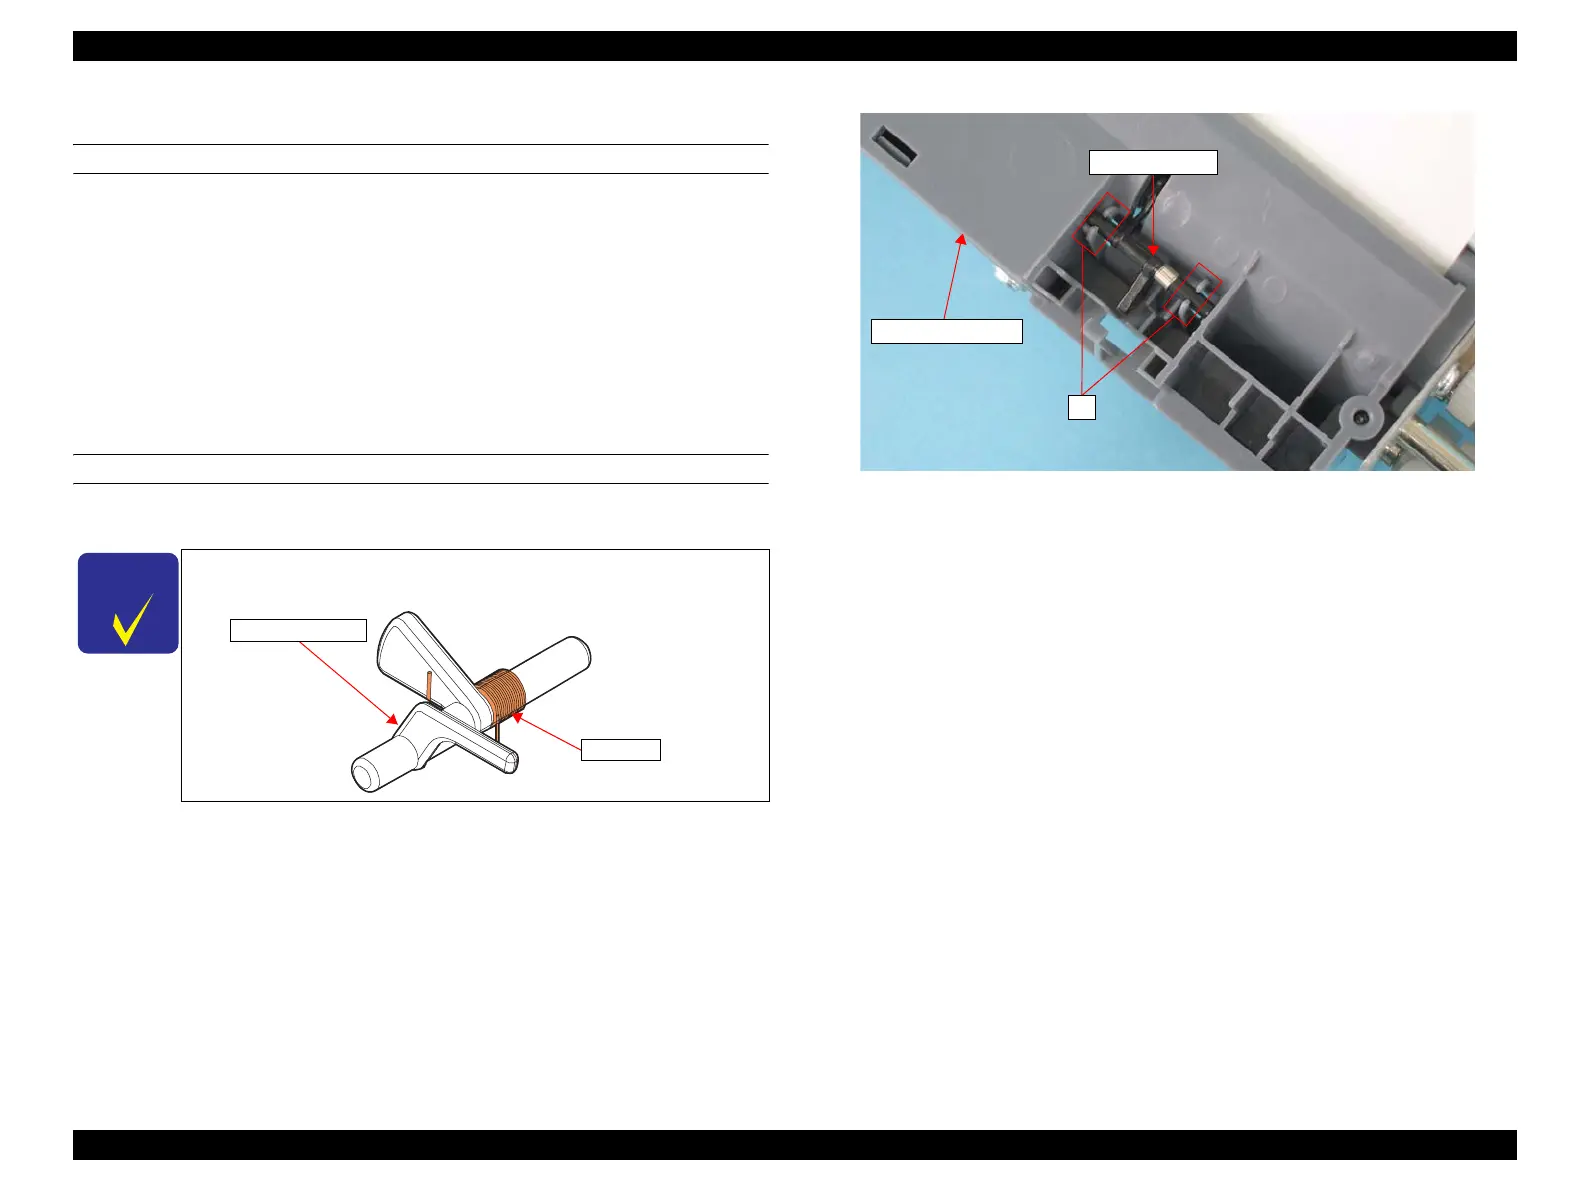
8. Remove the shaft of the SENSOR ARM from the bearing of the PAPER GUIDE
F, and remove the SENSOR ARM.
REINSTALLATION
1. Insert the shaft of the SENSOR ARM into the bearing of the PAPER GUIDE F.
See Figure 4-216.
2. Attach the CONNECTOR UNIT ACEMU. (p523)
3. Attach the ADF BASE ASSY. (p498)
4. Attach the ADF COVER C. (p496)
5. Attach the PAPER GUIDE ASSY. (p526)
6. Attach the ADF COVER R. (p492)
7. Attach the ADF Unit. (p481)
8. Install the Scanner. (p306)
Figure 4-216. Removal of SENSOR ARM
C H E C K
P O I N T
A spring is attached to the SENSOR ARM.If the spring falls off the
SENSOR ARM, reattach it referring to the figure below.
Spring
SENSOR ARM
SENSOR ARM
PAPER GUIDE F
8)
manuals4you.commanuals4you.com
 Loading...


