EPSON AcuLaser CX11/CX11F Revision B
DISASSEMBLY AND ASSEMBLY Printer 477
4.2.12.30 ACTUATOR T/R
REMOVAL
1. Remove 500 PAPER CASSETTE ASSY. (p442)
2. Remove COVER LEFT 500. (p449)
3. Remove CLUTCH ASSY FEED. (p457)
4. Remove DRIVE ASSY FEED. (p454)
5. Remove HOUSING ASSY FEED. (p472)
6. Remove ROLL ASSY FEED 500. (p479)
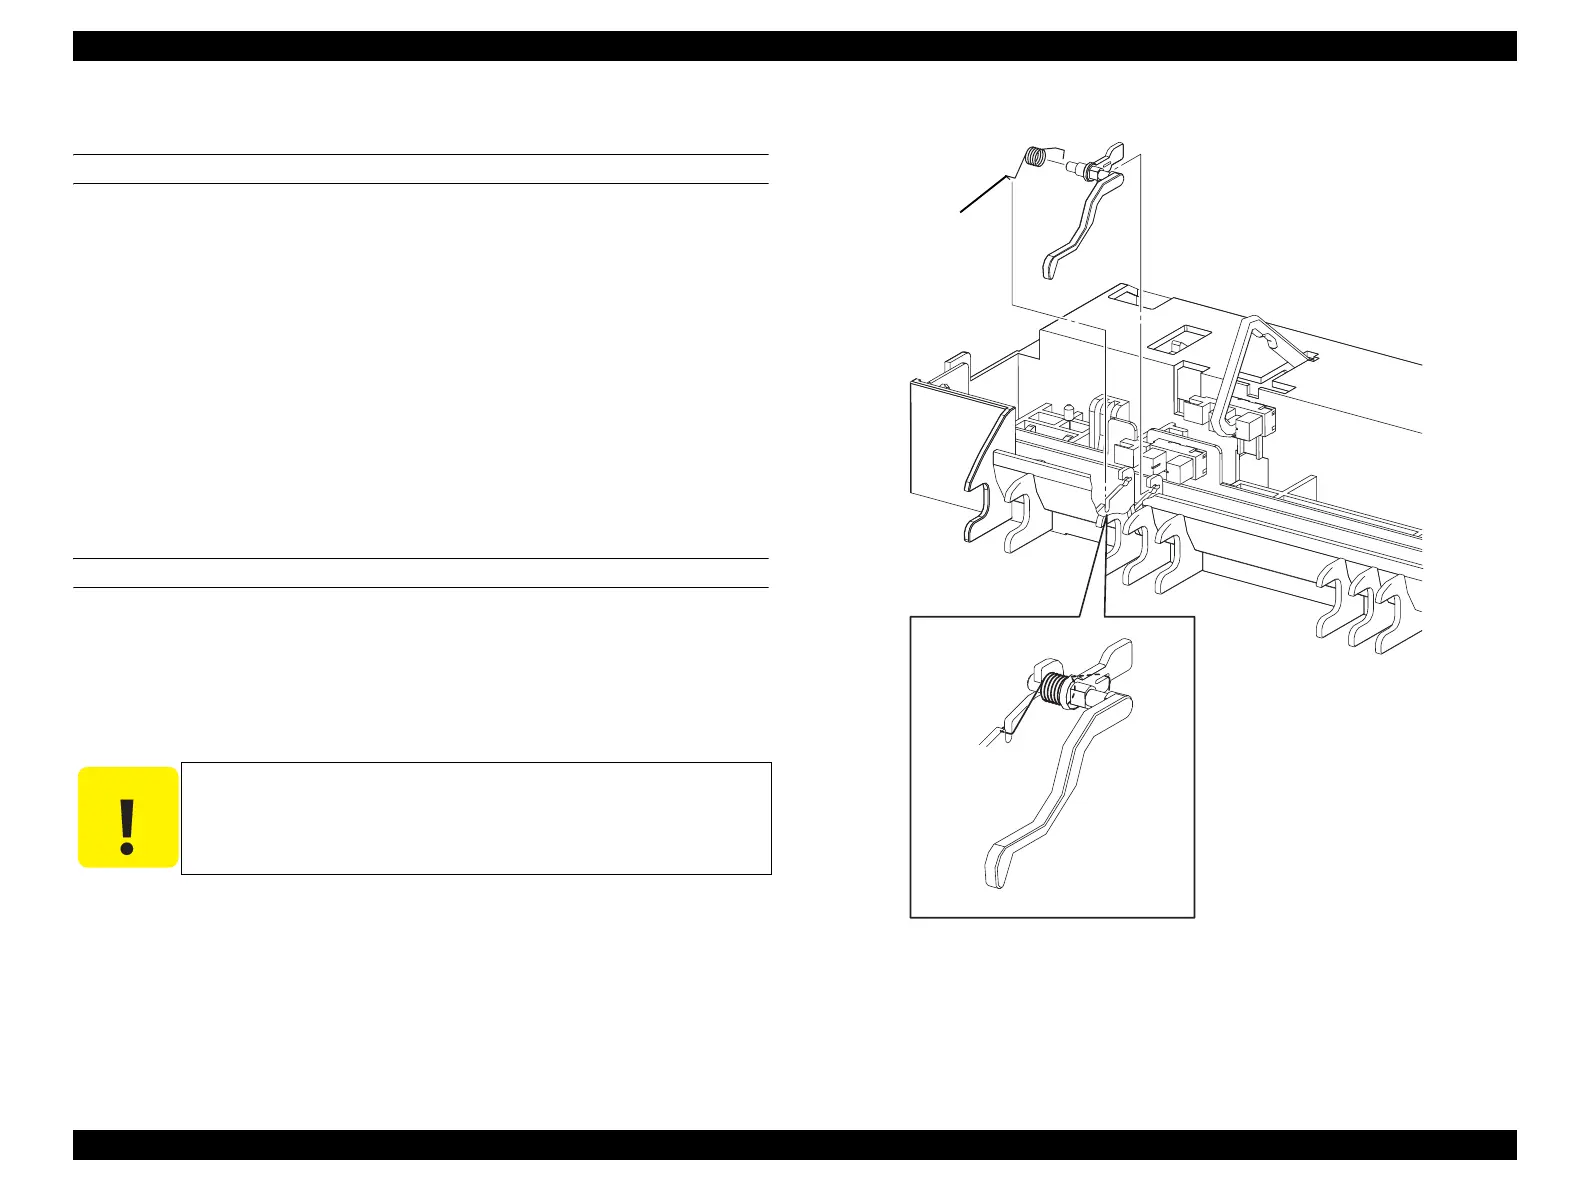
7. Remove SPRING ACTUATOR from the notch on HOUSING ASSY FEED.
8. Draw out the shaft on ACTUATOR T/R from the hook on HOUSING ASSY
FEED, and remove ACTUATOR T/R together with SPRING ACTUATOR.
9. Remove SPRING ACTUATOR from ACTUATOR T/R.
REINSTALLATION
1. Attach SPRING ACTUATOR to ACTUATOR T/R.
2. Fit the shaft on ACTUATOR T/R into the hook on HOUSING ASSY FEED, and
attach ACTUATOR T/R together with SPRING ACTUATOR.
3. Hook SPRING ACTUATOR onto the notch on HOUSING ASSY FEED.
4. Attach ROLL ASSY FEED 500. (p479)
5. Attach HOUSING ASSY FEED. (p472)
6. Attach DRIVE ASSY FEED. (p454)
7. Attach CLUTCH ASSY FEED. (p457)
8. Attach COVER LEFT 500. (p449)
9. Attach 500 PAPER CASSETTE ASSY. (p442)
Figure 4-151. Removal of ACTUATOR T/R
C A U T I O N
SPRING ACTUATOR must be firmly hooked onto the notch on
ACTUATOR T/R and HOUSING ASSY FEED.
Leg_Sec03_035FA
CAUTION
9)
8)
7)
 Loading...


