EPSON AcuLaser CX11/CX11F Revision B
DISASSEMBLY AND ASSEMBLY ADF Section 504
4.4.2.3 PICK UP ASSY
REMOVAL
1. Remove the Scanner. (p306)
2. Remove the ADF Unit. (p481)
3. Remove the ADF COVER R. (p496)
4. Remove the PAPER GUIDE ASSY. (p526)
5. Remove the ADF COVER C. (p496)
6. Remove the ADF BASE ASSY. (p498)
7. Remove the E CLUTCH UNIT. (p501)
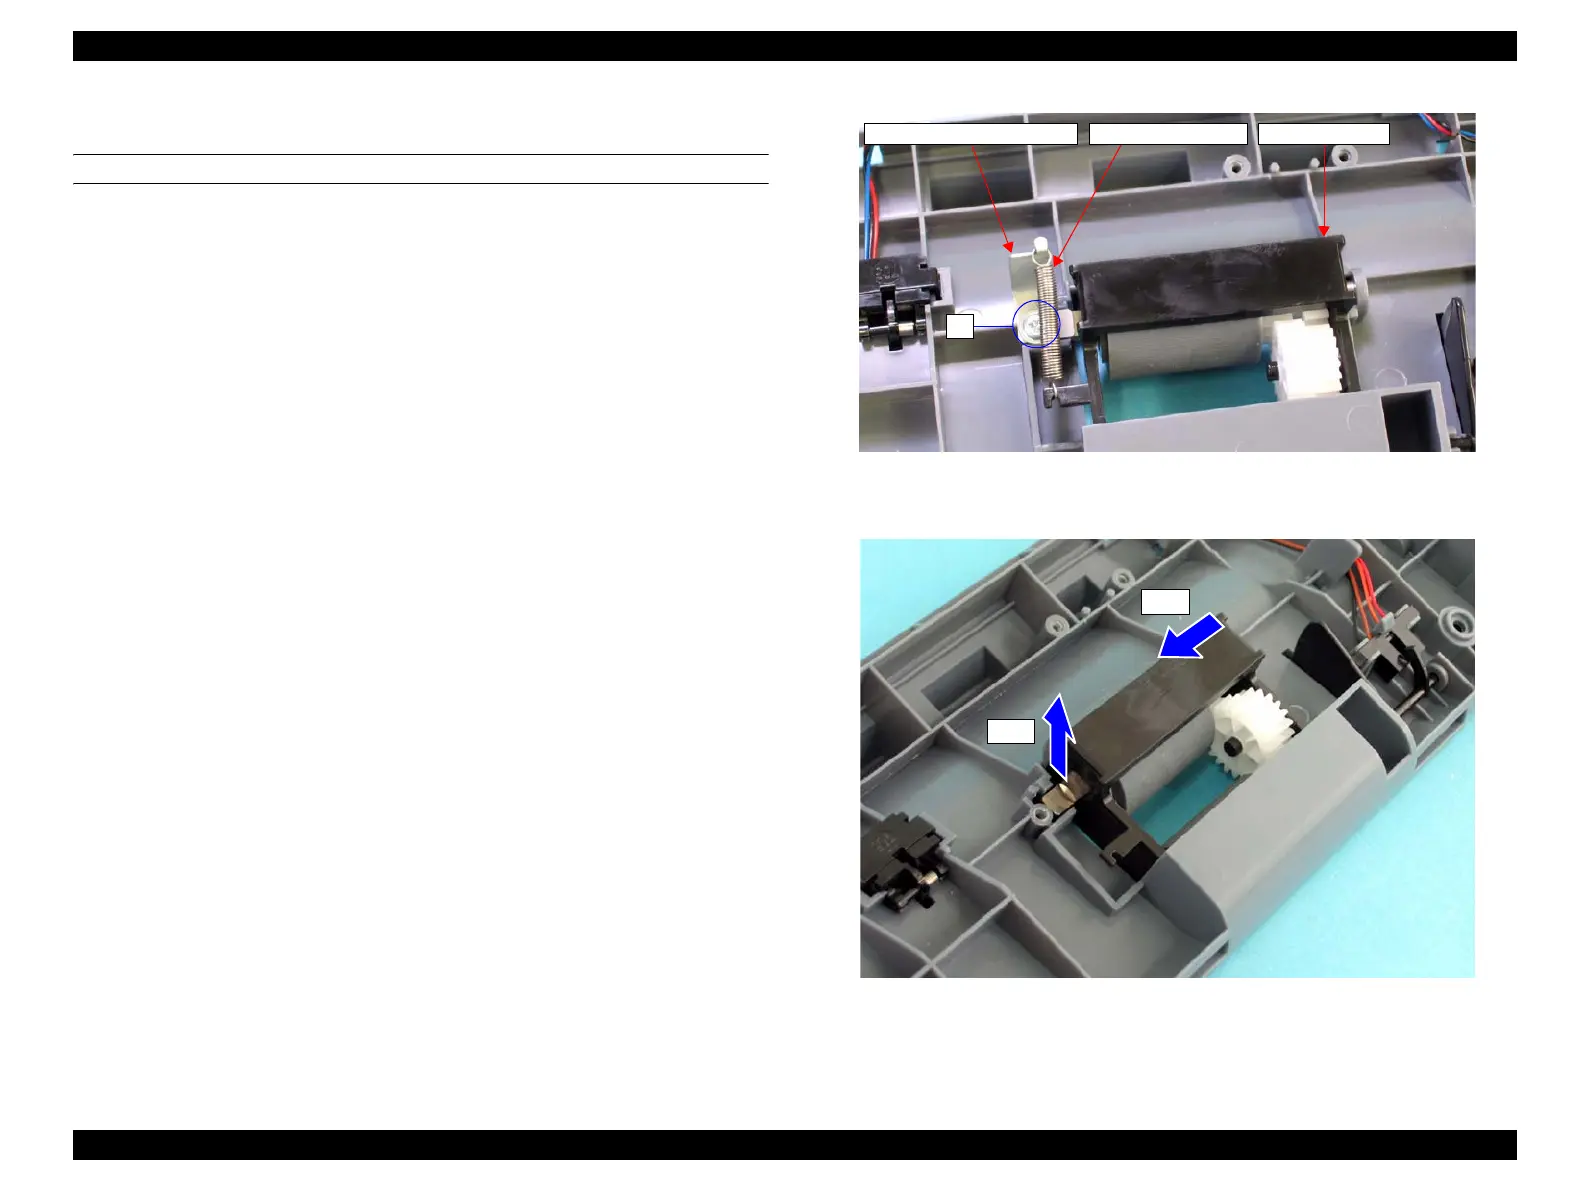
8. Release the TENSION SPRING from the hook of the PICK UP ASSY and the
ADF ROLLER FIX PLATE.
9. Remove the screw (M3 x 8 mm, P-type, A-head) that secure the ADF ROLLER
FIX PLATE, and remove the ADF ROLLER FIX PLATE.
10. Lift the left shaft of the PICK UP ASSY, and pull out the right shaft of the PICK
UP ASSY from the bearing of the ADF BASE, and then remove the PICK UP
ASSY from the ADF BASE.
Figure 4-189. Removal of PICK UP ASSY (1)
Figure 4-190. Removal of PICK UP ASSY (2)
9)
ADF ROLLER FIX PLATE TENSION SPRING PICK UP ASSY
10)-2
10)-1
manuals4you.commanuals4you.com
 Loading...


